Signing with SignPoint
Another way of signing documents is using the SignPoint process in Sofa. This option depends on your contract with Software602 a.s. and if it’s available, it is displayed as a separate button in the Bulk operations window.
-
Check to select the document(s) to sign.
-
In the Bulk operations panel, select SignPoint process.
-
The dialog Run SignPoint is displayed.
There are two options how to enter the details for signing: either in this dialog, or in the next step in SignPoint.
Entering the details in FormFlow
To enter the details directly in the Run SignPoint dialog, do not check the option Set detailed settings in SignPoint process.
-
Enter the general information on the documents to sign: Name, Description and Podepsat do (Sign before).
-
In the following part of the dialog, specify who will sign the document(s). The signers may be internal or external.
-
When adding an internal user, which means a user of Sofa, select their name from the list. You can add a note in the next field, and it will be displayed to the signer. No more settings are needed for an internal signer.

-
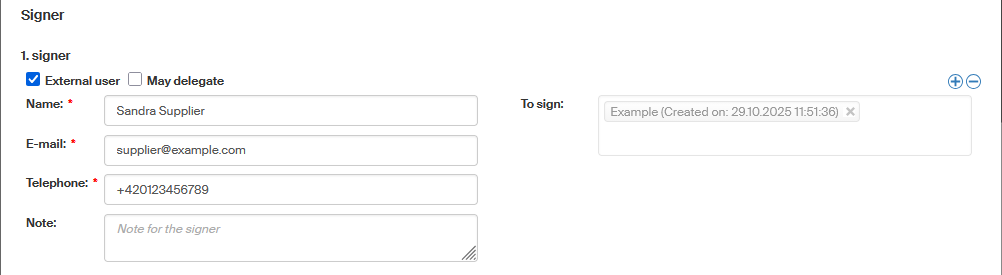
If the signer is not on the list, check External user. More fields are added to the dialog. Enter the signer’s full Name and their E-mail and Telephone number. These details will be used to inform the signer and also to authenticate them.
The field To sign displays a list of documents the external signer will sign.
An external signer may be authorized to add more external signers to the signature path. To grant this right, check May delegate.
-
-
If more than one signature is needed, use the button
 on the right to add sections for more signers.
Use the
on the right to add sections for more signers.
Use the  button to delete unneeded sections.
 -
Confirm the dialog by selecting Run. Sofa receives the SignPoint process and forwards it to the first signer. The signer will be notified by e-mail.
Entering the details in SignPoint
If you choose not to enter the details in this dialog, check the option Set detailed settings in SignPoint process. Select Run to confirm.
Only the selected document or documents are submitted to SignPoint.
The SignPoint form is displayed with the selected document or documents inserted in the Files to sign section. You can also display the window by clicking the link Open process in the blue information strip displayed in the main FormFlow after submitting.
The form is prefilled with your details and the selected documents are inserted in the Files to sign section.
-
Set up the list of signers in the Approval and signing section. For more details, see Sofa documentation, chapter Podpisová cesta (Signature path).
-
Confirm the dialog by selecting Start. Sofa forwards the process to the first signer. The signer will be notified by e-mail.
Signing documents in SignPoint – internal user
If you as a Sofa user have received a notification to sign documents in SignPoint, use the link in the e-mail message or the Sofa Dashboard to open the form.
-
Review the documents in section Files to sign.
-
If everything is in order, click Sign and sign the files in accordance with your Sofa settings. Then you can close the browser window or tab.
For more details, see Sofa documentation, such as chapters Kontrola dokumentů před podpisem (Checking documents before signing) and Podepisování (Signing).
Signing documents in SignPoint – external user
If you are not a Sofa user, an e-mail message will notify you that documents are waiting for your signature in SignPoint. The message contains a link to open the form.
-
Before displaying the form, you will be asked to verify your access. Click the Verify access button and follow the instructions.
For more details, see Sofa documentation in chapter Základní přístup (certifikát, SMS a Bank iD) (Basic access (certificate, SMS and Bank iD)). -
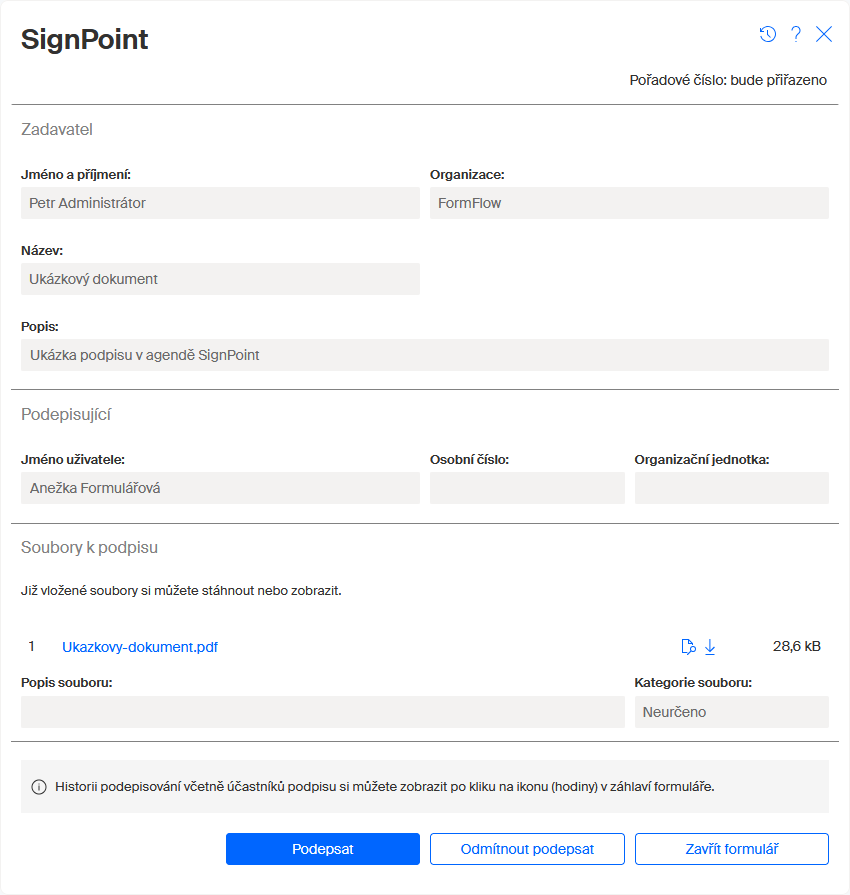
The SignPoint form is displayed after verification. Note especially the Files to sign section. You can display or download the inserted files here.
For more details, see Sofa documentation in chapter Kontrola dokumentu před podpisem (Checking the document before signing). -
If everything is in order, click Sign documents. An SMS message with a verification code will be sent to your telephone number. Enter the code in the corresponding field.
For more details, see Sofa documentation in chapter Vlastní podepisování (The actual signing). -
Following a successful verification, the form is displayed again, now signed. Now you can close the browser window or tab.
Finishing the signing
If more than one signer is set to sign the document(s), Sofa forwards the form to the next user after the first signature is complete.
Once the document is signed by all signers, Sofa returns it to FormFlow. It is then displayed as a new version of the original document. For more information on document versions, see chapter Versions.