Login using a Google account
To use this authentication method, you first need to register the FormFlow instance at Google and receive a pair of keys, Client ID + Client secret. Then enter these keys in FormFlow.
FormFlow settings
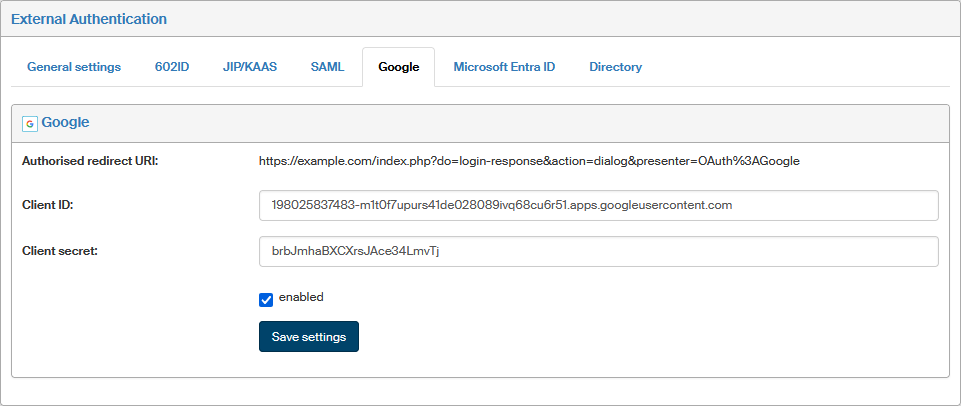
To set up authentication using Google, go to and switch to Google tab. Set up the following parameters:
-
Authorized redirect URI – the address where to redicrect users after their Google authentication. The address must not contain URL address fragments, relative paths or wildcard characters, and it must not be a public IP address.
-
Copy the details received on Google account registration (as described in the next chapter) in fields Client ID and Client secret.
-
Enabled – if checked, this authentication method will be available.
Select Save settings to confirm the configuration.
Account registration – getting the Client ID and Client Secret keys
To get the keys, create a project within Google Cloud Platform.
-
Log in to your Google account at https://console.cloud.google.com/home/
-
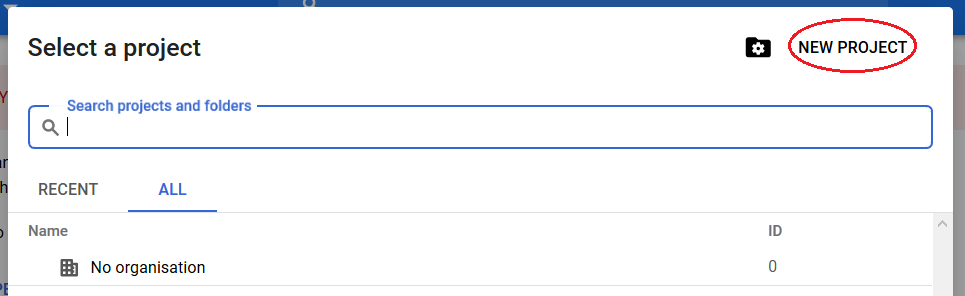
Expand the Select a project menu in the upper part of the screen.

-
In the Select a project dialog, click the NEW PROJECT button.
-
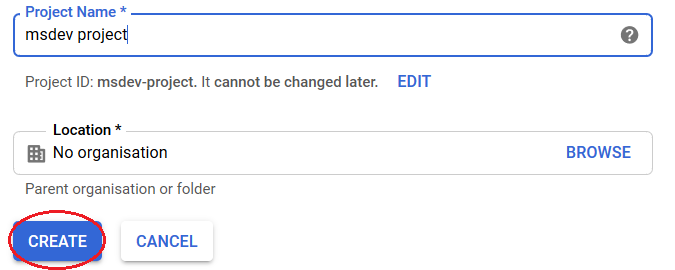
In the New Project window, in field Project Name, enter a name for the project. You will get a project ID, which is your project’s globally unique identifier.
You can click EDIT to open a field displaying the ID created from the Project Name and you can edit the ID directly. After you create the project, you will not be able to change its ID. Click CREATE.
-
If the name of your new project is not displayed in the project selector in the upper part of the window, click it and select the name from the list.

-
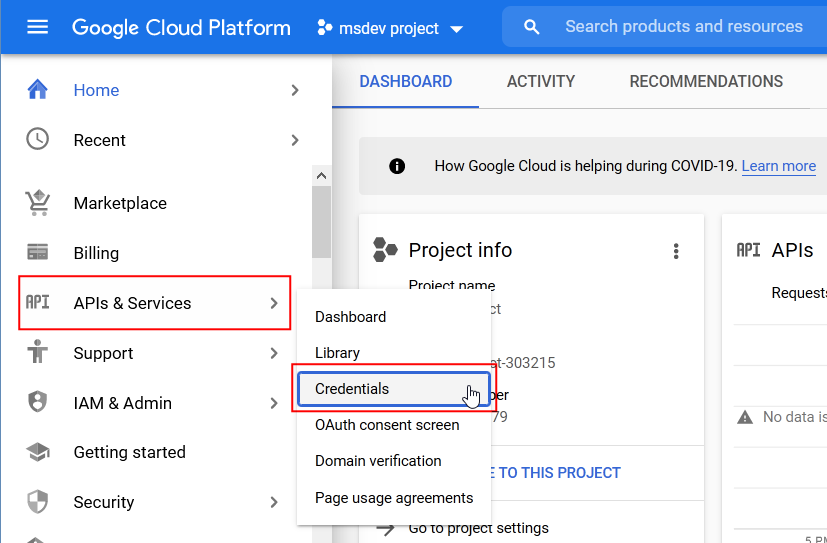
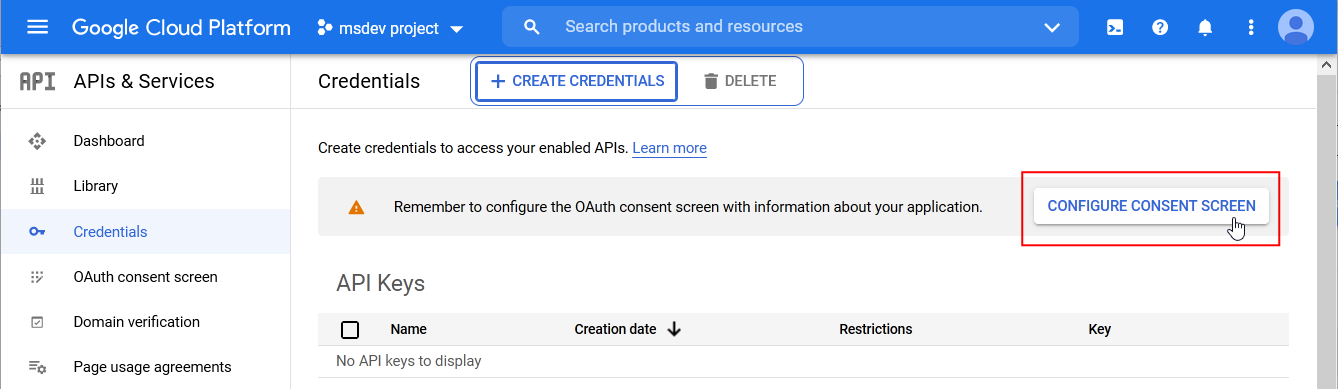
On the left, in the command menu, click APIs & Services and select Credentials from the submenu.
-
In window APIs & Services – Credentials, start by configuring the consent screen with details of your application. Click CONFIGURE CONSENT SCREEN.
-
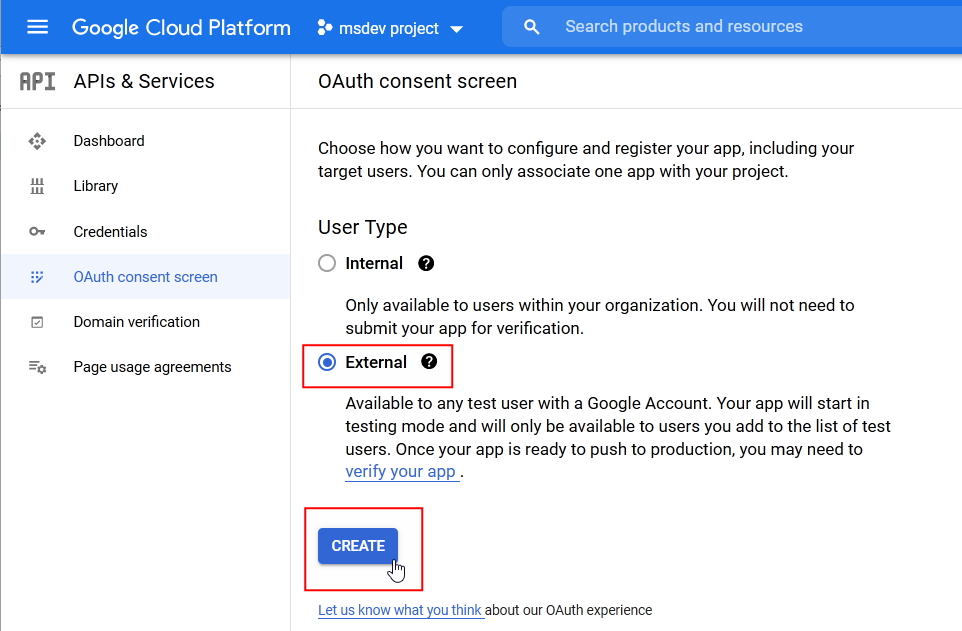
In window OAuth consent screen, select how to configure and register your application regarding the target user access:
-
Internal – this option is only available to (internal) users in your organization. You can communicate with your internal users directly and use their data.
-
External – this option is available to every test user with a Google account. Your application will be run in test mode and will be available to the users you place on the test user list. When your application is ready to switch to live (production) mode, users will have to authenticate.
Click CREATE.
-
-
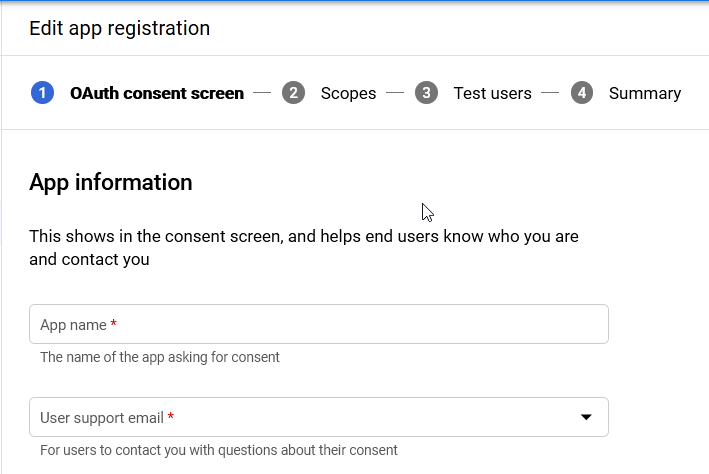
In the next screen, Edit app registration, fill in the mandatory items (marked with a red asterisk). In App information, set up the following:
-
App name – the name that will be displayed in the verification window.
-
User support email – e-mail address where users can contact you with queries.
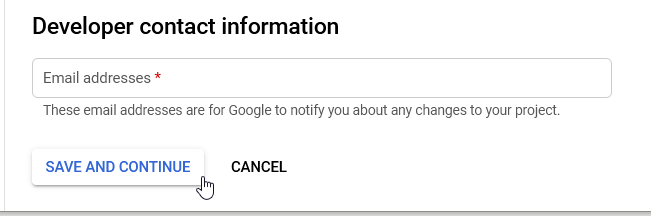
In the lower part of the screen, in section Developer contact information, enter an e-mail address in field Email addresses; Google will send “developer” information for the project to this address. Click SAVE AND CONTINUE to complete the setup.
-
-
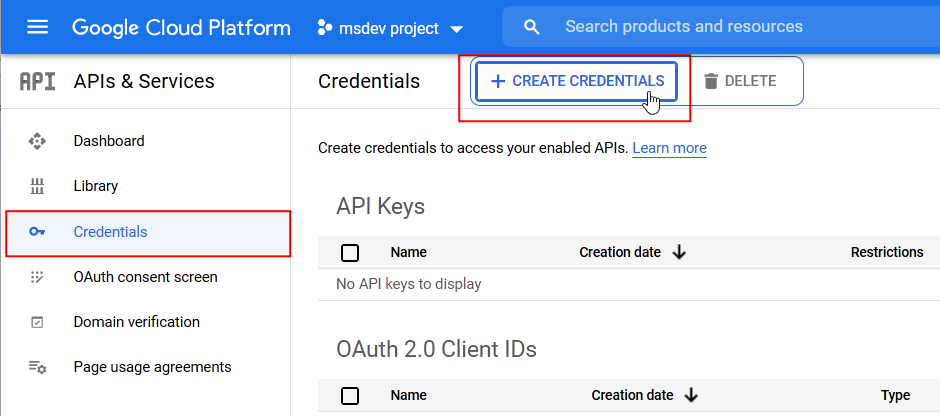
In the menu on the left, click Credentials and in the following screen, click + CREATE CREDENTIALS.
-
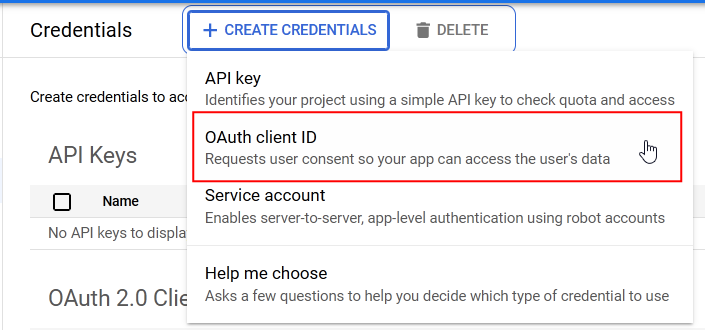
Select OAuth client ID from the menu. It is a request for user’s consent with the application accessing the user’s data.
-
In the following window Create OAuth client ID, click the option Application type and select Web application.
It is an unambiguous platform specification for the client ID used to specify one single application at Google’s OAuth server.
If your application is running on more than one platform, each will need their own client ID. 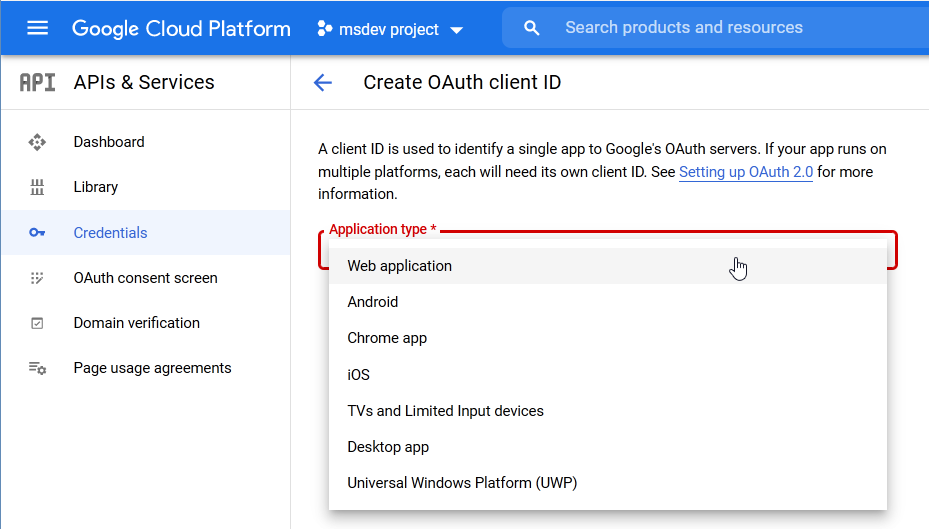
-
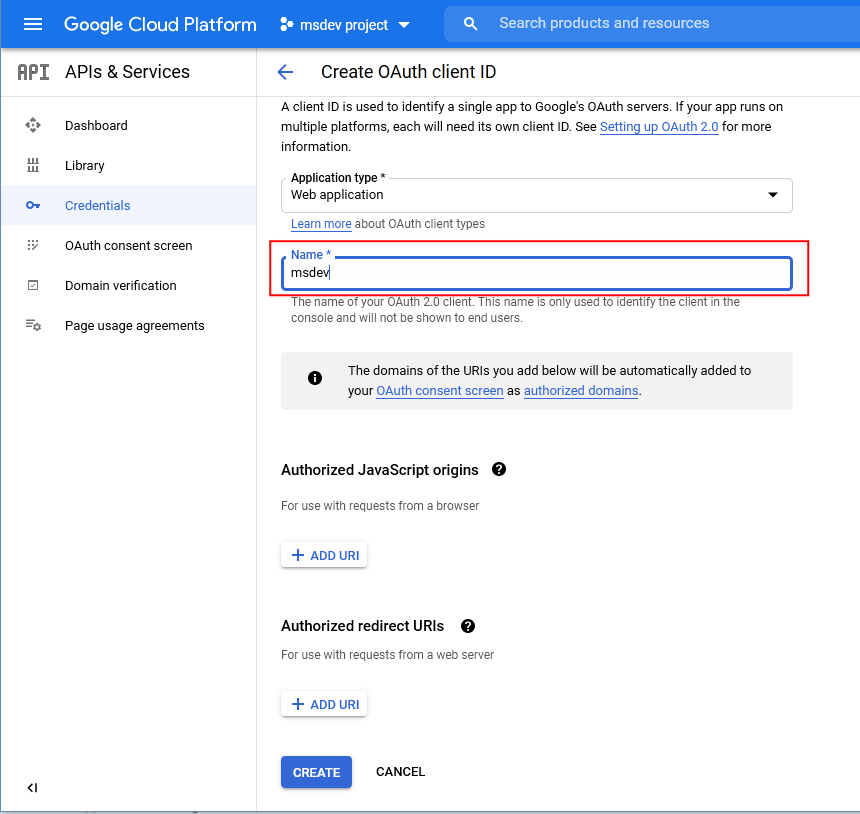
Several controls are then displayed, as shown on the following image.
-
Enter your OAuth 2.0 client name in the Name field. This name is only used to identify the client at the console and is not displayed to end users.
-
Click + ADD URI in section Authorized JavaScript origins to open the field where to enter the URL address where your web application is hosted and that will be accessed by the web browser. This value may not contain any wildcard characters nor path specification. If you use other port than 80, include it in the address. For example:
https://example.com:8080.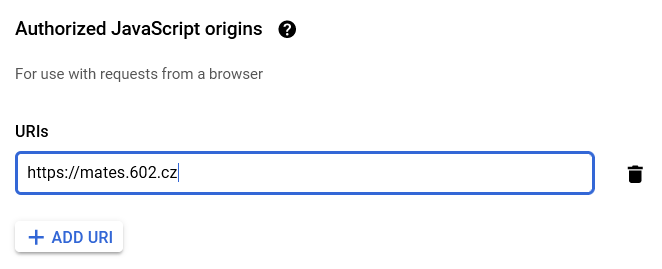
-
Click +ADD URI in section Authorized redirect URIs to open the field where to enter the address where users will be redirected following their Google authentication. The path will be attached to the access authorization code and must include the protocol. It may not contain URL address fragments, relative paths or wildcard characters, and it must not be a public IP address.

Click CREATE.
-
-
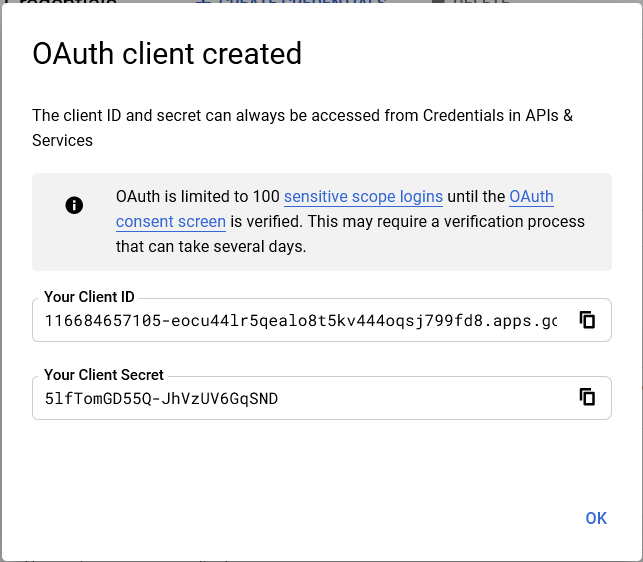
The next screen, OAuth client created, will notify you that the two keys have been created. They are listed in fields Your Client ID and Your Client Secret and you can copy them using the buttons on the right of the fields. You will need to copy both the keys to authentication settings in the External authentication window.
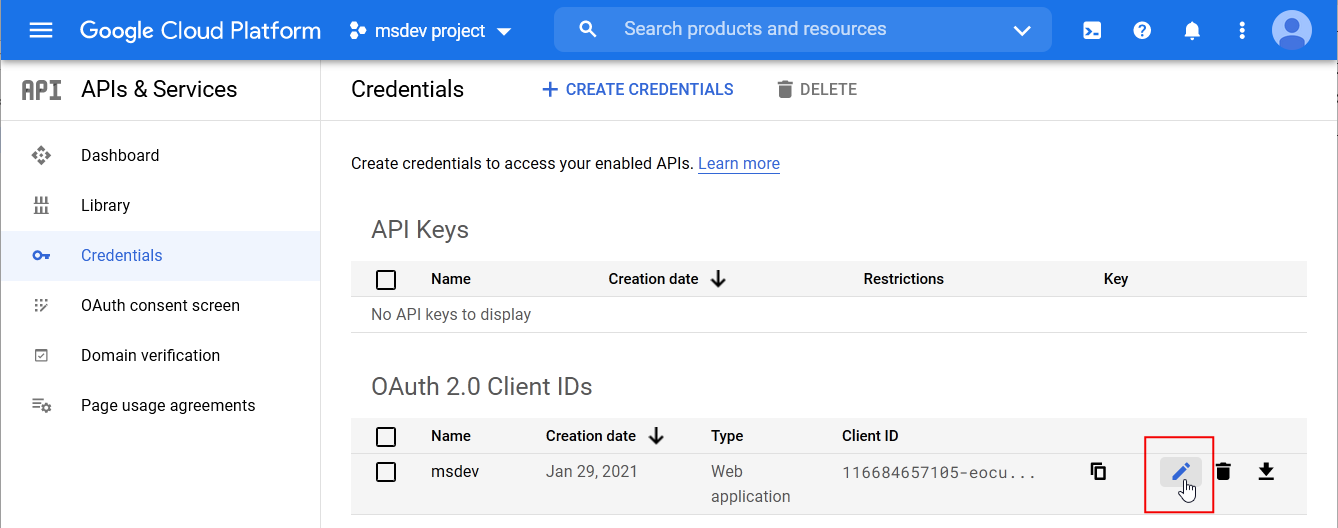
To look up the key values later, open the Credentials screens and click the pencil button next to the item with the corresponding OAuth client ID.
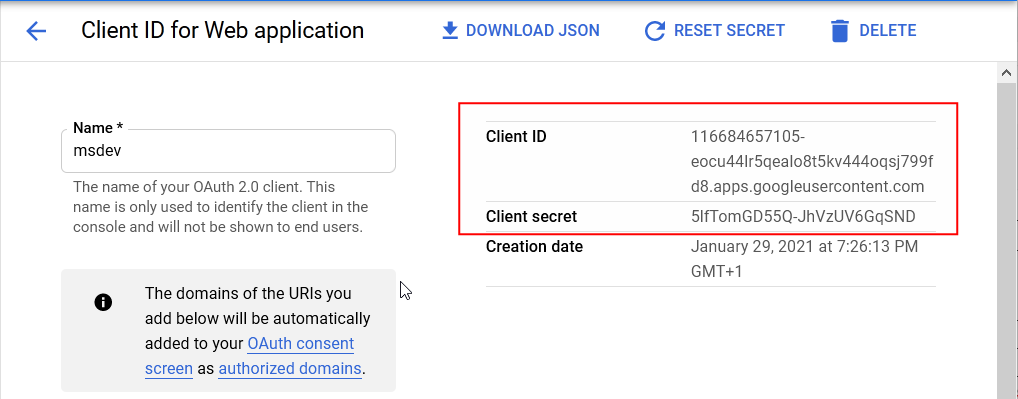
Both values can be found in the upper right part of the screen with the client properties.
-
Copy the Client ID and Client secret keys in the fields of the same name in Google section of External authentication ().