Communication plan
Use this section to set up (plan) automatic communication with the data mailbox and e-mail account. The configuration is divided into tasks. Each task has its supervisor, a user responsible for the task.
On the left panel in the Entities screen (), make sure the entity you want to edit is selected in the Entities list. Then go to Menu and click Communication plan. The screen Communication plan (entity name) is displayed on the right. The section contains a list of existing tasks, which you can edit or add to.
Scheduling a task
Click Add task above the list of existing tasks to display the Add a scheduled task dialog.
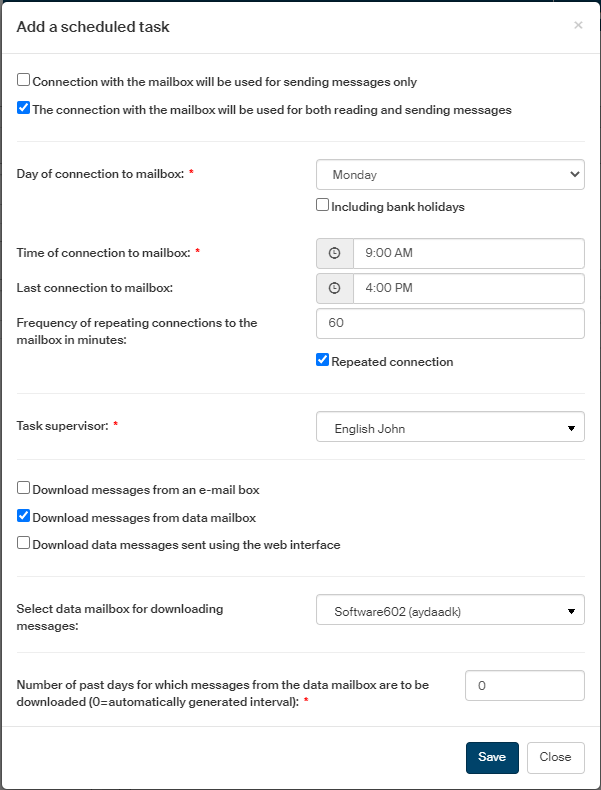
In the upper part of the dialog, select whether the connection to the mailbox will only be used to send messages (check Connection with the mailbox will be used for sending messages only, or for both downloading and sending (check The connection with the mailbox will be used for both reading and sending messages). If only sending (Connection with the mailbox will be used for sending messages only), the dialog will only display limited setting options.
-
In Day of connection to mailbox, select the day(s) of the week when to connect to the data mailbox. The options are: Monday, Tuesday, Wednesday, Thursday, Friday, Saturday, Sunday and the ranges Monday–Friday, Saturday–Sunday and Every day.
-
Check Including bank holidays to enable submitting messages on bank holidays too (holidays are determined based on the entity’s country settings).
-
-
In field Time of connection to mailbox, set the time of the first connection to the data mailbox.
-
Checking Repeated connection will display more controls.
-
In Frequency of repeating connections to the mailbox in minutes, select how often to repeat connection to the data mailbox.
-
Then set the last time of data mailbox connection attempt for the day in field Last connection to mailbox.
-
-
Select the user or group responsible for the communication plan in Task supervisor.
If the checkbox in the upper part of the dialog is set to reading messages as well (and not “for sending messages only”), the following settings are available in the dialog:
-
Check or uncheck the boxes Download messages from an e-mail box, Download messages from data mailbox and Download data messages sent using the web interface to set up the sources from which to download messages.
-
If you are using more than one data mailbox, select the one to download from in field Select data mailbox for downloading messages.
-
Next, enter a number of days in Number of past days for which messages from the data mailbox are to be downloaded. Make sure to set the interval so that messages are downloaded, even if they were received on a day when no downloads are scheduled. The value 0 means an automatically generated interval. If the field is not filled in, an error message is displayed.
Click Save to confirm the task setting. Or you can click Close to close the window without saving any changes.
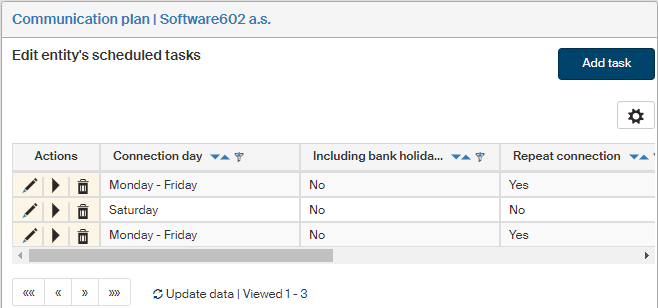
Editing scheduled tasks
The right side of the Edit entity’s scheduled tasks displays a list of existing tasks. Use the buttons in the Actions column to manage the entries:
-
 Edit communication plan – displays the Edit scheduled task dialog. The dialog contains the same fields and controls as the Add a scheduled task dialog.
 -
 /
/  Suspend/Run scheduled task – click the button to stop the task temporarily without deleting it, or run it again.
 -
 Delete communication plan – removes the whole task entry.