Outgoing mail
The Outgoing Mail Room window combines all standard controls for processing, record keeping and sending traditional paper mail. Click the Outgoing Mail button on the Records management tab to display a list of sent messages and messages waiting to be sent.

In older versions of FormFlow the Outgoing Mail button offered two options, To be mailed and Mailed. Now you can find all the messages in a single view. The previous two options are now available as preset filter sets – check the box To be mailed or Mailed to apply them.

The window displays documents that have been finished by their processor and submitted to be mailed, and now it is up to the mail room staff to print them out, place in envelopes and hand over to the post office or other delivery service. The window also displayed messages that have already been sent.
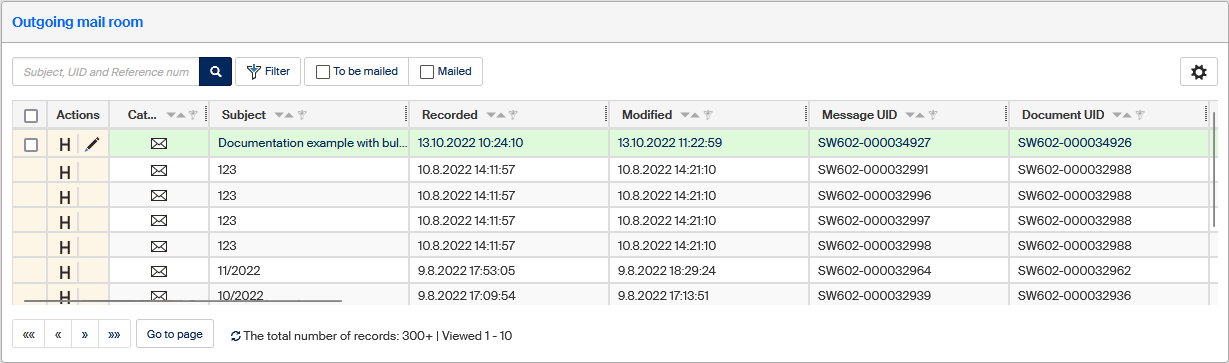
Message list in Outgoing mail
The Outgoing mail room window displays the list of outgoing messages. The first column on the left contains checkboxes for bulk operations (described in chapter Bulk operations in Outgoing mail). The boxes are not available for messages that have already been sent (with white background). Unmailed messages are displayed with green background. If an entry has yellow background, another user can take over the message.
There can be three buttons available in the Actions column for each entry:
-
H Document history – displays a window of the same name with a chronological list of events related to the document.
-
 Edit message – opens the MSG_IN form for the document.
 -
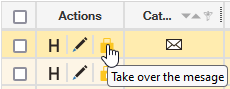
 Take over message – the document is on another user’s desk, but you can click to take it over; only displayed for documents you are authorized to take over.
The icon in the Category column indicates the message form; it is always the same one: ![]() means traditional paper mail.
means traditional paper mail.
The other columns display the following details:
-
Recorded – date and time the message (traditional mail, e-mail, data message) was entered in FormFlow.
-
Modified – date and time of the last change in the incoming message.
-
Message UID – unique identifier of the message, used since version 10.2.2.
-
Document UID – unique identifier of the document received with the message.
-
Reference number – reference number for the document received with the message.
-
Subject – subject (name, …) of the document received with the message.
-
Processor – name and surname of the user who has the incoming document “on their desk” for processing.
-
Organizational unit – name of the organizational unit where the incoming document is assigned.
-
Entity – name of the entity where the incoming document is assigned or received.
-
Processing method.
-
Recipient – name and surname of the outgoing document recipient.
-
Street – street name and number.
-
City – city or municipality name.
-
ZIP –ZIP number.
-
Post office – post office name.
-
Bulk posting form – name of the bulk posting form where the MSG_OUT form is inserted. Click to open the bulk posting form.
-
Address – text composed of the Street, ZIP code, City and Country
-
Paper mail type – message delivery options (ordinary mail, registered mail, mail with a certificate of delivery).
-
Recipient second row.
If you are authorized to view the document, you can click its identification details to display the form.
Confirming the send date
When a mail shipment is submitted (sent), the actual send date needs to be filled in the form. Look up the shipment in the Outgoing mail screen and click one of the identification details to display the form.
The Shipments section lists addresses where the document has been sent. Next to the relevant shipment, go to the Sent column and click the calendar icon (![]() ).
).
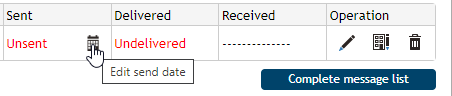
A field is displayed with a control to enter the send date. Select the date the shipment was sent and click the ![]() buton to confirm.
buton to confirm.

The date is copied to the Delivered field – with traditional paper mail, these two fields use the same value.
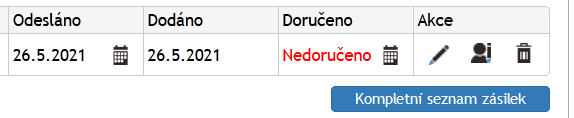
Click Confirm sending in the lower part of the form to confirm changes in the form.

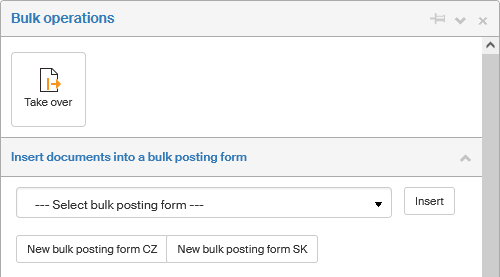
Bulk operations in Outgoing mail
The Bulk operations window
Check the box in the leftmost column for one or more table entries to display a floating window with a list of Bulk operations you can run for all the selected documents at the same time: specifically, you can click the Take over button in the upper part of the window to take over responsibility for all selected documents.