The contact detail screen
The structure of Address book entries differs based on the selected contact type (legal form). It is composed of several sections you can collapse or expand using the buttons on the right side of their header (![]() and
and ![]() ).
).
-
Basic information – contains the contact’s identification details. For more details, see chapter Basic information.
-
Contact details – contains contact details, especially addresses: postal, e-mail and data mailbox. For more details, see chapter Contact details.
-
Places of business – allows adding an entry for another premises to the contact by creating a relation to an existing contact of type Premises. For more details, see chapter Inserting premises.
-
Comments – any comments to the contact; you can also attach a file. For more details, see chapter Writing a comment.
-
Actions – a group of buttons that allow you to delete the entry or check the details using public registers. For more details, see chapter Buttons in the Actions section.
Click the Relations button in the upper right corner of the form to insert another relation to a FormFlow element (e.g. a document, record, form or Address book entry). You can also use relations to track whether you are authorized to save specific personal details (according to the GDPR). For more details, see chapter Adding a relation.
Basic information
Section Basic information is used to enter the contact’s basic identification details.
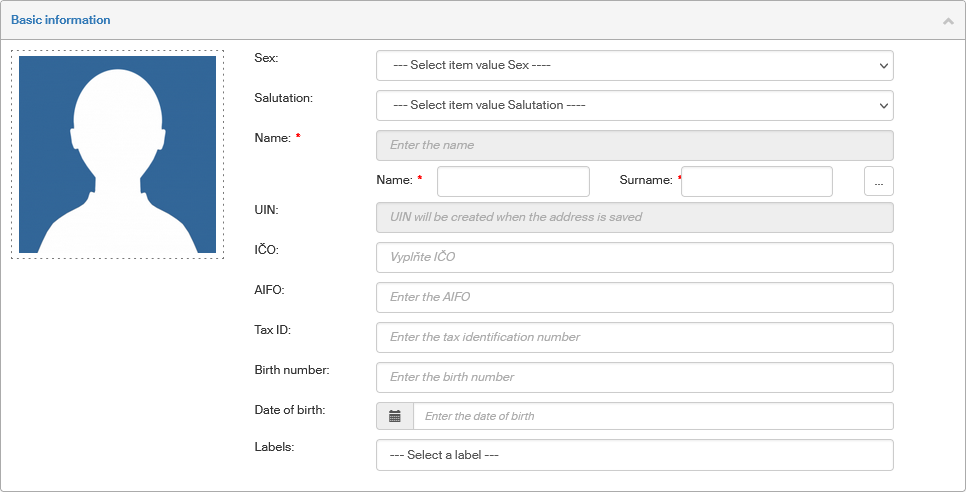
There is space for an image on the upper left: you can insert a person’s photograph or a company logo there. Click the image area to open a file selection dialog. You can use a file with one of the common graphic formats (e.g. BMP, JPG, GIF or PNG) not larger than 3 MB. Image dimensions will automatically resize to the area.
Text entries are available based on the subject type. Most of them are optional, only the name or company name is mandatory.
-
Sex – only for natural persons or entrepreneurs. Select one of the options; the administrator can edit the list of available options.
-
Salutation – only for natural persons or entrepreneurs. The salutation text can be used as part of address, e.g. “Dear Mr.”. The administrator can edit the list of available options.
-
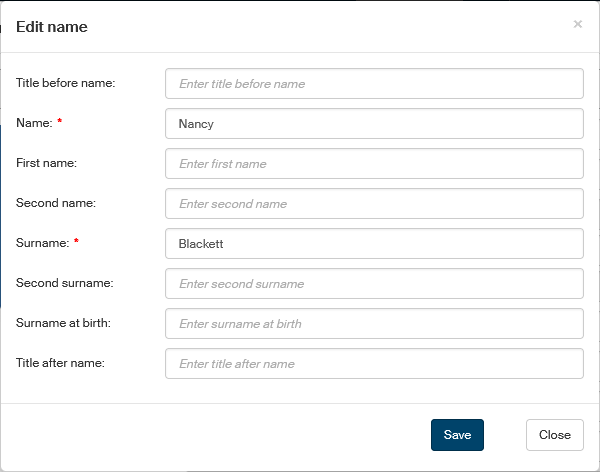
Name – only for natural persons or entrepreneurs. Enter the corresponding details in fields Name and Surname; the whole name is then displayed in the read-only gray field above.

Or click the three-dot button to open a separate window Edit name, where you can enter all parts of the name including titles. Only the Name and Surname are mandatory.
-
Company name – only for legal persons and places of business. Mandatory.
-
UID – the unique identifier is generated automatically. This identifier is different from the UID in records management and is used for identification within the Address book. The numbering method is set by the administrator.
Other details available:
-
ICP – premises identifier. Only for premises.
-
IČ – identification number.
-
AIFO – natural person’s identifier from the basic registers. Only for natural persons and entrepreneurs.
-
DIČ – tax identification number.
-
Social security number – only for natural persons and entrepreneurs.
-
Date of birth – in d.m.yyyy format. You can enter it manually or click the button on the left to display a control for entering a date. Only for natural persons and entrepreneurs.
-
Labels – you can select any number of labels from the list and attach them to the contact. The administrator can edit the list of labels.
Each entry displays an icon on the right, indicating whether a purpose is registered for the type of detail.
If it is, a green checkmark ![]() is displayed, otherwise an orange warning icon
is displayed, otherwise an orange warning icon ![]() .
.
Contact details
You can enter various types of addresses and other contact details in this section. Some entries are available only for some subject types.
-
Permanent residence – only for natural persons or entrepreneurs.
-
Delivery address.
-
Delivery address in ISZR – delivery address listed in the Basic registers. Only for natural persons and entrepreneurs.
-
Registered office.
-
Billing address.
-
E-mail.
-
Telephone.
-
ISDS data mailbox – data mailbox identifier in the Czech data mailbox system.
-
UPVS data mailbox – data mailbox identifier in the Slovak electronic mailbox system.
-
FAX.
-
P.O.BOX.
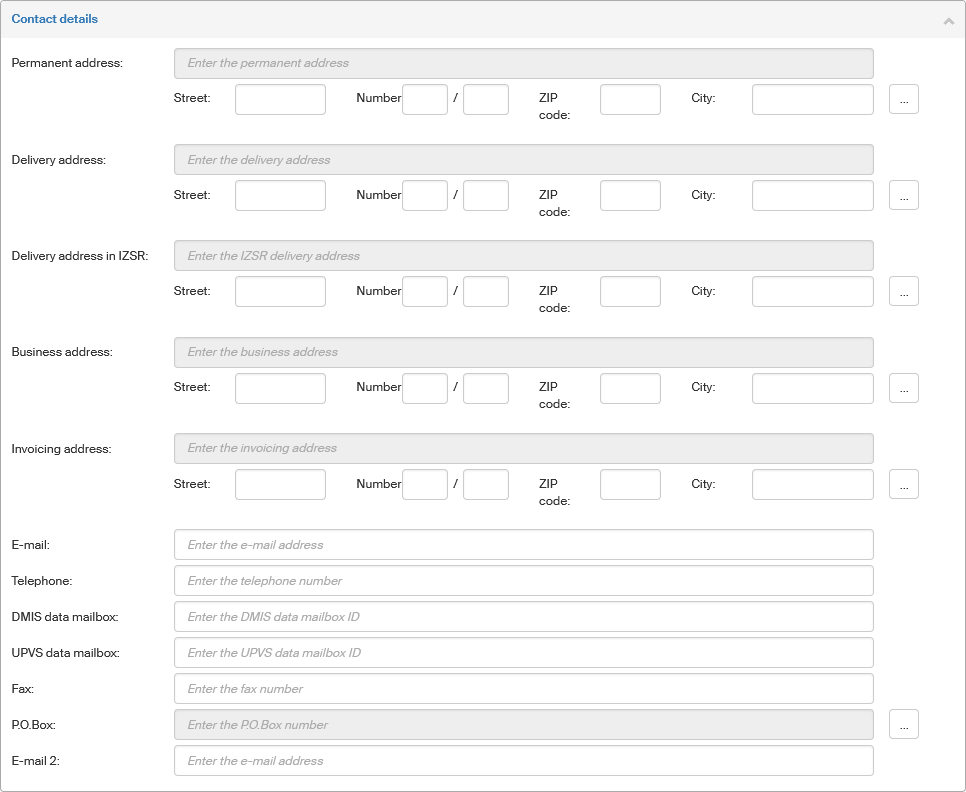
To add or edit one of the classic postal addresses (except P.O. Box), click the three-dot button on the right of the entry. A dialog window is then displayed where you can enter the parts of the address separately. Confirm the dialog to insert the address detail in the contact.
You can edit postal addresses either in the individual white fields (the resulting address is composed and displayed in the gray read-only field above them) or click the three-dot button on the right. A dialog window is then displayed where you can enter the more parts of the address. Confirm the dialog to insert the address detail in the contact.
Other contact details can be entered directly in the white editable fields, except the P.O. Box address, where you need to click the three-dot button to display a dialog window and enter the values in it.
Each entry displays an icon on the right, indicating whether a purpose is registered for the type of detail. If it is, a green checkmark ![]() is displayed, otherwise an orange warning icon image:ROOT:iko/oranzovy_vykricnik.png[warning icon,width=14,height=14 is displayed.
is displayed, otherwise an orange warning icon image:ROOT:iko/oranzovy_vykricnik.png[warning icon,width=14,height=14 is displayed.
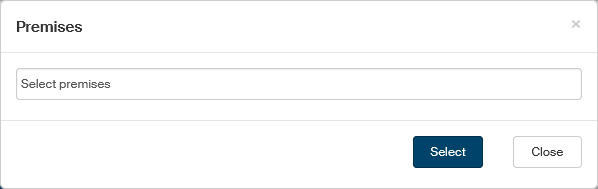
Inserting premises
You can add an entry for premises to the contact by creating a relation to an existing contact of type Premises.
To add premises, click New. A dialog window is then displayed with a list of premises not yet attached to this contact. Select one or more premises from the list and click Select to confirm the selection.
You can always detach premises from a contact by clicking the ![]() button on the right.
button on the right.
Writing a comment
You can add a comment for the contact in section Comments and view the comments left by other users. A comment can include a file, which is then available to the other users for download.
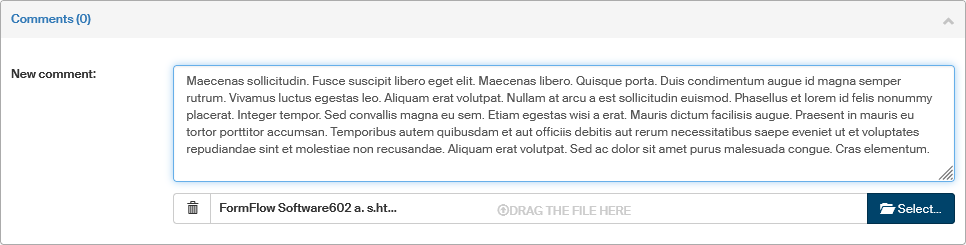
To insert a comment, write it in the field New comment. If you want to add a file, look it up using the Select button or drag and drop it in the area marked “drag the file here”. Then confirm the whole edit dialog and save the comment using the Save button in the lower right corner of the page.
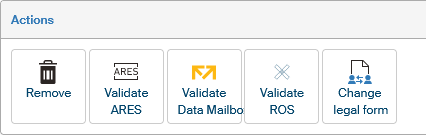
Buttons in the Actions section
Section Actions contains several controls to manage the subject.
They are the following:
-
ARES (Administrativní registr ekonomických subjektů) – a database of economic subjects.
-
DMIS – Data Mailbox Information System.
-
ROB (Registr obyvatel) – register of inhabitants.
-
ROS (Registr osob) – register of persons.
-
Legal form – specifies the legal character of the contact. It may be a natural person, entrepreneur, legal person or premises.
The controls in this section offer the following functions:
-
Remove – delete the contact from the address book.
-
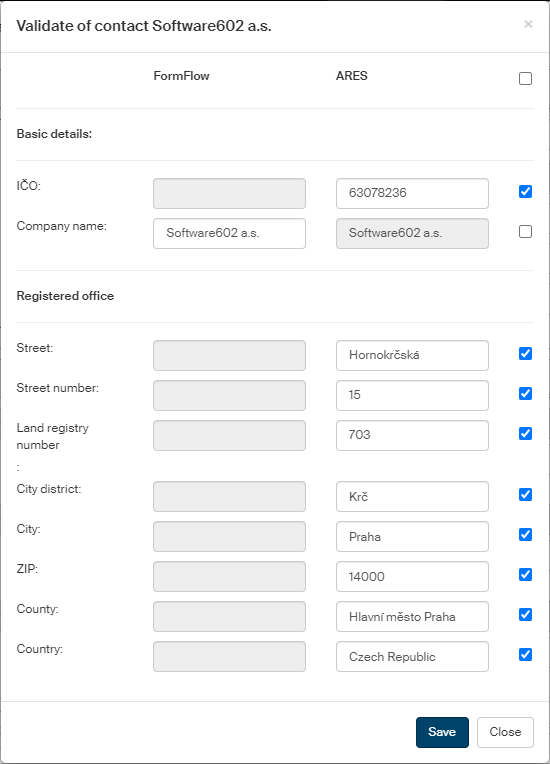
Validate ARES – FormFlow looks up the contact in the ARES database based on the identification number (in the contact’s basic information). A dialog window is then displayed where you can compare the contact details from FormFlow with the details from the database. Select the checkbox on the right from selected entries and click Save to copy them from the ARES database to FormFlow.
-
Validate Data Mailbox – FormFlow looks up the contact in the data mailbox information system based on the data mailbox identifier entered the contact information section. A dialog window is then displayed where you can compare the contact details from FormFlow with the details from the database. Check the box on the right next to the selected entries and click Save to copy them from the data mailbox system to FormFlow.
-
Validate ROB – the entered details are checked against the Register of inhabitants and the Register of territorial identification, addresses and real estate (RÚIAN). Click Validate ROB to display a dialog to enter the reason for searching. Enter the reason and click Select to confirm. A dialog window is then displayed where you can compare the contact details from FormFlow with the details from the database. Check the box on the right next to the selected entries and click Save to copy them from the data mailbox system to FormFlow. This feature is only available for natural persons, the name, surname and date of birth must be filled in to run the validation.
-
Validate ROS – the entered details are checked against the Register of persons. Click Validate ROS to display a dialog to enter the reason for searching. Enter the reason and click Select to confirm. A dialog window is then displayed where you can compare the contact details from FormFlow with the details from the database. Check the box on the right next to the selected entries and click Save to copy them from the data mailbox system to FormFlow. This option applies to the other contact types.
| The Validate ROB or Validate ROS buttons are displayed based on the contact type. |

-
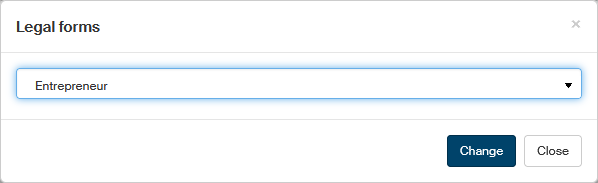
Change legal form – use this button to change the contact type. Click it to display the Legal forms dialog with a single option where you can select the legal form of the contact. If, for example, you open the dialog for a natural person, you can change their legal form to entrepreneur, legal person or premises.
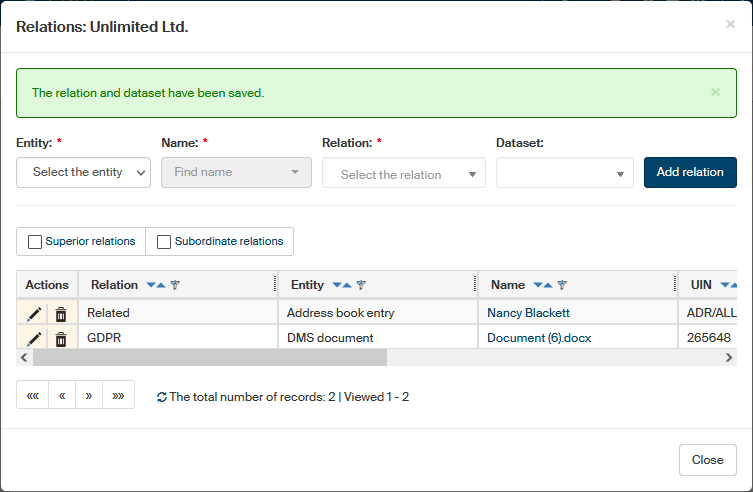
Adding a relation
Use the ![]() Relations button in the upper right corner of the contact window to display a window where you can attach another FormFlow object to the contact – e.g. a document, form, record, but also another Address book contact. You can also use relations to track whether you are authorized to save specific personal details (according to the GDPR).
Relations button in the upper right corner of the contact window to display a window where you can attach another FormFlow object to the contact – e.g. a document, form, record, but also another Address book contact. You can also use relations to track whether you are authorized to save specific personal details (according to the GDPR).
| You can only add a relation when editing a saved contact. When creating a new contact, it is not yet possible. |
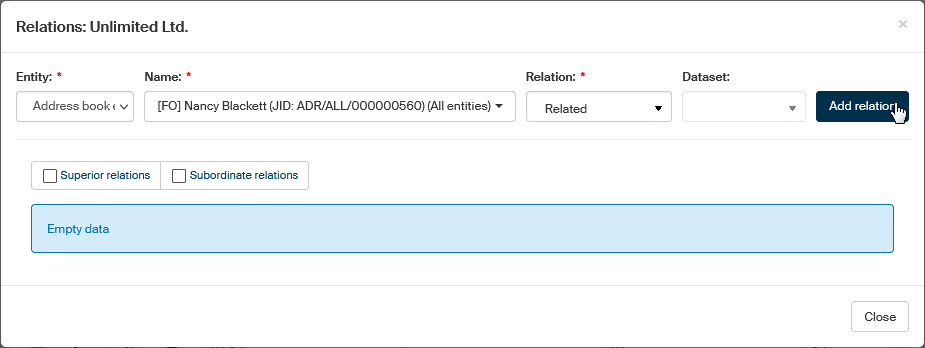
Specify the element to attach and the relation properties in the Relations window:
-
Entity – select the type of object to attach from the menu. The following options are available:
-
ESS document – a document registered in the records management;
-
DMS document – a document registered in the document section of FormFlow;
-
Record registered in the records management;
-
Process – a form from the process section of FormFlow;
-
Address book entry – a contact in the Address book.
-
-
Name – as soon as you select the object, you can enter the name of your object (or just the first three letters from the name) and click the magnifying glass button on the right. FormFlow will look up the matching objects and display them in the field; click on the required name to select it. If more than one entry is found, you can use the bar on the right to scroll the list.
-
Relation – select the relation type.
-
Dataset – select the purpose of storing the data according to the GDPR. If it is filled in, a green checkmark will be displayed in the contact detail next to the data entries included in the dataset to indicate that their purpose is registered. A dataset is only needed for relations related to the GDPR. Select one from the list of existing datasets or create a new one for this specific relation, as described in chapter Creating a new dataset.
Creating a new dataset
If no existing dataset applies to the relation you are just creating, you can create a new dataset. It will be used in this relation only.
In field Dataset, select the value Create a new dataset after saving the relation. Fill out the rest of the dialog as usual. Click Add relation.
A dialog to create a dataset is then displayed. A dataset is a set of personal details that will be registered for this case.
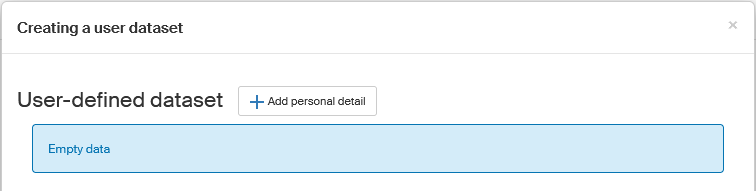
Click Add personal detail.
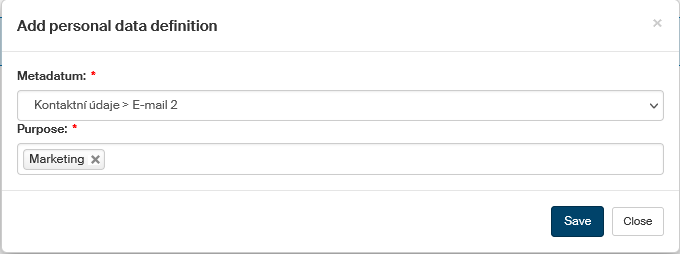
A dialog Add personal data definition is displayed. Select the type of data to register – one of the Basic data or Contact information categories. In Purpose, select one or more purposes of processing the detail from the list. Click Save to confirm the settings.
To add another detail, click Add personal detail again and repeat the procedure.
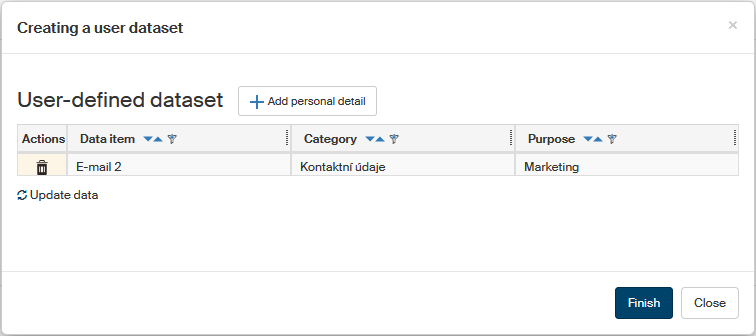
When all the required details are listed in the dataset, click Finish. FormFlow will create both the relation and the dataset and the personal details included in the dataset will be marked with a green checkmark in the contact detail. This is not necessary, if the values are already entered and a dataset created for them. In that case, the values are automatically assigned and marked with a green checkmark.