Sender groups
Received messages are usually distributed to recipients based on the senders. It is not necessary to create a special sorting rule for each sender: you can create sender groups, place senders in groups based on their type and then create a single distribution rule for the whole sender group.
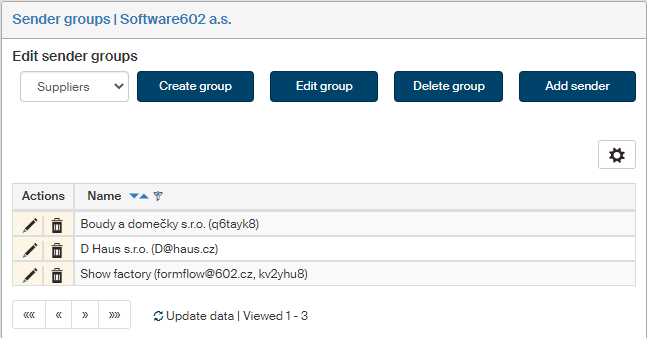
On the left panel in the Entities screen (), make sure the entity you want to edit is selected in the Entities list. Then go to Menu and click Sender groups. The screen Sender groups (entity name) is displayed on the right. The section contains a list of existing sender groups, which you can edit or add to.
Groups created here are then available in screen Message sorting rules.
Creating a new sender group
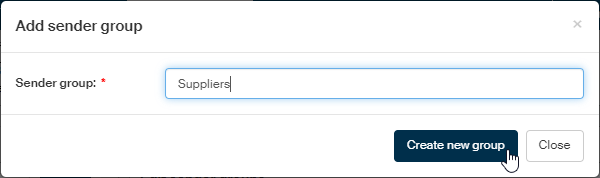
If there are no sender groups available for the entity, or you want to create a new one, click Create group.

Enter its name in the new window and click Create new group to confirm.
Sender group overview and editing
The upper left of the Sender groups screen displays the Edit sender groups control.
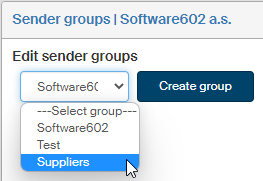
Select a group from the list to edit it. The screen displays a list of senders included in the group.
There are controls in the upper part of the screen to edit the group: create a new group, edit or delete this one and a button to add a sender to the group.
The basic options for the group are the two following:
-
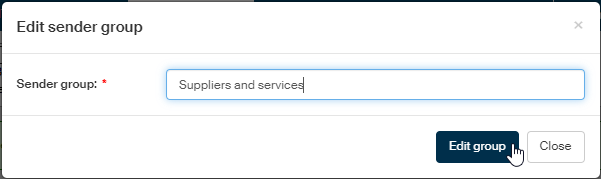
Click Edit group to display a window where you can change the group name.
-
Click Delete group to remove the group completely. A confirmation dialog is displayed first.

Adding a sender to the group
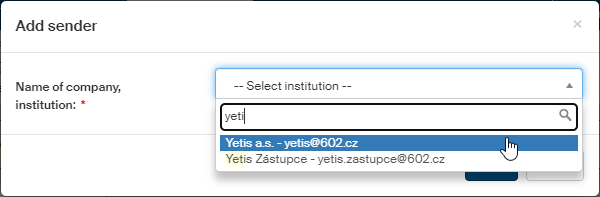
Click Add sender to display the Add sender dialog where you can look up a sender.

In field Name of company, institution, select the sender to add. You can use the autocomplete function – start writing a part of the name and the form will offer matching results. Click Save to confirm the selection.
To add more senders, click the Add sender button again and repeat the procedure.
The senders are added to the table. The table lists senders in this group. Use the buttons in the Actions column to manage the entries:
-
Click
 Edit sender to display the sender edit dialog.
 -
Click
 Delete sender to remove the sender form the group.