Metadata administration
Open the Metadata administration screen () to create and edit the list of metadata to be filled in for documents based on the folder where they are stored. To learn how to create and edit the folder structure, see chapter Document folders.
The Metadata administration screen is split into two sections. The left one displays the existing folder structure. Click a folder name to display a list of metadata kept for documents stored in this folder.
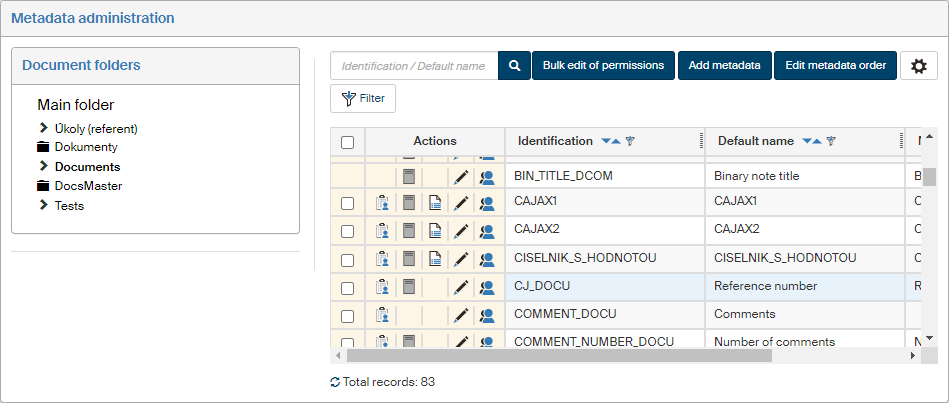
The list of metadata is displayed on the right. There are several controls available to edit the metadata.
Click Edit metadata order above the list to display a dialog showing the visible metadata, organized in columns and panels as they are displayed in dialogs when inserting or editing documents. The dialog is described in chapter DMS metadata designer.
Check the box in the left-most column to select metadata and edit their permissions in bulk – when you have selected the metadata to edit, click Bulk edit of permissions. This dialog is described in chapter Setting up metadata permissions.
The Actions column buttons provide the following features:
-
 Set permissions – displays a table where you can grant or remove permissions to (from) users, groups or roles. For more details, see chapter Setting up metadata permissions.
 -
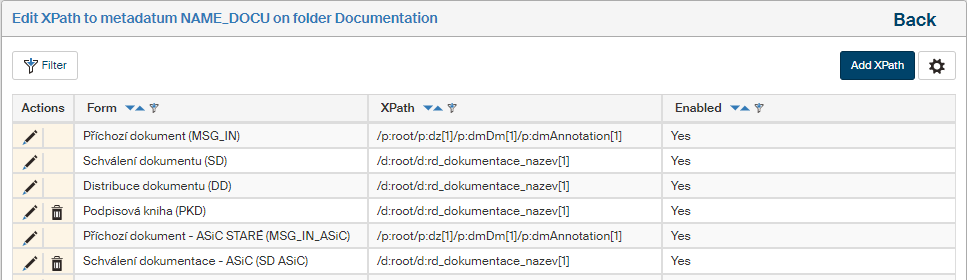
 Set XPath – displays a dialog Edit XPath to metadatum xxx on folder yyy for the selected metadata item. Use the dialog to create a new XPath entry; the steps include process selection (only processes available in the document folder are listed) and entering the XPath itself. You can set the entry as enabled or disabled. If you are setting up a metadata entry in a document folder containing subfolders, you can select whether to copy the properties from the folder to its subfolders.
 -
 Edit the list – only available for metadata of list data type. The button displays a dialog where you can edit the list items.
 -
 Edit the metadatum – displays a dialog window where you can edit the properties of this metadata item. For more details, see chapter Creating and editing a metadata item.
 -
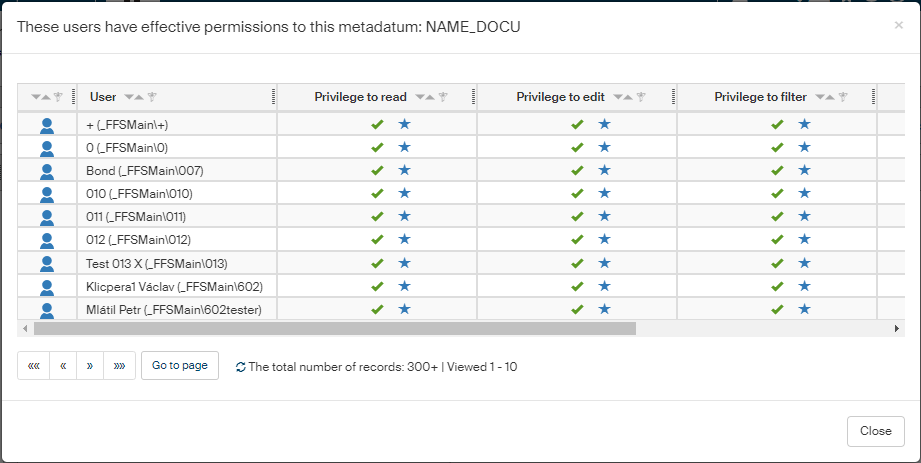
 Show effective permissions – displays a window with a list of all users how were granted a permission or permissions to the metadata item, either directly or through membership in a group or role. The assigned permissions are displayed as a green check mark in the corresponding column.
 -
 Delete the metadatum – removes the entry. It is not possible to delete global metadata (the default metadata set), the button is not available for these items.
Click  Grid administration on the upper right above the list of metadata to display a dialog where you can adjust the filtration and sorting limits for this table. The settings are described in more detail in chapter Grid administration.
Creating and editing a metadata item
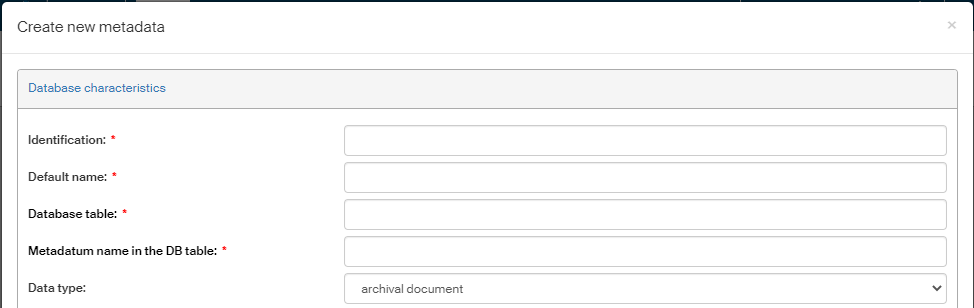
Metadata can be added to subfolders too. Click Add metadata on the right above the list of existing metadata. Clicking the button displays the window Create new metadata where you can enter its properties.
The same dialog window is displayed if you select the action Edit metadata in the list of existing metadata. Use the dialog to edit the existing metadata entry as needed.
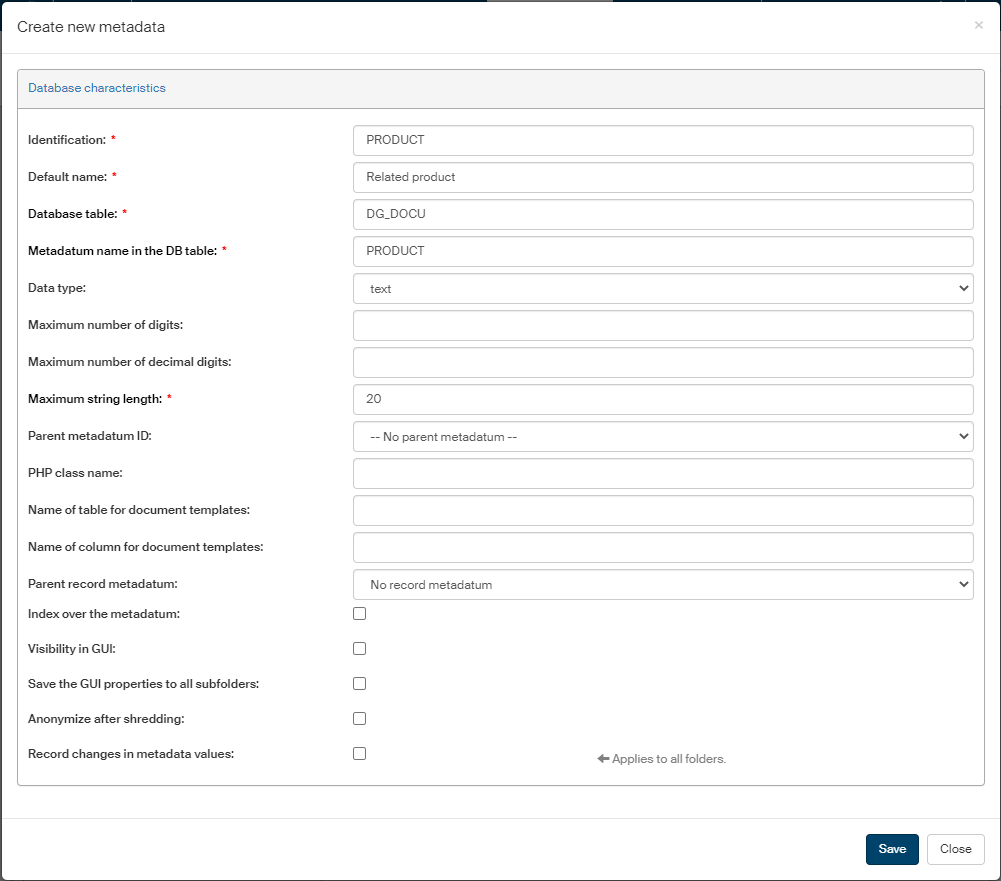
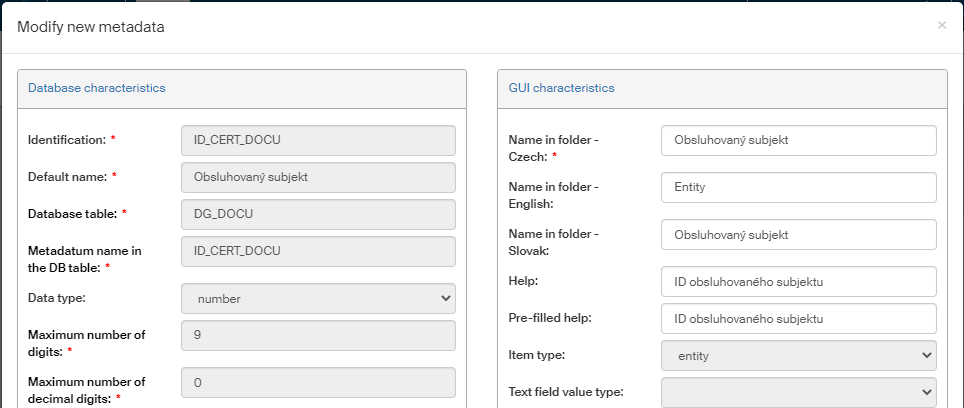
The basic display shows the Database characteristics section where you can set up how the metadata item will be stored. The entries marked with an asterisk are mandatory; some of them depend on the data type selected.
-
Identification – unique string that identifies the metadata item.
-
Default name – the name displayed in lists.
-
Database table – name of the database table where to store the metadata item.
-
Metadatum name in the DB table – name for the metadata item to be written in the database.
-
Data type – based on the selected data type, filling in some of the following entries might be required.
-
Maximum number of digits, Maximum number of decimal digits – these entries are mandatory if the data type is “number”.
-
Maximum string length – this entry is only mandatory if the data type is “text”.
-
Parent metadatum ID – the metadata item can depend on the value of another metadata item; if it is the case, select the other metadata item here.
-
PHP class name – class name in an external PHP script where e.g. a list can be stored.
-
Name of table for document templates, Name of column for document templates – these entries are not in use.
-
Parent record metadatum – metadata items can be structured in such a way that one or more metadata items are parts of a parent metadata item. In such a case enter the parent metadata item here.
-
Index over the metadatum – this is entry is for reference only. If it is checked, it means there is an index over this metadata item in the database and can be used for searching.
-
Visibility in GUI – if checked, an additional column, GUI characteristics, is displayed in this dialog window. The data in this section is used to set up how the metadata item is presented to the users.
-
Save the GUI properties to all subfolders – the metadata item is also applied to all subfolders to the current folder.
-
Anonymize after shredding – metadata with this entry checked is hidden after the document has been shredded.
-
Record changes in metadata values – this option is only available for some simple (scalar) data types. If it is checked, previous values of the metadata entry will be saved during edits. The old values will be available in the document detail on the Metadata value history tab.
If you have checked Visibility in GUI, the metadata setup window is displayed as shown here:
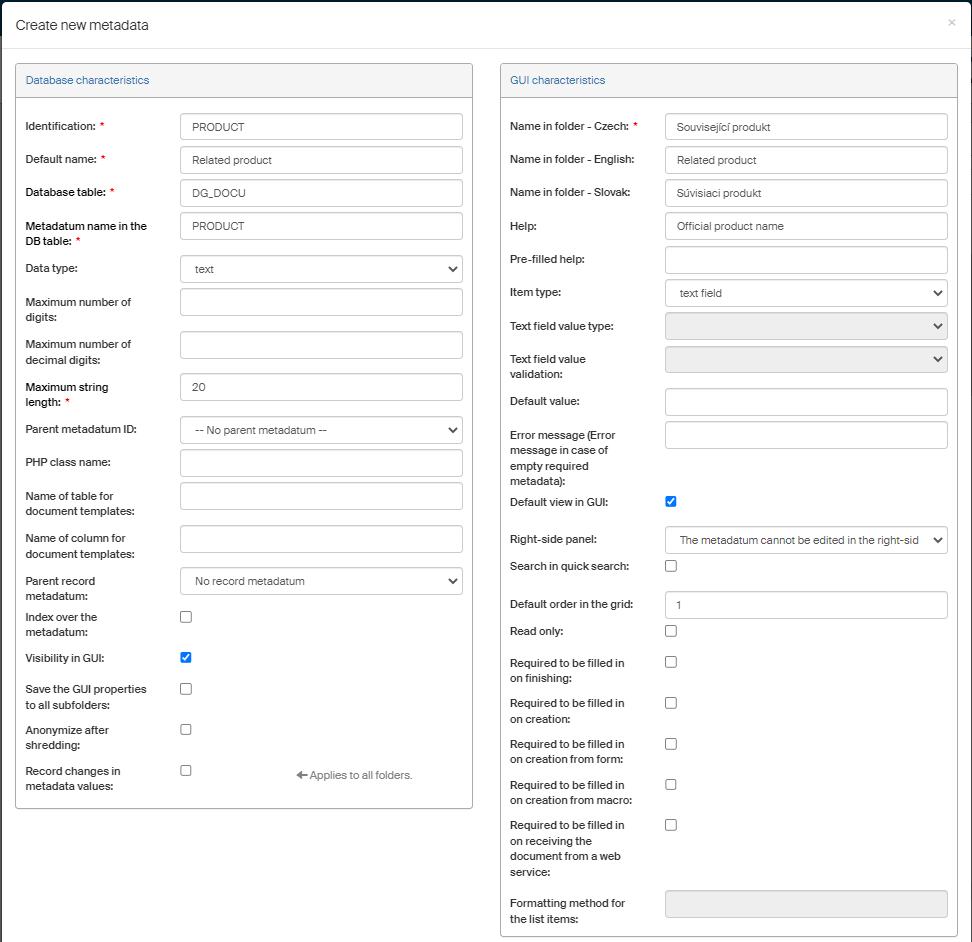
The Database characteristics table is moved to the left and another column, GUI characteristics, is displayed on the right and offers the following entries:
-
Name in folder – Czech/English/Slovak – name as displayed to the users. You can set up a different name for each language version.
-
Help – instructions how to fill in the field (not displayed anywhere yet).
-
Pre-filled help – help text displayed directly in the metadata item field.
-
Item type – item data type as presented in the GUI.
-
Text field value type – if there is “text” selected in the Item type field, you can select one of several options in this field (Free text, Identification number, Tax identification number, E-mail, Telephone, URL) to adjust how the metadata item is displayed and/or validated.
-
Text field value validation – if the Item type is “text” and based on the setting in the Text field value type, you can request validation of the metadata value filled in by the user. The options are “No validation”, “Soft - warning only” and “Strict - error thrown”. On the strict setting, it will not be possible to save a metadata item if it is filled in incorrectly.
-
Default value – the value to be used if the field is not filled in.
-
Error message in case of empty required metadata – if this metadata item is mandatory and a user leaves the entry empty, the text entered in this field will be displayed.
-
Default view in GUI – if not checked, the item will not be displayed when inserting a document, filtering, etc.
-
Right-side panel – select which panel/dialog window will display the metadata item for filling in.
-
Search in quick search – if checked, this item will be searched when using the quick search field.
-
Default order in the grid – column order for this metadata item in the document table when the folder is displayed.
-
Read only – if checked, this item will only be available for viewing, not editing.
-
Required to be filled in on finishing – if checked, it will not be possible to finish a document until this item is filled in.
-
Required to be filled in on creation – if checked, it will not be possible to insert (create) a document until this item is filled in.
-
Required to be filled in on creation from form – the metadata item must be filled in when creating a document using a form in the FormFlow interface.
-
Required to be filled in on creation from macro – the metadata item must be filled in when creating a document using an MS Office macro (ECM extension).
-
Required to be filled in on receiving the document from a web service – the metadata item must be filled in when creating a document by sending it to FormFlow using a web service.
-
Formatting method for the list items – how to display them in the form, e.g.
%KEY% - %VALUE%.
To create the entry, click Save.
A similar window is displayed if you click Edit the metadatum in the list of existing metadata. Use it to edit the existing metadata entry as needed.
Setting up metadata permissions
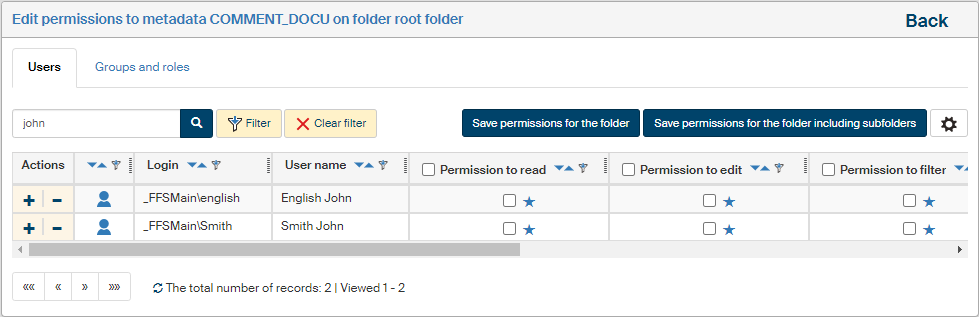
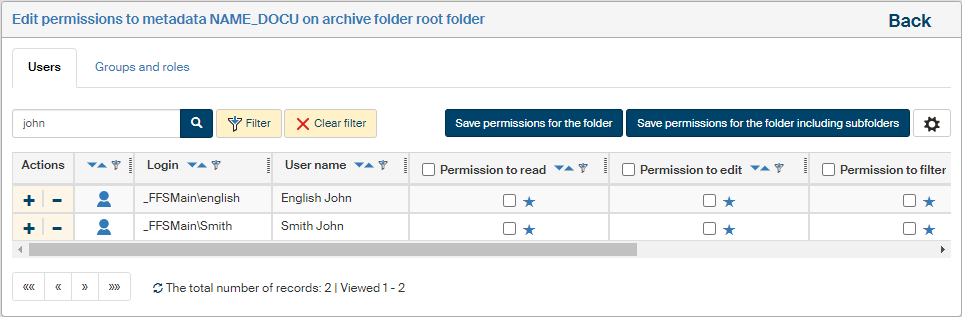
Click Set permissions next to a selected metadata item to display a table where you can assign access permissions to users as well as whole groups and roles.
If you select the checkbox on the left for several items and then select the button Bulk edit of permissions, a similar dialog will be displayed but the settings will apply to all selected metadata items. In such a case, the dialog header shows the text “Edit permissions to selected metadata” and, next to it, the button Show selected metadata, which you can use to display a dialog window with a list of metadata this setting will apply to.

For the rest of the setting, proceed the same way whether setting up a single item or several items at once:
Use the tabs in the upper part of the page to switch between a list of users and a list of groups and roles. A filter is also placed above the list, and you can use it to look up individual entries.
Check or uncheck the individual permissions for every entry (user, group or role):
-
Permission to read;
-
Permission to edit;
-
Permission to filter using the metadata item;
-
Permission to sort based on the metadata item;
-
Permission to grant permissions;
-
Enabled – if not checked, the metadata item is not in use.
You can click  to check all the fields and assign the user, group or role all the permissions at once, or
  to remove all permissions at once.
When bulk editing metadata permissions, there are three options available for each permission: yes, no and do not change.
Then click the Modify permissions button placed above the list of users or groups to confirm any changes. If you check the option Edit permissions in subfolders, the permission changes will also apply to subfolders to the current folder.
Return to the list of metadata by clicking the Back link in the upper right corner.
If you want to check the overall permissions assigned to a user (i.e. permissions assigned both by being a group/role member and individually assigned permissions), return to the metadata list and, in the Actions column, click Show effective permissions.
Editing a list
If the selected metadata item data type is set to list, the buttons in the Actions column include Edit the list. Click it to display a list of existing list items.
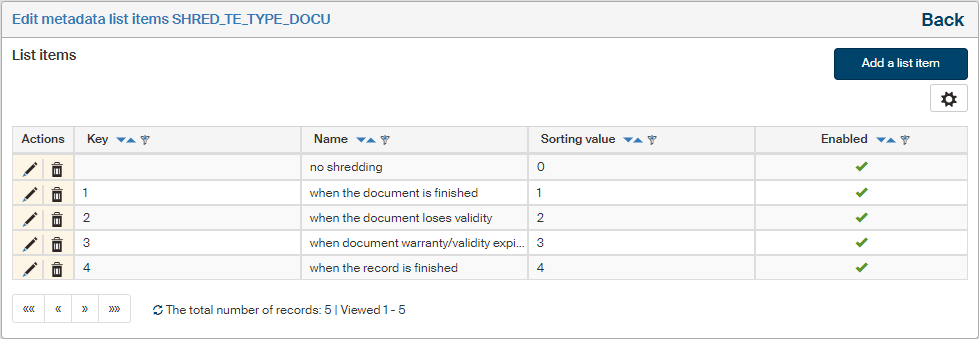
Each table row corresponds to one list item. The Actions buttons include Edit item to display a dialog window with item properties, and Delete item.
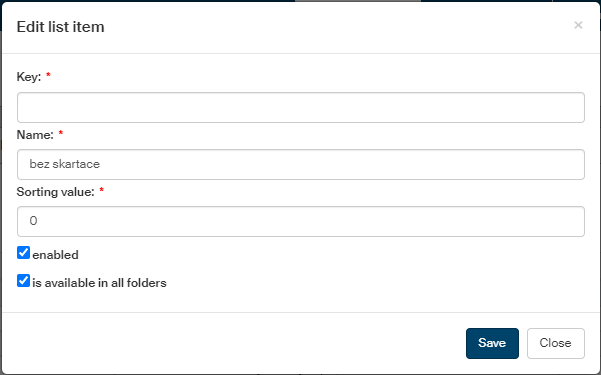
Click the Add a selection item button placed on the right above the table of existing items to create another item on the list. A dialog window is opened, similar to the editing one. Enter the item properties:
-
Key – item identifier;
-
Name – this text will be displayed as an option in the list;
-
Sorting value – this value will be used to order the list items.
Click Save to confirm and add the new item.

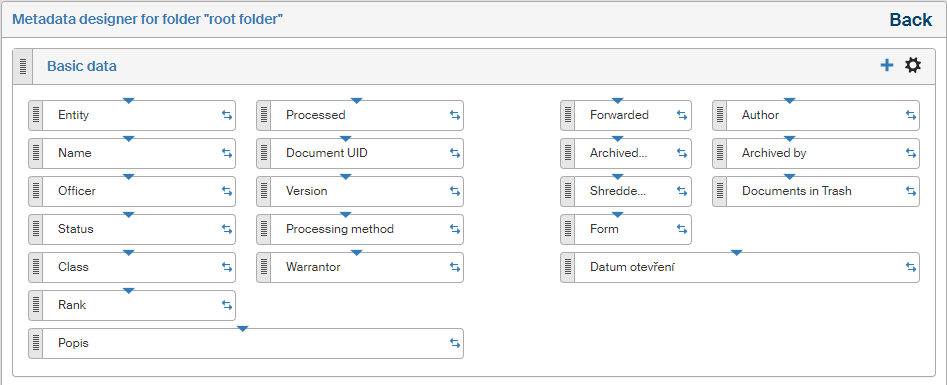
DMS metadata designer
Click Edit metadata order in Metadata administration to display the screen Metadata designer for folder xxx, where you can change the order and inclusion of metadata items in the document metadata setting screen. The metadata is separated into four basic system panels (Basic data, Archive and retention data, Relations and Comments). These panels cannot be removed, but you can click Add panel to add user-defined panels.

Each small rectangle corresponds to one metadata item. Move the items around using drag and drop to place them in a different place within the same panel or to a different panel. You can also adjust the properties of each metadata item.
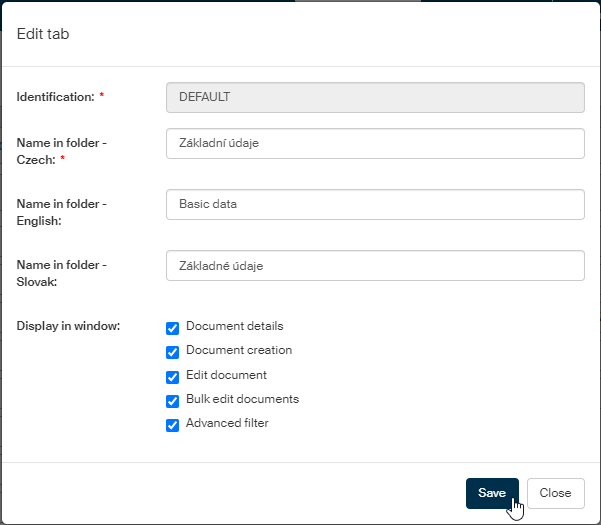
Panel visibility settings
You might need to make a panel visible at some locations only – for example in the table and filters, abut not in other windows, for example when creating and editing documents.
The metadata designer allows you to specify where to display a panel and where not, for each panel separately. You can select the default display when creating a new panel (using the Add tab button).
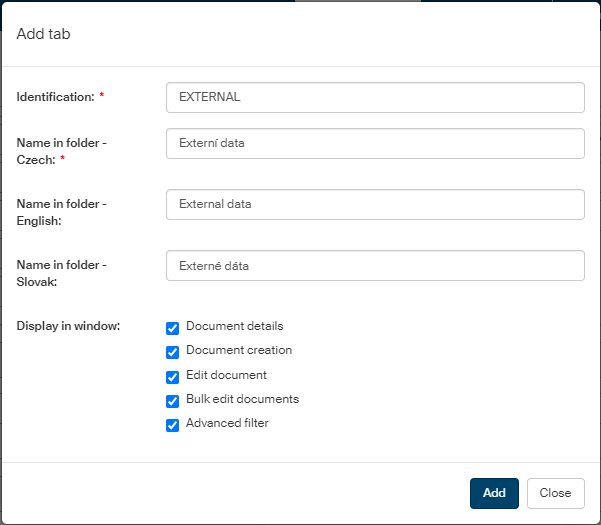
Use the group of checkboxes Display in window to select the windows where the metadata panel will be displayed. The following windows are available:
-
Displaying document information.
-
Creating a document.
-
Editing a document.
-
Bulk editing selected documents,
-
Displaying metadata items in advanced filters.
The default is all the boxes checked, meaning that the panel will be displayed in all the windows.
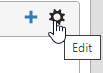
You can change the setting later: click the cogwheel icon in the upper right corner of the panel description frame (Edit).
Adjust the checkboxes and the visibility of the panel in the corresponding windows will change.
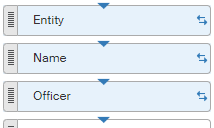
Editing the metadata item position and size in the window
Drag the double arrow  at the right-hand part of the field to make it wider or narrower and, as a result, change the entry field size.

Drag the left-hand (gray) end of the field to move it to another part of the window. Position of the other items will adjust automatically.

The black cross cursor can be used to select more than one metadata item and then edit them at the same time.

Select the items either by dragging the mouse (selecting an area) or by clicking on several metadata items while holding down the Ctrl key.
Drag the blue triangle near the top border to adjust the margin between the metadata name and the beginning of the entry field.
The red warning triangle on the left side of the field indicates a conflict of metadata position after it has been updated. If you place the mouse cursor over the triangle, the following message is displayed: There is no valid location set for the metadatum.

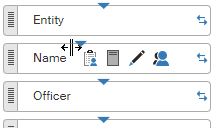
Editing the metadata item contents
Place the mouse cursor over a metadata item to display four edit buttons. These are, from left to right:

 Edit permissions – opens the window Edit permissions to metadata xxx on folder yyy. Use this window to edit permissions for the selected metadata item for any user. Looking up users can be easier with filtering.
 Set XPath – displays a dialog Edit XPath to metadatum xxx on folder yyy. Check or edit the individual XPath items here – modify, add or even delete the ones you have added.
Edit the metadatum – displays the window Edit metadata, where you can edit some metadata item properties (not all the fields are editable).
 Show effective permissions – displays the window These users have effective permissions to this metadatum xxx with a read-only list of individual users' effective permissions to this metadata item.
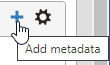
Adding a metadata item
Click the plus symbol in the upper right corner of a panel (Add metadata) to display the window Create new metadata. Give the item a name and set up its parameters. You can add metadata items to both the system and user-defined panels, but if you have just created a new user-defined panel, save the design first, and then you can start adding metadata items.
Adding another panel
Metadata items in a document creation window can be organized into several panels. Create new panels and move metadata items between them to adjust the window layout. To add a new panel, click Add panel in the lower left corner of the window.
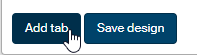
In window Add tab, enter the panel identifier and its name in Czech, English and Slovak. Then click Add to create the panel and place it in the metadata designer window.
You can reorder the panels in the designer using drag and drop: drag a panel by the symbol on the left of its header.
There are several buttons in the right part of the new panel header.
-
Add metadata – inserts a new metadata item directly in the new panel.
Do not forget to save the design before you start inserting metadata.
You can also drag and drop items from other panels.
-
Delete – deletes the panel from the designer.
This button is only available for the new panels you have created.
-
Edit – opens a dialog where you can adjust the panel properties (the identifier and the panel names in Czech, Slovak and English).