Downloading e-mail from Microsoft 365
To configure downloading Microsoft e-mail, you need to have set up an e-mail account at Microsoft.
Registration in the authorization portal
First you need to register the app in the authorization portal.
-
In a browser, enter the following:
-
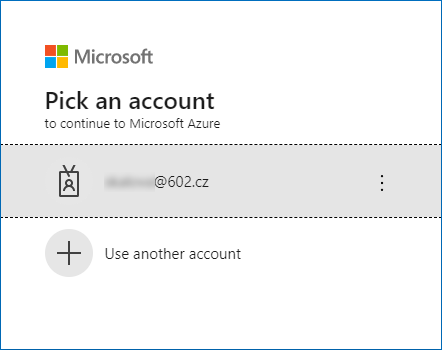
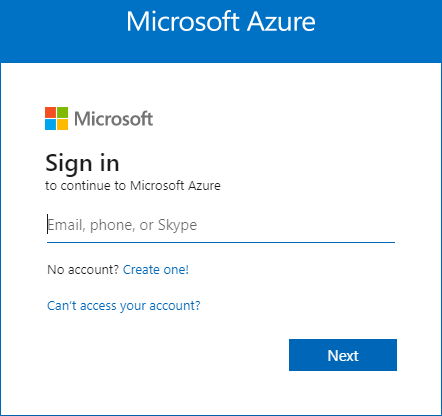
Use your Office 365 account where you access your mail to log in to the authorization portal.
-
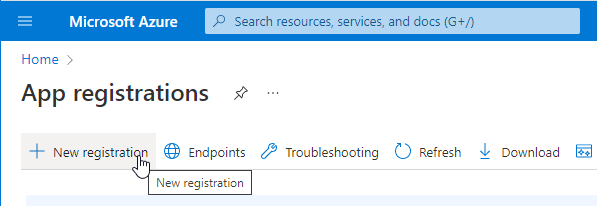
In window App registrations, click + New registration.
-
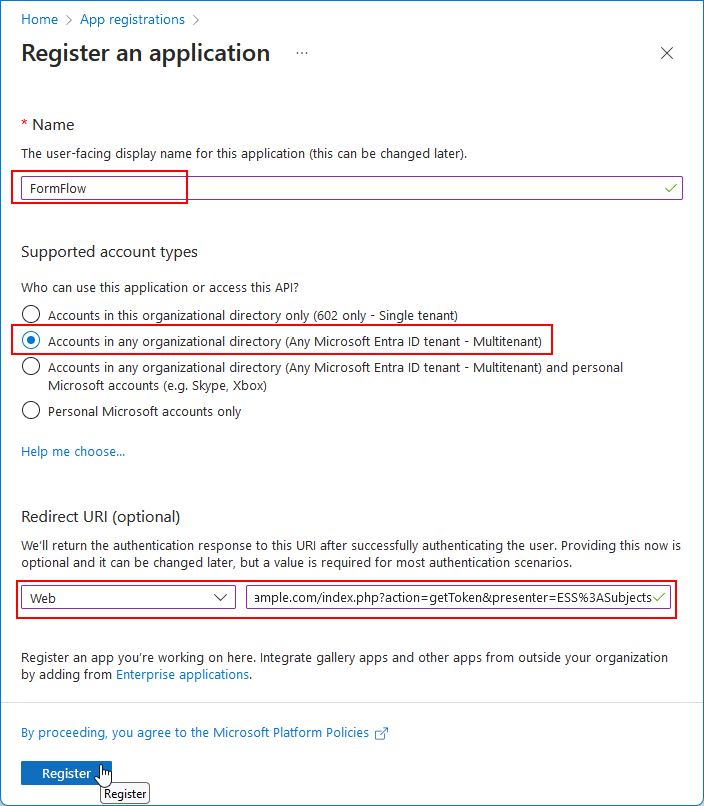
The window Register an application is displayed. Enter the following values:
-
In Name, enter the application name that will be displayed to users (can be changed later). In our case, enter FormFlow.
-
Switch Supported account types to Accounts in any organizational directory (Any Microsoft Entra ID – Multitenant).
-
Redirect URI – this section is optional. If the user is authenticated successfully, the result will be sent to the given URL. Set the first part of the control to Web and enter the following address in the field:
https://[FormFlow address]/index.php?action=getToken&presenter=ESS%3ASubjects(Replace the
[FormFlow address]string with the base URL of your FormFlow server.)
-
-
Click Register to confirm the settings.
-
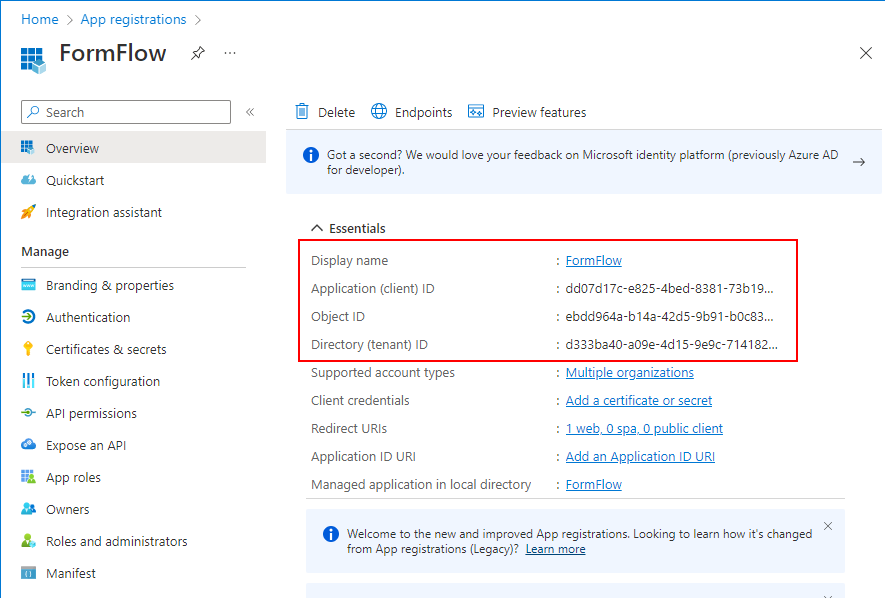
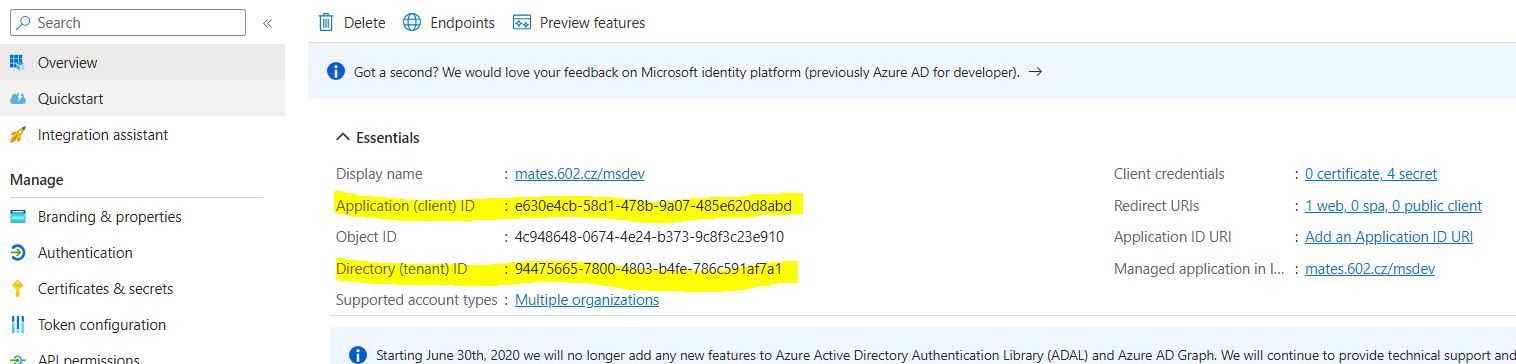
In the following window, note the values in fields Application (client) ID, Directory (Tenant) ID and Object ID. Copy and save their values.
-
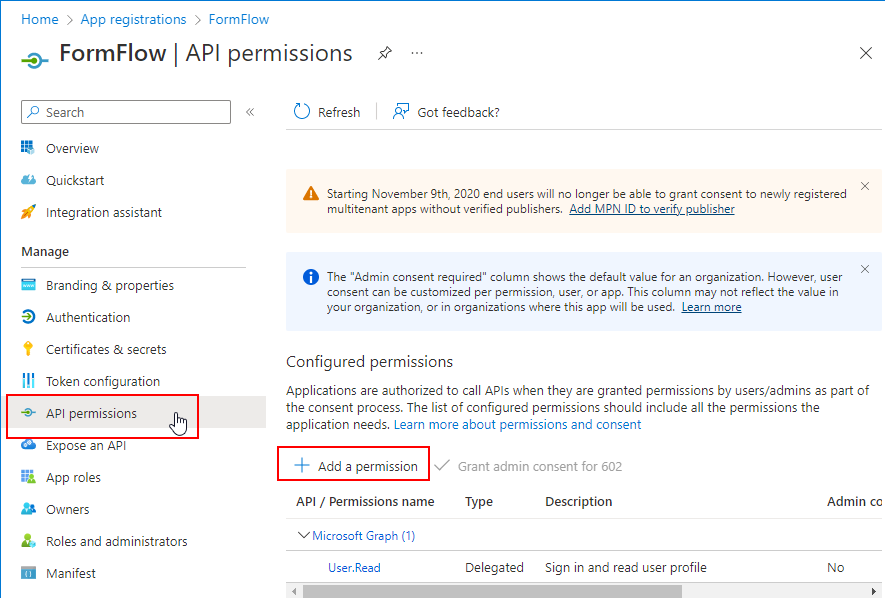
Now set up the API permissions. On the left, click API permissions and then, on the right, click Add a permission.
-
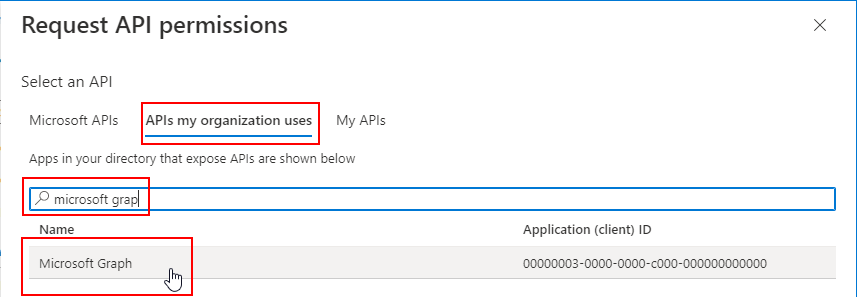
In window Request API permission, click My organization’s API. Use the search field to look up Microsoft graph.
-
Click Microsoft graph to select your application’s API permission type.
-
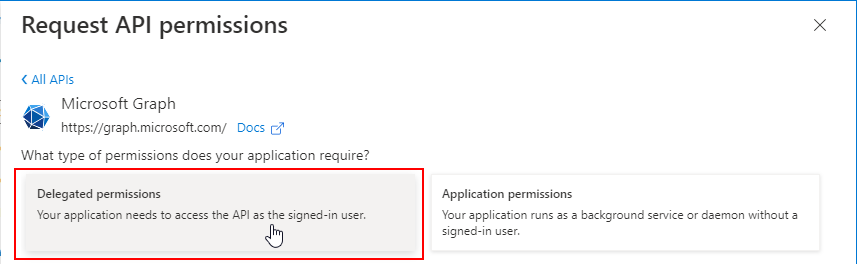
Click Delegated permissions. This gives your application access to the API as a logged-in user.
In field Select permissions, enter mail and then look up and check MailReadWrite. Click Add permissions.

-
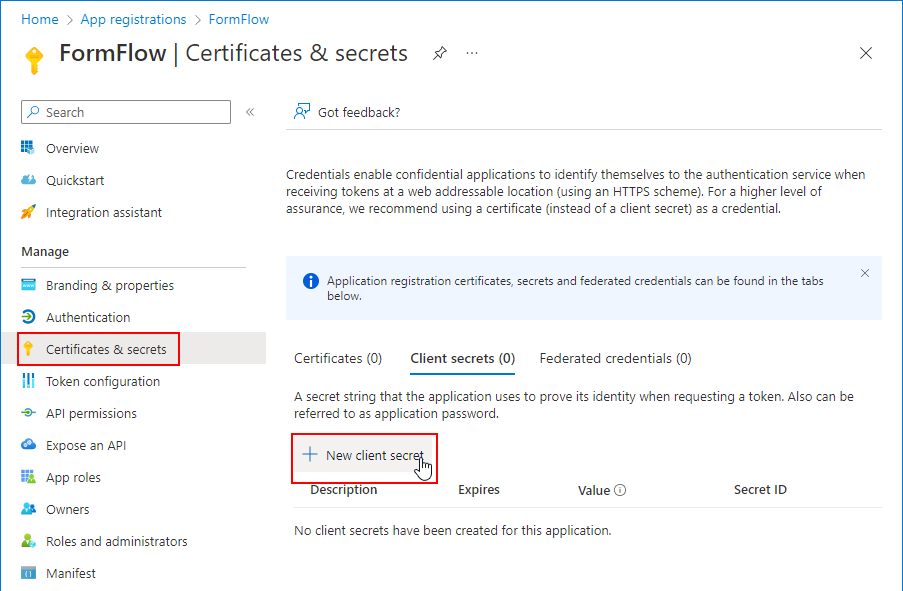
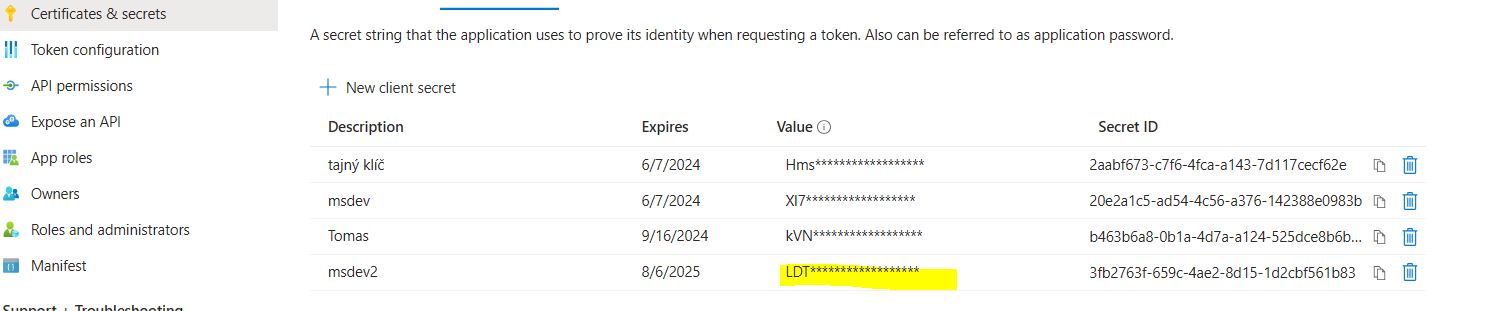
On the left, click Certificates & secrets. In the first section, click + New client secret.
-
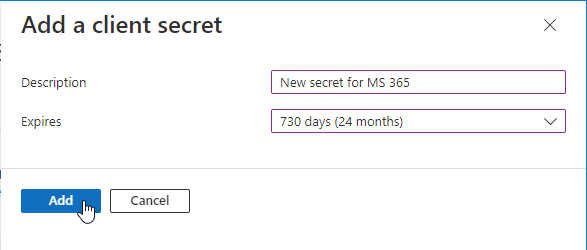
In window Add client secret, enter the description for your secret in the Description field. Switch Expires to Never and click Add.
-
The secret is generated and displayed in the Value column. Copy the value and save in a secure place.

FormFlow settings
-
In FormFlow, go to screen Edit entity (). Select the entity to use the mail and click Mail settings in the left panel.
-
In the Mail settings screen, click Add.

-
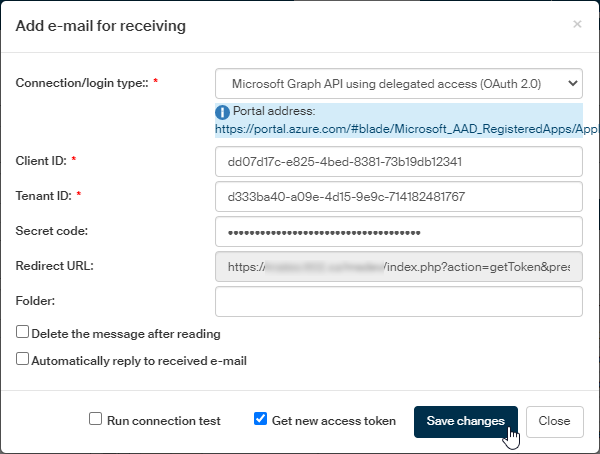
In the Add e-mail for receiving dialog, set up the connection parameters:
-
Switch Connection/login type to Microsoft Graph API using delegated access (OAuth 2.0).
-
In Client ID, copy the code you have created and saved during registration as Application (client) ID. See an example below.
-
In Tenant ID, copy the code you have saved during registration as Directory (Tenant) ID. See an example below.
-
In Secret code, copy the secret value you have generated and saved during application registration.
-
The field Redirect URL is read-only and the URL address the value used during application registration.
-
To download messages from a single folder in the mailbox, enter its name in the Folder field.
-
If you check Run connection test, the connection details will be tested immediately after you save this configuration.
-
During authentication, two tokens will be created – access token and update token. The validity of the update token is longer. During each API call the tokens are loaded and if the access token is valid, access can be granted. If the access token is invalid, but the update token is still valid, a new access token is created and then an update token is created too with new validity expiry time. If Get new access token is checked, the tokens are refreshed on each access.
-
If you check Delete the message after reading, e-mail messages will be deleted from the mailbox when they are downloaded to FormFlow.
-
If you check Automatically reply to received e-mail, an automatic reply will be sent to each received e-mail.
-
-
Click Save changes to confirm the connection settings.
If you are not logged in to your Microsoft account, you will be asked to log in.