Signing a document
An option to sign documents is available in the right-hand panel (Bulk operations) in the DMS section, similarly to the Controlled documentation processes or records management documents.
Only documents that are not locked can be signed, which means documents not in a process, not being preserved and without a user lock.

Check the box in the leftmost column for a suitable document to open the Bulk operations panel. The Sign button is available there.
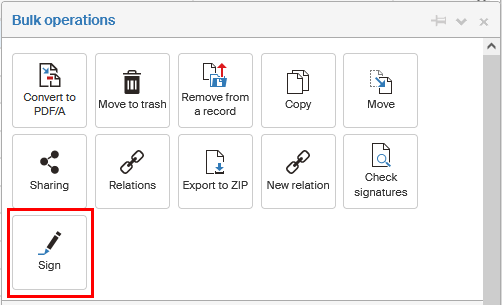
Click the button and a user lock (Locked by a user) is applied to the selected document or documents, so that another process cannot interfere with it during signing.
The signing process itself depends on whether you are using the server signing service or the Signer application.
Signing with Signer
This procedure is used, if you have set in Application Preferences the signing method to Signer – browser addon.
When you select Sign in the Bulk operations window, the document or documents are analyzed to make sure they can be signed. The analysis progress and results are displayed in the window Document signing.
If one or more documents fail to be analyzed, they will be removed from the signing process.
If at least one document is analyzed successfully, select Continue.
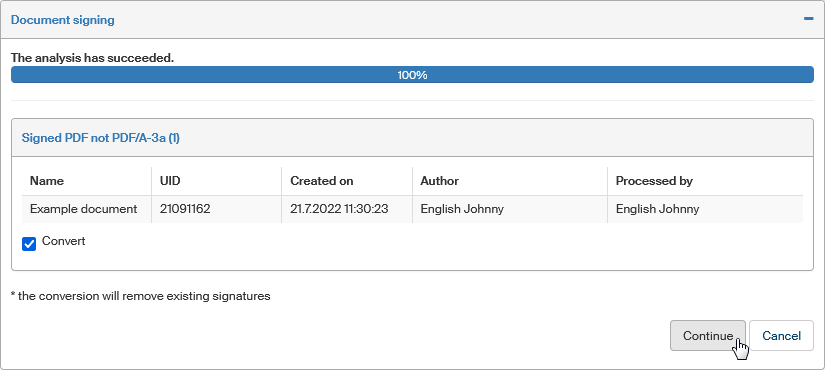
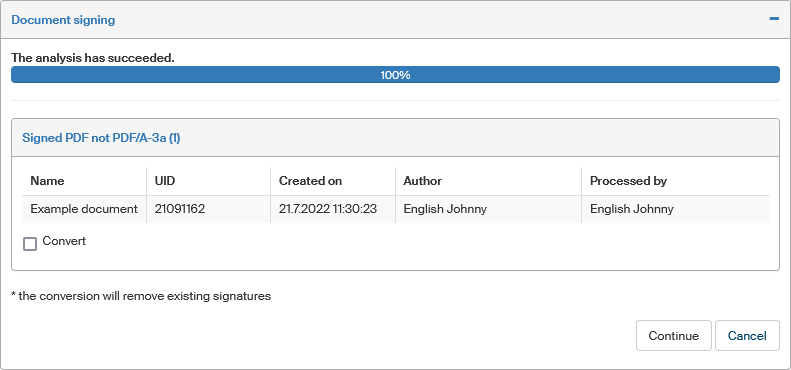
Before the documents are signed, they need to be converted to the archival format, PDF/A. The conversion progress is also displayed in the Document signing window.
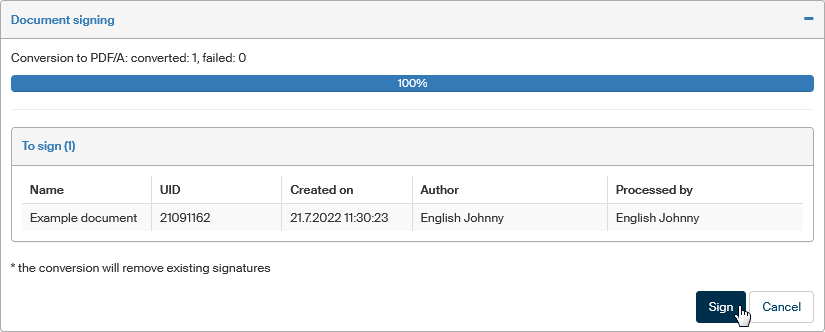
Select Sign to set up the signature for the successfully analyzed and converted documents.
-
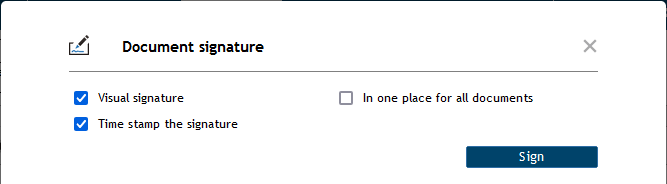
Check Visual signature to insert signature details at a selected place in the document along with graphical visualization.
-
If you are signing more than one document, the box In one place for all documents is available. Check it to make sure the visualization image will be placed at the same location in all the documents.
-
To apply a time stamp to the document(s), check Time stamp the signature.
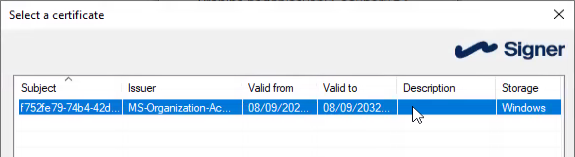
Next, select the certificate to use for signing in the window Select a certificate in Signer.
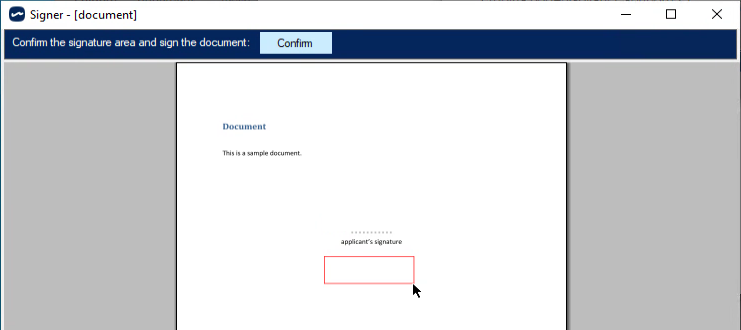
If you have selected signature visualization, drag the mouse cursor in the Signer window to select the visualization location and click Confirm.
Enter the certificate PIN and the document (or documents) is then signed.
Server-based signing (HSM)
This procedure is used, if you have set in Application Preferences the signing method to Server signing service.
-
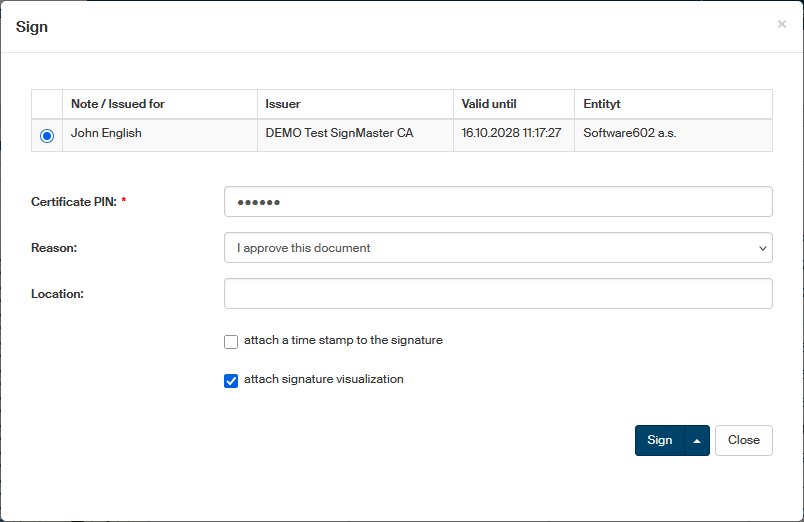
When you select Sign in the Bulk operations window, a setting dialog is displayed. In the dialog:
-
select the HSM certificate (if you have more than one),
-
enter its PIN,
-
optionally, you can select the reason for signing the document and/or enter the location where you are signing,
-
check the optional parts of the signature as needed:
-
attach a time stamp to the signature
-
attach signature visualization.
-
-
-
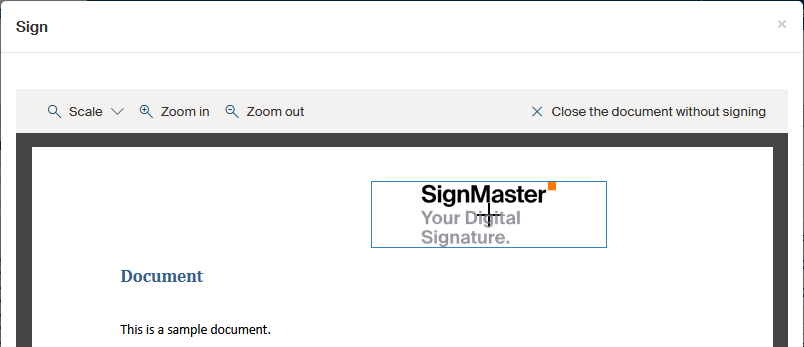
If you have selected to attach signature visualization, a dialog with document preview is displayed first. Select where to display the signature in the preview. Use the mouse to move the signature frame to a selected place and left-click to place it. Confirm the position by clicking Confirm location and sign below the preview, or click Change location to adjust the position.
-
The rest of the procedure is similar to signing with Signer. Run the analysis…
-
…then enable conversion and document signature.
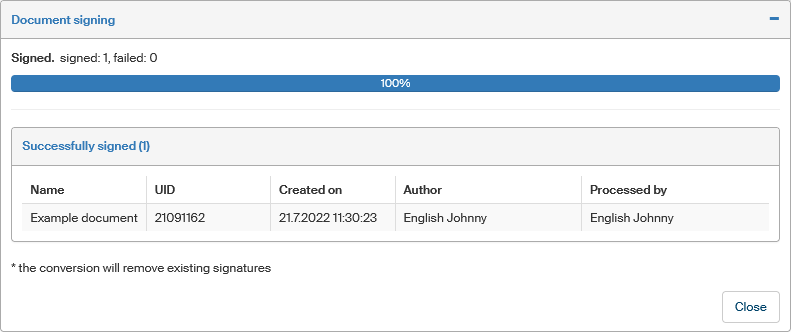
If a document failed to sign, you can click the  icon the Error column to display details.
A signed document in the DMS folder
When a document is successfully signed, its lock symbol returns to blue – The document is not locked.
The signature seal symbol turns to green – Signature status: Valid.
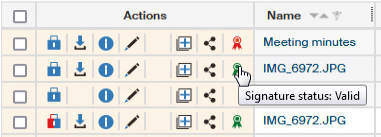
Click the seal symbol to display the Document signature details window with detailed information on all signatures and time stamps.