Example of form use in practice
Let’s show how to use FormFlow in practice, using an example of creating and circulating a form based on a document approval template. Of course, every user has different forms available and different setting preferences, so you should not take this example as a procedure to be followed to a dot, but rather an illustration of possible use.
Installing form templates in the system and making them available to other users is a task given to an administrator. These procedures are not included in this chapter – they are described in detail in the administration manual. Let’s suppose you have an installed and configured form template available.
In this example, we will show you how to fill out a form and run its workflow to approve a documentation you have created. In general, the steps are as follows:
-
The form author starts by downloading the form template, filling it out and submitting the form to workflow.
-
The submitted form is forwarded to a user we will call the first approver. The first reviewer reviews the contents – in our case, the documentation presented for approval – and decides the next step.
If the documentation does not meet its criteria, they can return it for revision. The form in its workflow returns to the form author.
If the first approver finds the documentation in good order, they will forward the form to the next step in the workflow. When submitting, an electronic signature of the first approver is attached to the form. -
If the form author receives the form for revision, they adjust the documentation as requested. Then they restart the form workflow and the form is forwarded to the first approver again. They can approve the form contents now or, if necessary, repeat the revision cycle and return the form for revision again.
-
After the first approver approves the form, it is forwarded to the second approver and they proceed the same way as was described in the previous steps. This process repeats until the form passes through all users specified as approvers. In the simplest cases, there might be only one approver – for example if the author only needs an approval from their boss.
-
As soon as the form is approved by the last approver, the form is automatically delivered to the final recipient to be finished. The final recipient is specified in the form template – it can be the form author; the form returns to them when it is finally approved.
Let’s describe a simple form workflow in more detail.
Loading a form template
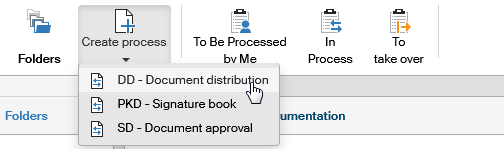
An employee who wants to hand in a document they prepared will become the form author in the approval process. This employee opens the PROCESSES tab, clicks Folders and looks up the corresponding folder. Then they click the Create process button to open the template list and select the template to use. In our case, the template will be Document approval.
Note that process availability depends on the employee’s permissions and the templates they are allowed to use. If the required template is not on the list or the Create process button is not displayed in the folder at all, they are not authorized to use that template (or even any templates). In that case they need to contact the FormFlow administrator to set the corresponding permissions.
The form based on the template is then loaded and displayed, so that the employee can fill it out – based on their settings, either directly in the browser, or in the stand-alone application, Software602 Form Filler.
Filling out a form
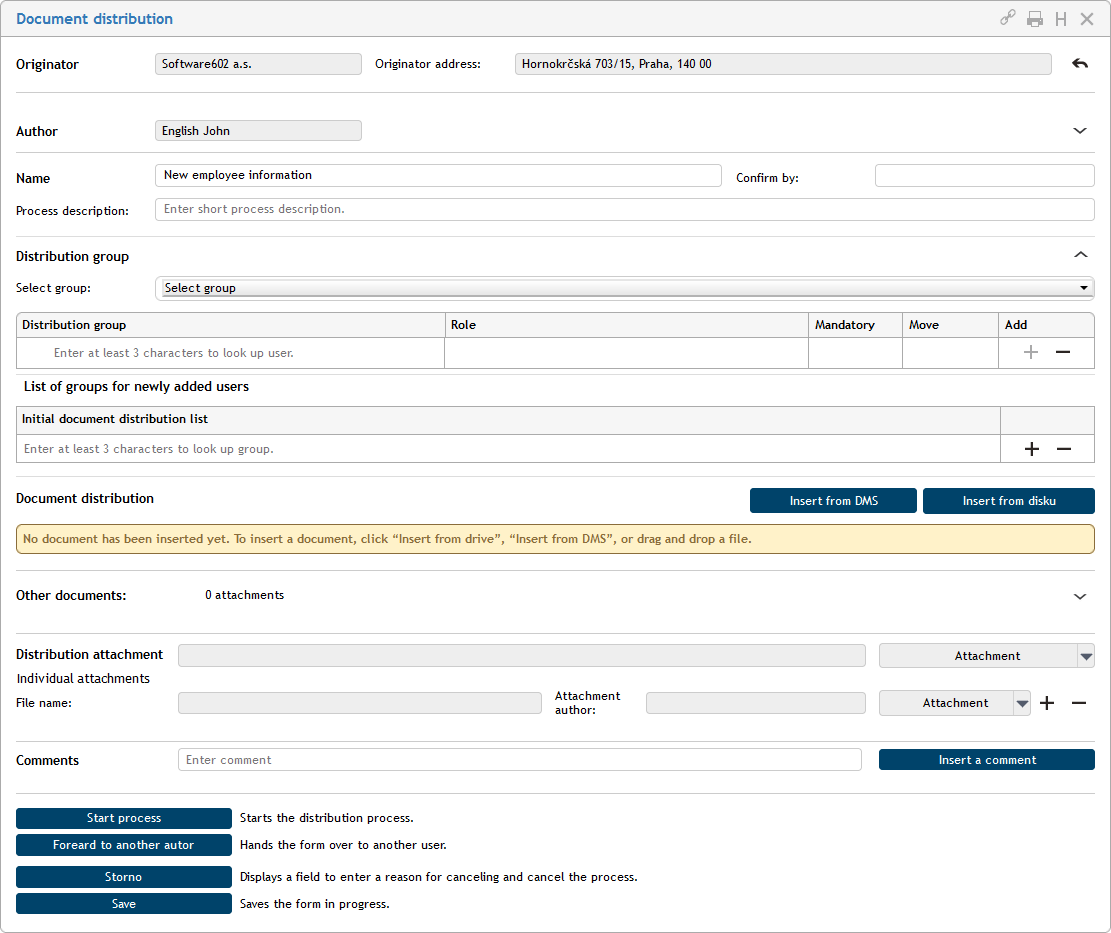
Now the form author can fill in all the required details, which in this case include an attachment – the document to be approved.
The originator and the process type
The Originator option lists the organization (company, department, etc.), who owns the document that is being processed. If there is more than one originator available, select the one you need. Based on the originator selection, the contents of the (read-only) field Originator address is filled in automatically.
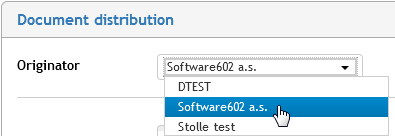
You can clear the originator selection and empty the fields by clicking the arrow symbol on the right. Then you can select a different originator.

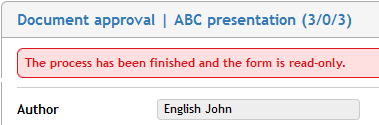
The field in section Author is also not editable and display the form author name (who will submit the form). You can expand the section using the arrow symbol on the right to view the author’s contact details (e-mail, telephone) and job position (department, section). The details are read only – they are filled in from the author’s user data.

Use the Name section to name the process, give it a short description, select the type (sequential or parallel) and specify the deadline for the document approval process.
-
In a sequential process, the form is forwarded to the individual users one after another in a preset order. As soon as one processor deals with the document, the form is automatically forwarded to the next one.
-
In a parallel process, the group of processors is set beforehand, but without a specific order. A copy of the form is created for each processor when the form is submitted, and they do not need to wait for the other processors.

Workflow setup – selecting the approvers
Now it is time to set up the workflow participants – the form approvers.

Use the option Select group to choose a preset approver group as a whole (if there are any set). Or choose User-defined path to set up the approver list manually.
Let us have a preset group named Documentation approvers. Select it to fill the table with the approver names, their roles in the process and indication whether their participation in the process is mandatory. You can now adjust the order of approvers in the workflow using the arrows in the Move column to move a name up or down. If you need, you can use the buttons in the Add column to add more approvers to the group or remove already added ones.

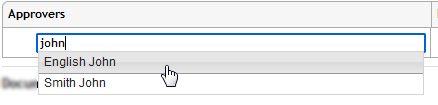
The method of adding an approver is the same here as for the User-defined path option. Use the empty field in the Approvers tab column to type the first few characters from the approver’s name. If there is a matching user, the autocomplete will offer the full name. Then you can add a role description (optional). You can hide the Select group option by clicking the arrow on the right.
Selecting and checking the files for approval
The next step is attaching document files to the process – the documents to be approved. You can insert the documents from the DMS (FormFlow document store - using the button Insert from DMS), load it from your computer drive (the button Insert from disk) or drag the file over with a mouse cursor, if you have it somewhere visible and available.

You can attach more than one document file, and you can combine files from your drive and the DMS.

Make sure that the document files do not contain viruses.
-
If a green shield is displayed before their name, the file has been tested and no infection has been found.
-
If other symbols are displayed – for example an orange shield – click Antivirus check of unchecked attachments or Antivirus check of all attachments.
Do not submit unchecked files or files suspected of infection to workflow!
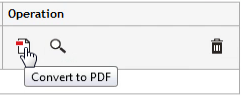
There are control buttons available in the Operation section based on the file type. You can use them to convert the file to PDF, display their preview in a separate window, view metadata (only if loading from DMS), display in DMS, change the order of documents in the list or remove documents from the list.
Apart from the documents for approval, you can attach additional documents as simple attachments for reference. Place them in section Other documents – click the arrow on the right to expand the section.
It is also possible to add a comment to the form – a message intended for the approvers. Write it in the Comments section. You can add more than one comment.

Submitting a form to workflow
The form author clicks Start process to submit the form to FormFlow for processing.

FormFlow will forward the form to the user specified as the recipient in the next step – in our example, it is user Frank First. The form author can see the form in the folder In Process. The form can also be found in the folder the author set while filling it out. The author can therefore look up the form again to check its details or, if the form allows it, to cancel (delete) it.

Note on recipient search
When entering a recipient name in a form, you can use the autocomplete feature. Note that the Address book contact entries might contain spaces in their names. You will not be able to look such names up in recipient fields by simply entering the name as it is spelled. For example, if the company is named M y c o m p a n y, then simply typing this name will not work. To look up the company, use quotes around the name and enter "M y c o m p a n y". This way, you can only enter the first few characters to successfully find the entry.
If you enter the name without the quotes, the autocomplete function will find all entries whose names contain all these characters (as if the AND operator is placed between the characters instead of spaces).

Returning a form to the previous approver for revision
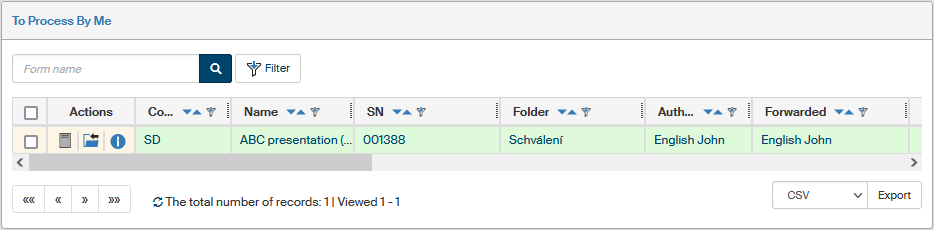
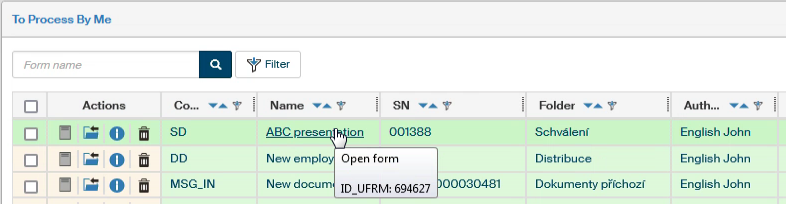
Now the first approver decides how to deal with the form next, in our example it is user Frank First. He can find the form in his folder To Be Processed by Me, and also in section In Process of the corresponding folder. The green background in the form list signifies that the form’s current recipient in the current step is the current user – you.
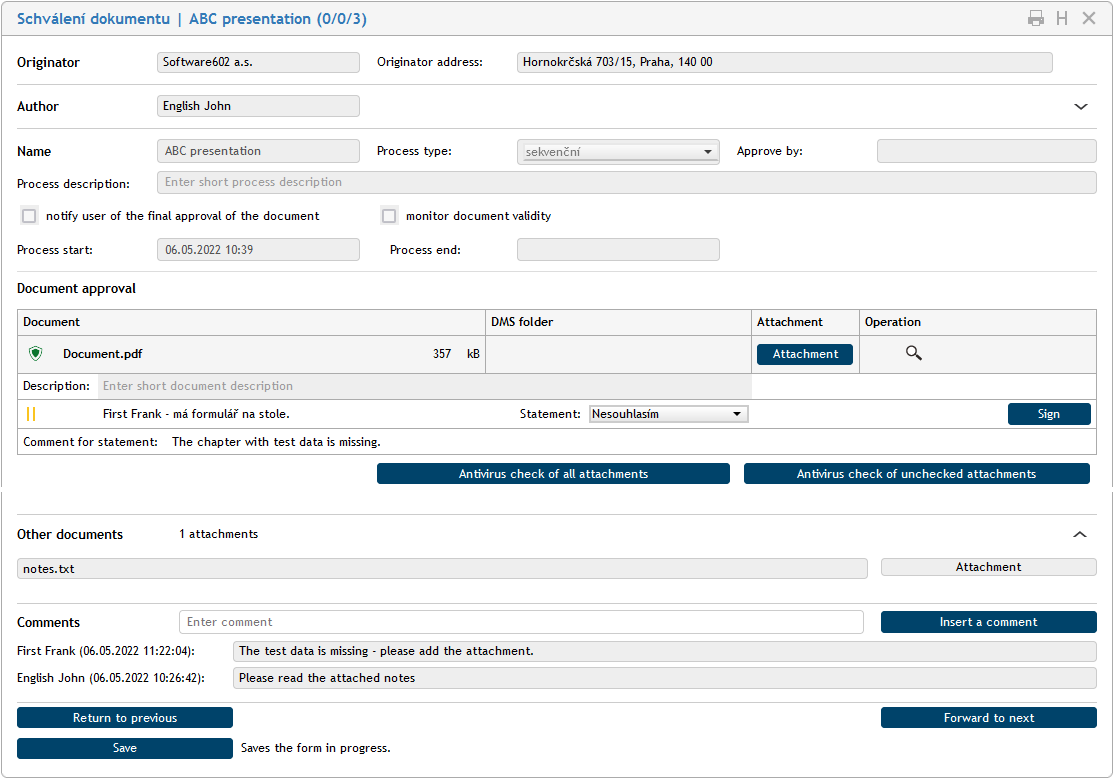
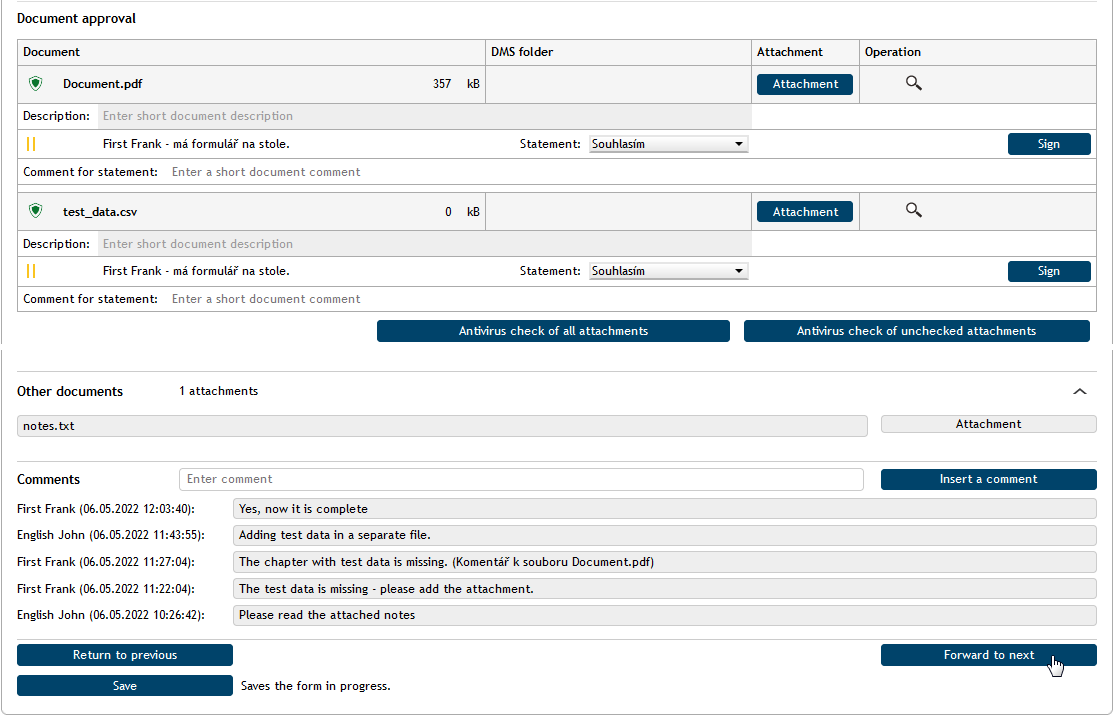
The approver now opens the forms and reviews the data entered by the author. There are several options how to deal with the form at this point. Apart from saving the form and returning to it anytime later, the approver can approve or reject the form (and attach their electronic signature to the form). If the form is set up to allow this, they can also return the form to the author for revision.
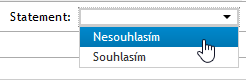
In our example, the approver realized that one of the required attachments is missing from the document. He cannot approve the form as it is, so he clicks Return to previous to return the form back to its author. Before that, though, he should use the Statement button to specify why he is returning the form and add details in the field Statement comment.
Form revision and resending
If a form is returned by an approver, the author can find it again in section To Be Processed by Me. Based on the settings – if notifications are enabled – the user is notified on the form status change by e-mail.
The author now needs to edit the form (or, in this case, the attached document) as requested. The author opens the form and edits it. Then the author selects Start process again to forward it to the approver again.
Approving a form
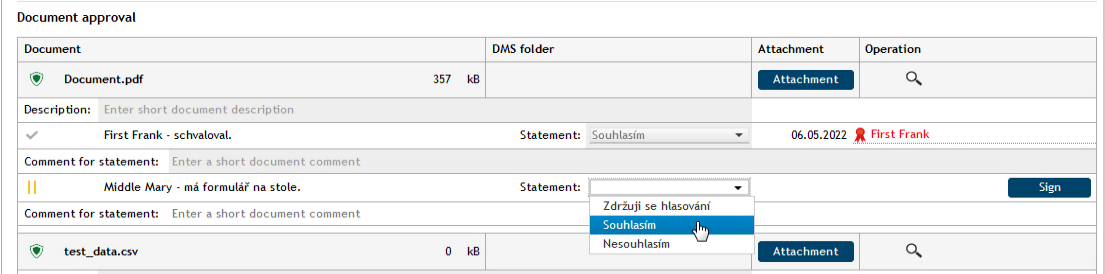
Now the first approver receives the form again. There are no objections and the approver approves the document – use the Statement button to add I agree. If there is more than one document to be approved, each one needs to be approved separately. An additional comment or message related to the documents can be added in the Comment field.
The first approver will then click Forward. The first approver’s electronic signature is automatically attached to the form and the form continues its workflow. If there is another approver specified, they will now receive the form. If not, the form is forwarded to the final recipient.
If the form is forwarded to more approvers, they can see the statements of previous approvers and the fact that they have attached an electronic signature.
If one of the next approvers finds any objections, they can also return the form for review. The button Return to previous will return the form one step back, meaning that the second approver will return the form to the first approver, and so on.
Process finishing, form archiving
When all the approvers take their turn (analogous to the form path we have described so far), the form signing workflow is at an end. As soon as the last approver clicks the Forward button, the form is forwarded to the final recipient to be finished. In our example, the last recipient is the form author again. Note that you do not set the final recipient in the form – they are preset in the form template.
The final recipient can see the form ready for finishing in the default folder or the folder In Process. The final recipient opens the form and selects Finish process. After a confirmation dialog and selecting a signature certificate, the form workflow is finished. The form can now only be found in the folder selected by the author at the start of the process.

Click the ![]() form information icon, you can view the Past recipients tab to see the form’s signature path including the return for review when an approver chose so.
form information icon, you can view the Past recipients tab to see the form’s signature path including the return for review when an approver chose so.
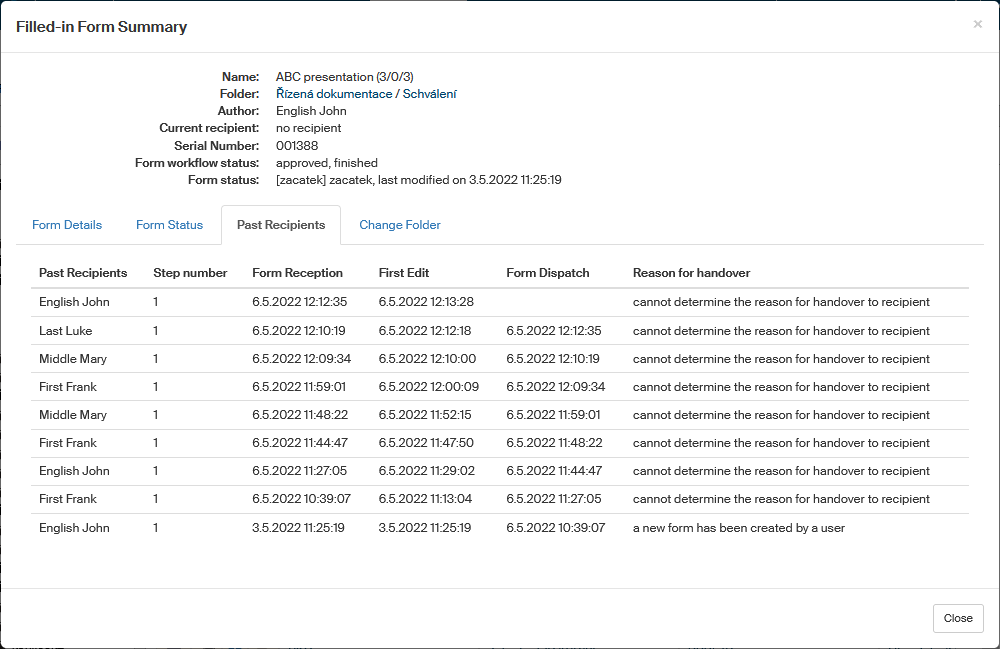
From this point on, the form is available for viewing to all users who took part in the signing. They can find the form by opening the corresponding folder and selecting the Finished label.

If you open such a finished form, a message Archived form is displayed in red in the upper part of the form window.
Reopening a process
There is a Reopen button available in the lower left corner of the window with a finished form.

Click this button to remove the red archiving message and activate a group of buttons that include the option to create a follow-up process or cancel this process.
Creating a follow-up process
Use the button Create a follow-up process to look up and select a user who will become form author of a new process created from the current form.
Select a process type from the option Create a follow-up process.
Enter the first few characters of the name of user who will receive the process in the field For user. The autocomplete function will help you select the user.

Click Finish process and create follow-up to finish the current process and create the process you have just set up.
The selected user will find the process in their folder To Be Processed by Me.
Canceling a finished process
A finished process can be canceled after reopening. Click the Cancel button.

Specify why you are canceling the process in the field Reason for canceling and select Cancel process.
The process form will now be marked with a message in red, "The process has been canceled and the form is read only"; the form contents cannot be handled any way anymore.