SFLF configuration
Use the screen File storage settings () to set up the location and properties of the store where documents and form attachments are placed.
General settings
The left part of the SFLF settings screen lists general store settings:
-
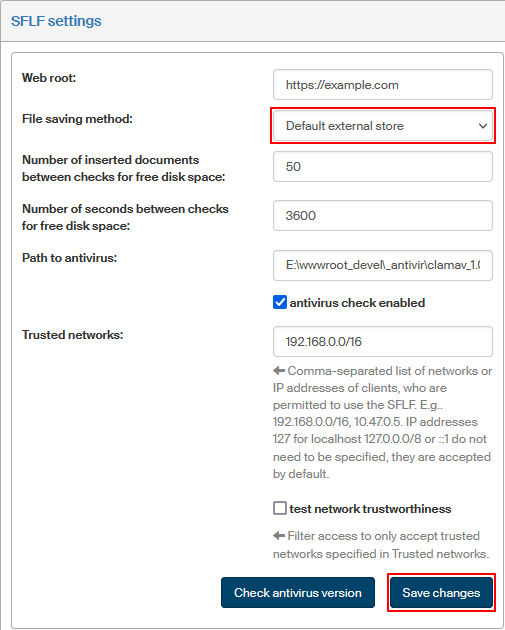
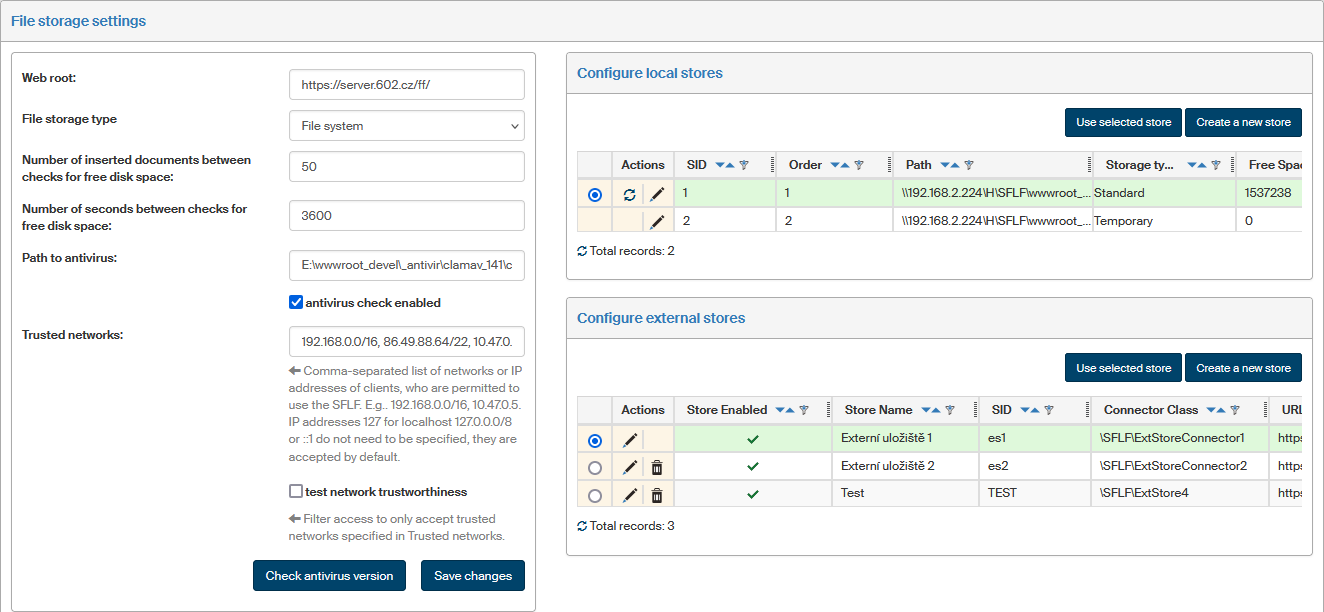
Web root – enter the webserver URL including the trailing slash.
-
Files storage type – you can choose from File system, Encrypted file system, Store in the database and Default external store.
-
You can use the entries Number of inserted documents between checks for free disk space and Number of seconds between checks for free disk space to set up how often to check that free space in the current store has not dropped below the value set in the store settings in column Minimum free space. If both values are specified, a check is run whenever one of the conditions is met. If neither value is specified, checks will be run at one-hour intervals.
-
Path to antivirus – path to the exe file to run antivirus check on the stored files. Clam AV or ESET can be used. Click the Check antivirus version button to request more details; they will be displayed as a text message in the upper part of the page.
-
Trusted networks – the field contains a list of client networks or IP addresses who are allowed to use the file store. Use a comma to separate individual entries.
Example:192.168.0.0/16, 10.47.0.5.
You do not need to enter the IP addresses of 127 for localhost 127.0.0.0/8 or ::1, they are accepted by default. -
If you check Test network trustworthiness, access will be limited to trusted networks specified in the Trusted networks field.
The right part of the page displays two sections where you can set up specific stores, either local (on the same server) or external. You can set up more than one store. Only one is used at a time; when it is full, the system will automatically select the next store to use.
Local store settings
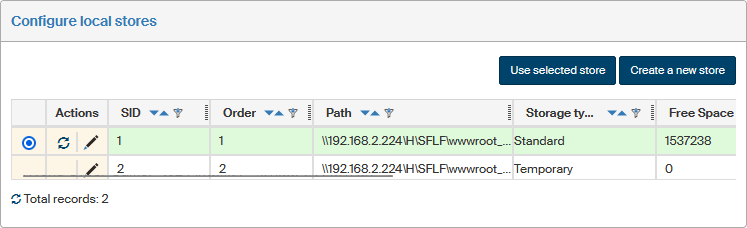
The list of available local stores in section Configure local stores displays the following details and controls:
-
use the first column to select which store to use right now; confirm any changes by clicking Use selected store;
-
the Actions column contains the following buttons:
-
 Check the amount of free space – updates the information on free space;
 -
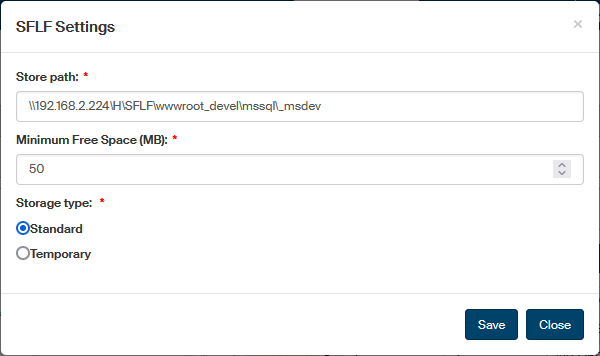
 Edit store properties – displays a dialog window with the details filled in when the entry was created, i.e. Base store path and Minimum free space;
 -
 Delete the store – this button is only available for a store not currently in use;
-
-
SID – unique store identifier;
-
Order – order number of the store in the list;
-
Path – path to the local folder where the files will be stored;
-
Storage type – select either Standard store for saving documents and attachments, or Temporary, which is to store temporary files. A store marked as Temporary is not backed up and will not be automatically selected in a situation when a standard store currently in use runs out of free space.
-
Free space – current free space (in megabytes);
-
Minimum free space – in megabytes; as soon as free space drops below this value, FormFlow will start saving files to the next store in order (if there is one);
-
Change order – use the
 and
and  arrows to adjust the store order and select which will be the next to use when the current store is full.
To add a new local store, click Create a new store in section Configure local stores. A dialog window is then displayed, where you can enter the path to a local folder to be used as a store, minimum free space and the storage type.
Confirm the settings by clicking Create a new store.
External store settings
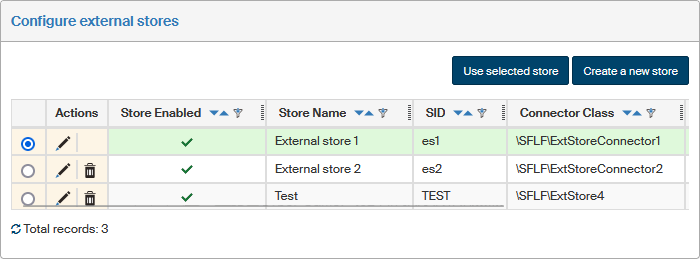
List of external stores
The list of available external stores displays the following details and controls:
-
use the first column to select which store to use right now; confirm any changes by clicking Use selected store;
-
the Actions column contains the following two buttons:
-
Edit external store properties – displays a dialog window with the details filled in when the entry was created.
-
Delete the store – the deletion button is only available for a store not currently in use.
-
-
Store name, SID, Connector class, URL – details that were filled in when the store entry was created.
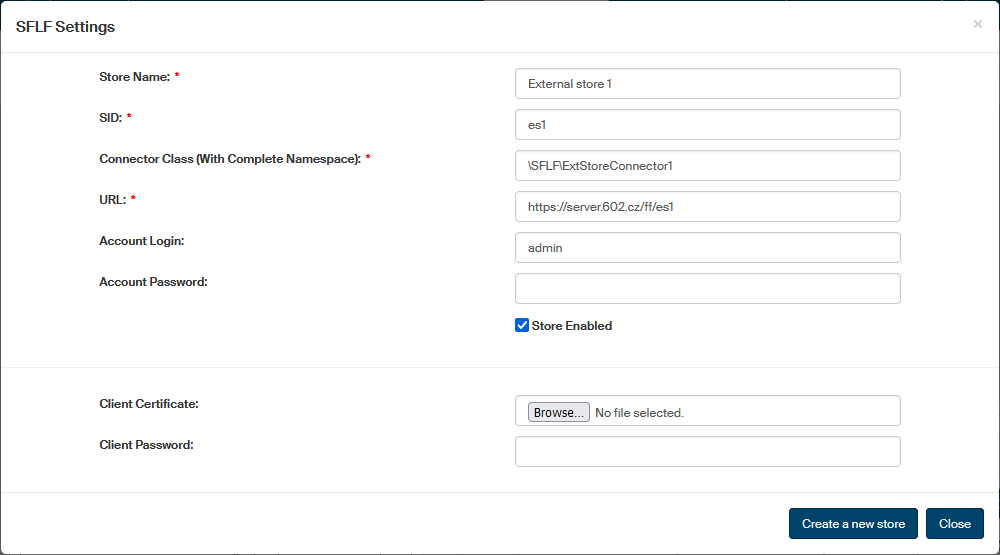
Adding a new external store
To add a new external store, click Create a new store in section Configure external stores. A dialog window is then displayed where you can enter the store details:
-
Store name – the name to be displayed in the list.
-
SID – unique identifier.
-
Connector class (with complete namespace) – the path to the class, which is written specifically for each customer matching their needs; the class also determines which login method (set up below) will be used.
-
URL – path to the store.
-
Account login – username to access the store, if name and password is used.
-
Account password – password to the login account.
-
Client certificate – the certificate file, if login using a client certificate is used.
-
Client password – password to the client certificate.
-
If you check Store enabled, the store will be enabled immediately.
Confirm the settings by clicking Create a new store.
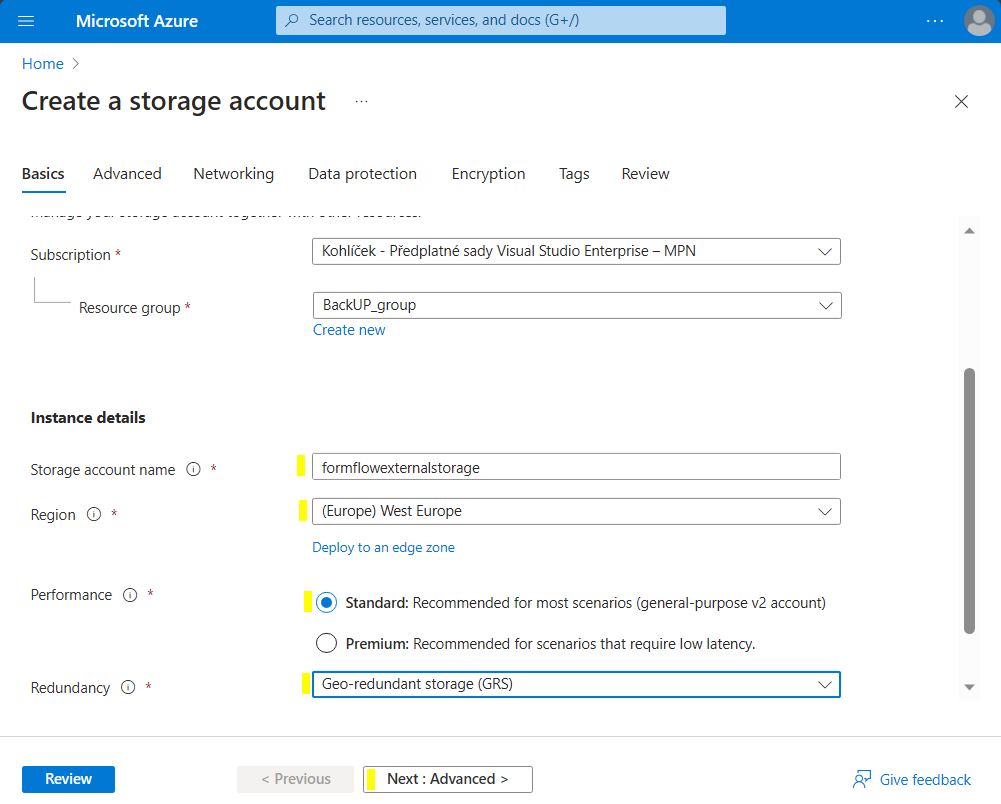
Creating an external store in Azure Container
One of the options for an external store is a cloud-based store in Microsoft Azure. This chapter describes how to create and set up such a store.
-
Log in to https://portal.azure.com/.
-
At the Azure portal, create a Storage account and select the corresponding region. In Redundancy, select Geo-redundant storage (GRS). Select Next to continue to the next tab.
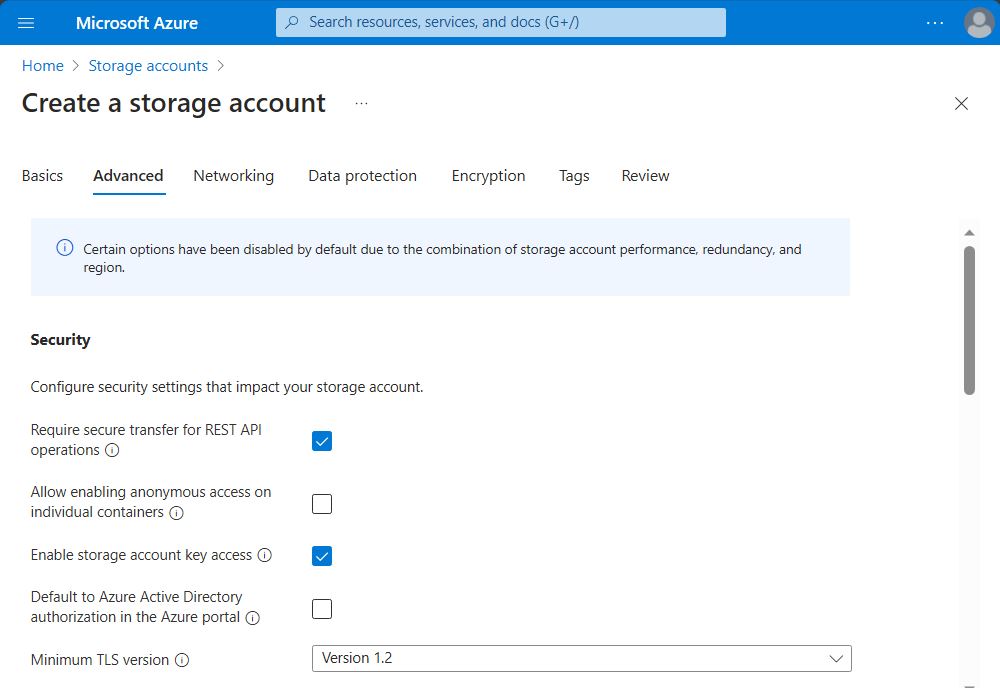
-
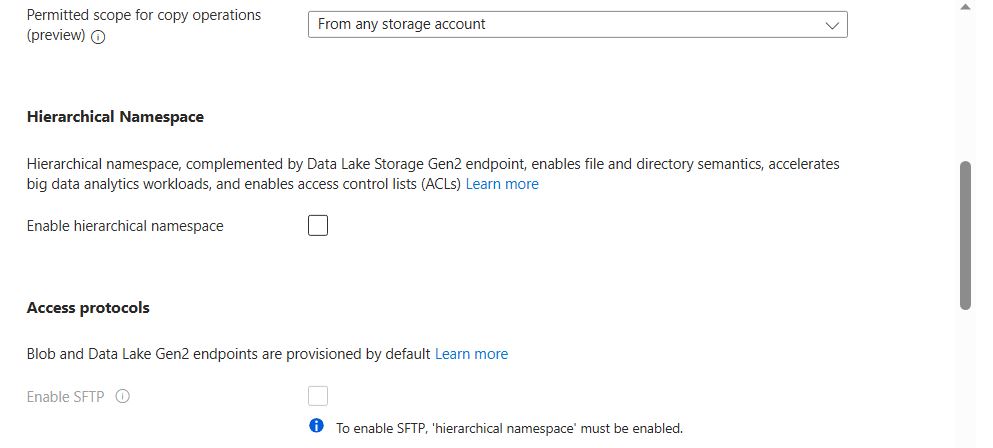
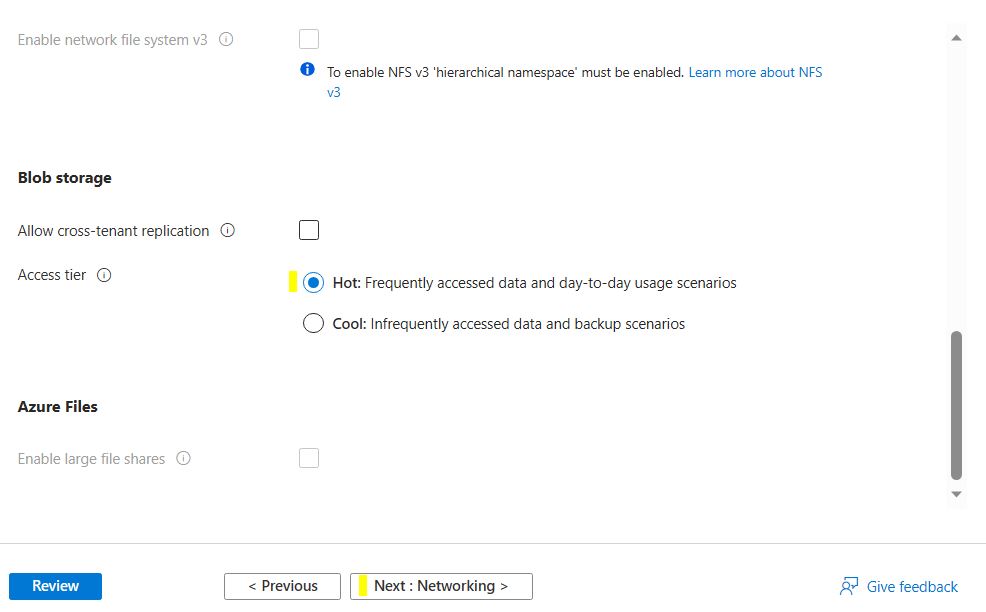
On the Advanced tab in Access tier, select Hot. Continue to the next tab.
-
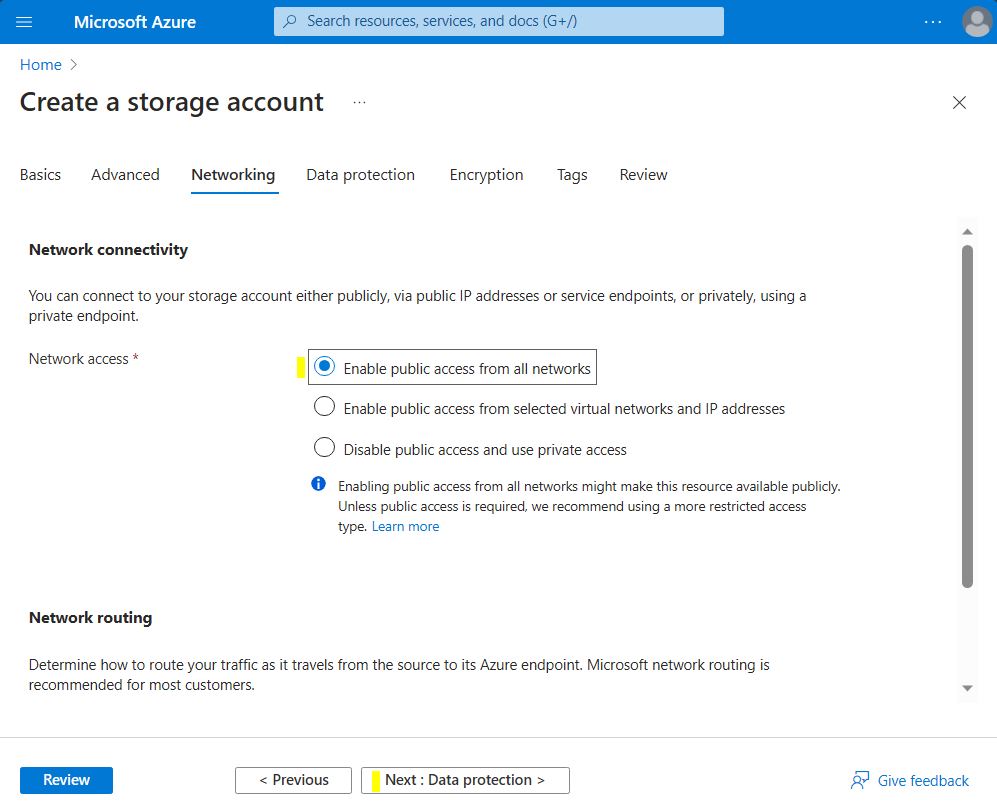
On the Networking tab, keep Network connectivity set to the default value Enable public access from all networks. Continue to the next tab.
-
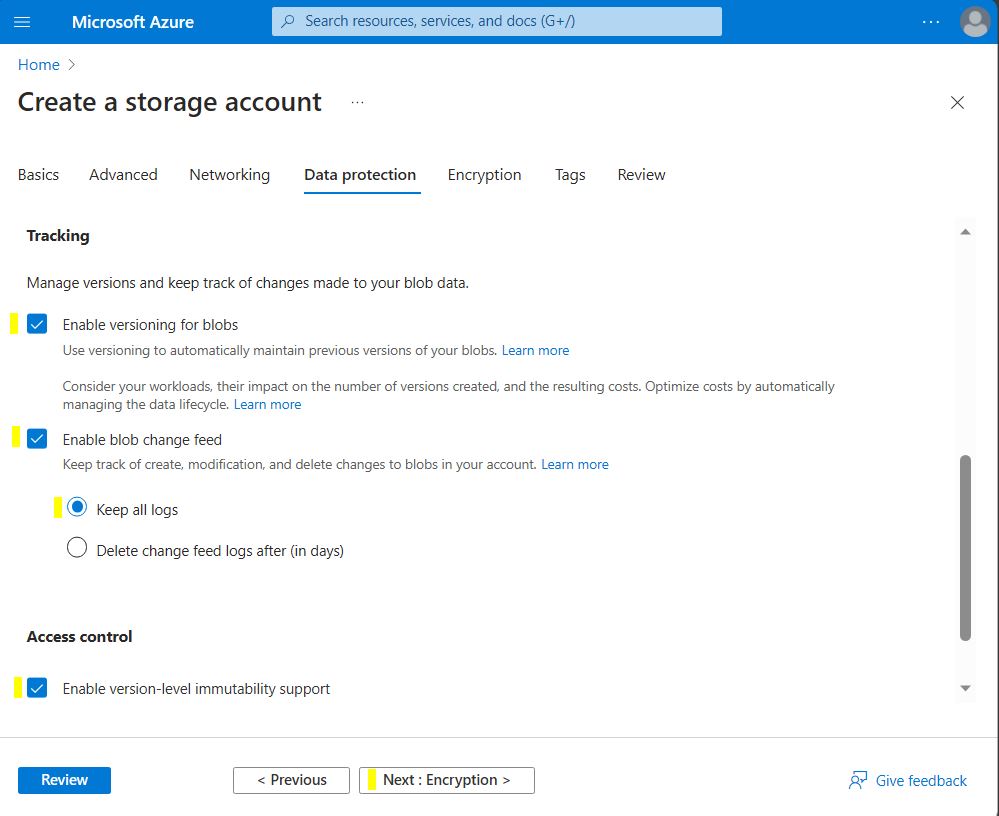
On the Data protection tab, check Enable versioning for blobs, Enable blob change feed and Enable version-level immutability support. Continue to the next tab.
-
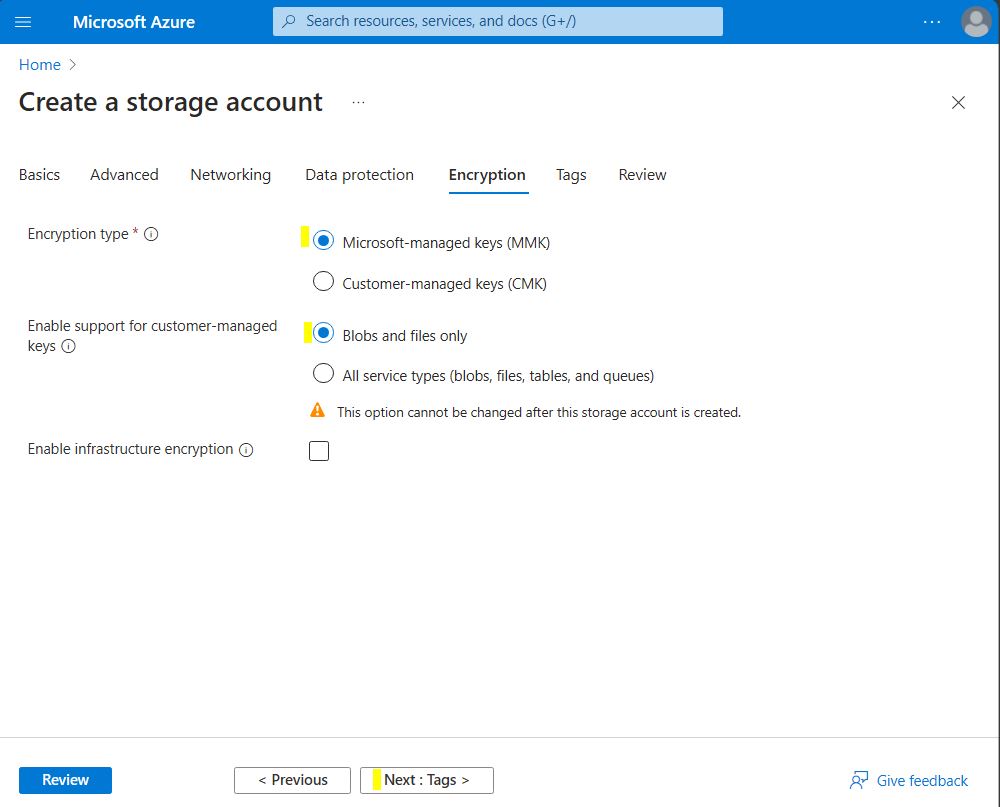
On the Encryption tab, keep the default values. Continue to the next tab.
-
Do not make any changes on the Tags tab, continue to Review and select the Create button to confirm creating the store.

-
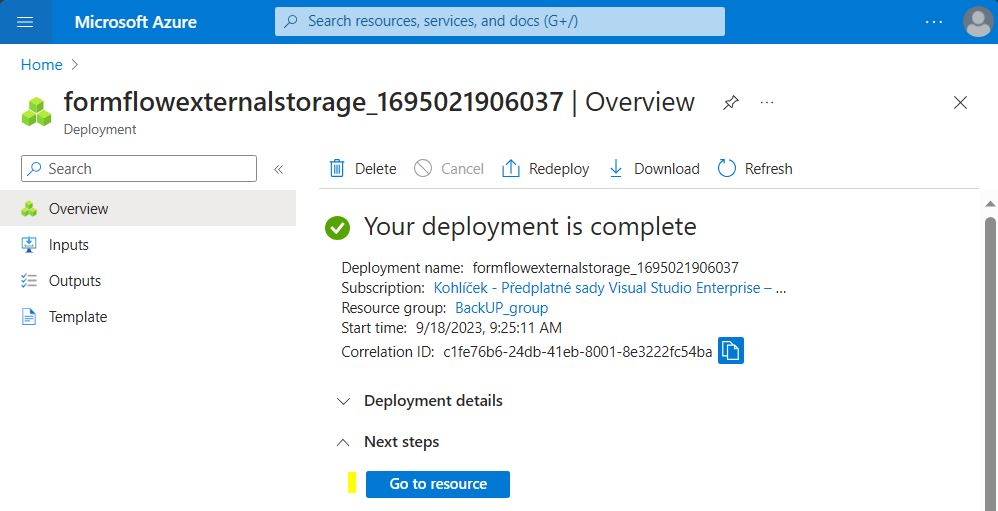
When it is successfully deployed, select Go to resource.
-
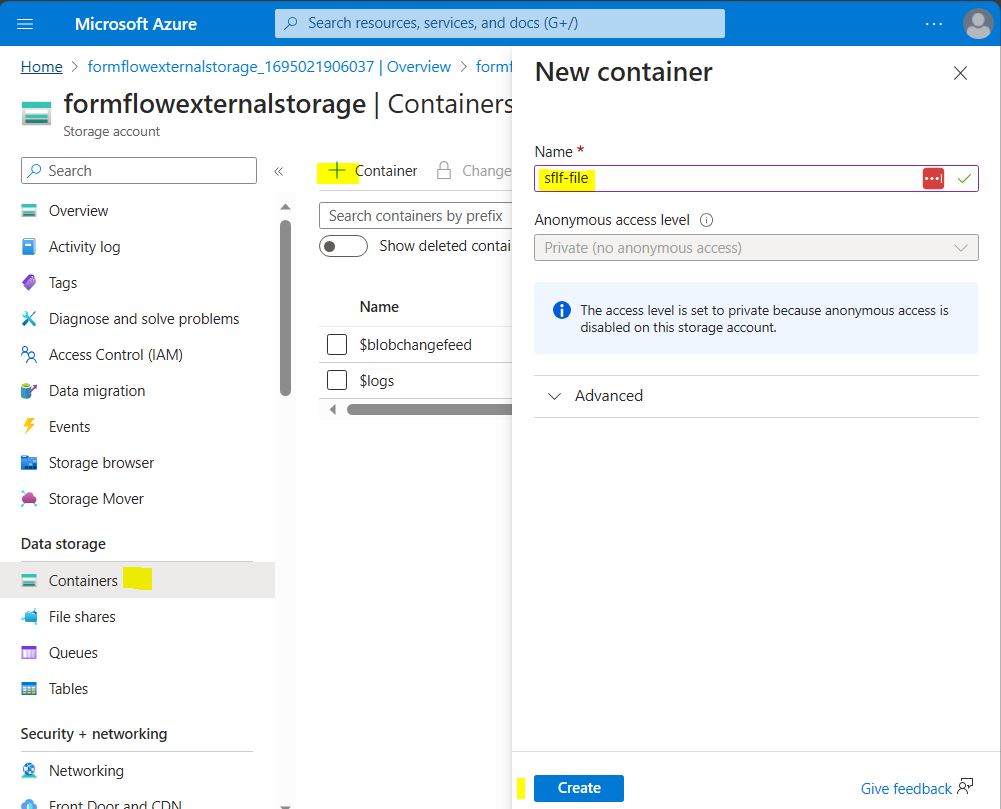
Select the option Containers and create a new container.
-
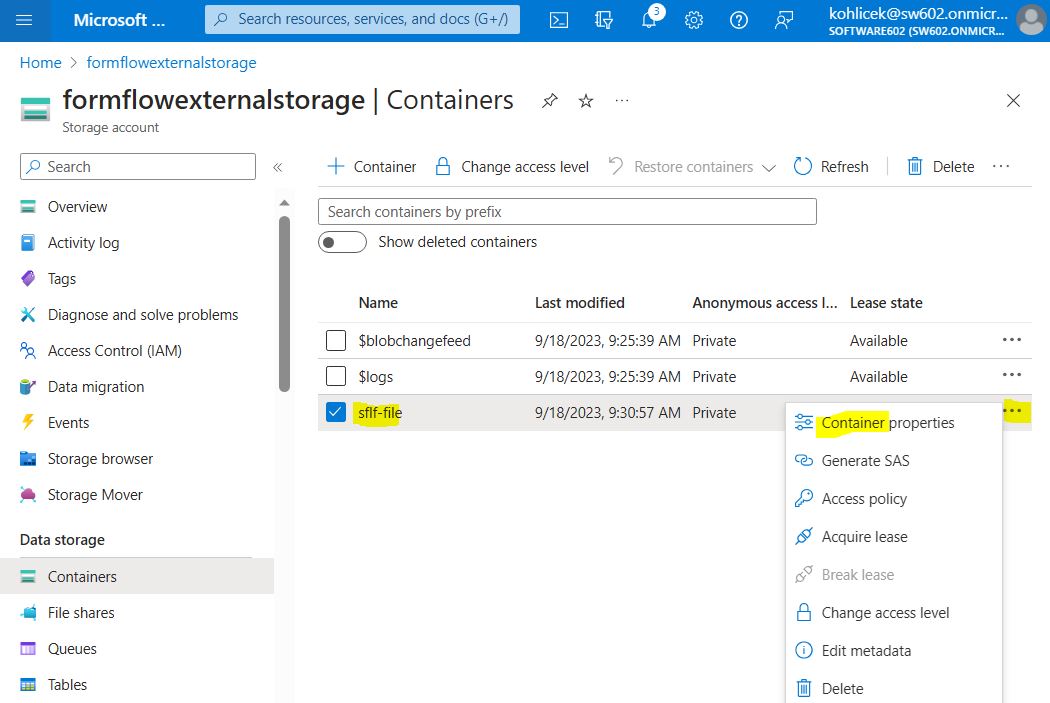
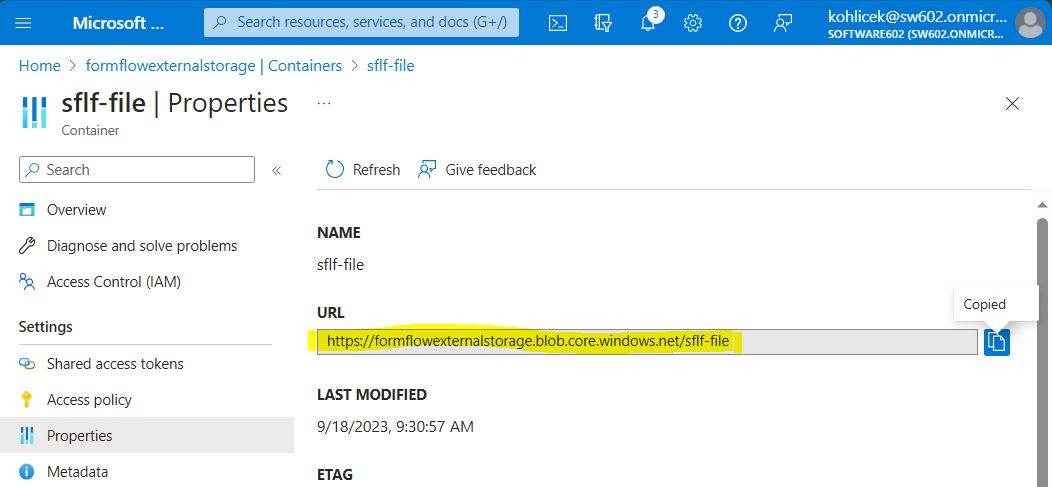
In the context menu for the created container, select Container properties.
-
Note down the displayed URL address, you will need it for the URL field in FormFlow.
-
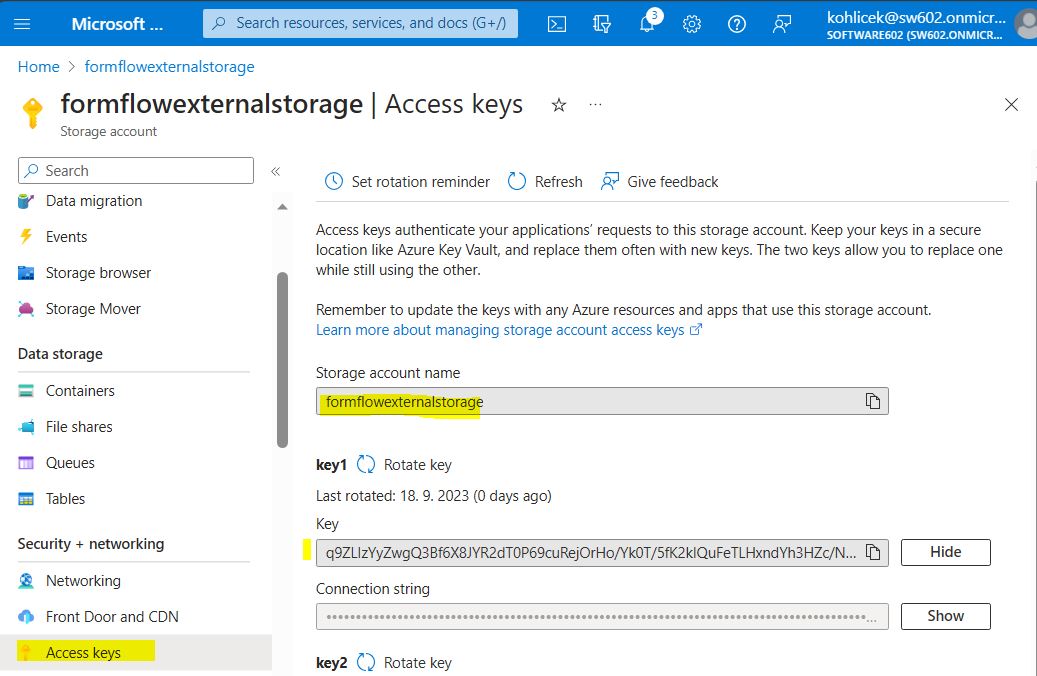
Within the same container, go to Access keys and note down Storage account name and Key, which you will need along with the URL when setting up the external store in FormFlow.
-
Open external store settings in FormFlow and create a new store.
Enter the following values:
-
Connector class:
FS\Azure\SflfBlobStorageConnector -
URL: URL you have noted in step 11.
-
Account Login: Storage account name you have noted in step 12.
-
Account Password: Key you have noted in step 12.
-
In the file storage settings, set File saving method to “Default external store”.