Creating a new project
To create a new database object, open the Existing projects screen and click New project.
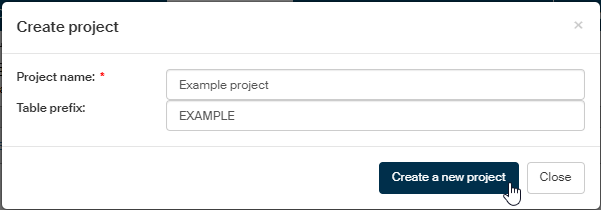
Naming the project
Name the project in the Create project dialog.
-
Enter the new project name in the field Project name.
-
In Table prefix, enter the prefix to be used in database table names.
Creating a mapping
From an existing form
Then select the form for which to create the mapping, based on its data record. The form template must be installed in FormFlow and released to use.
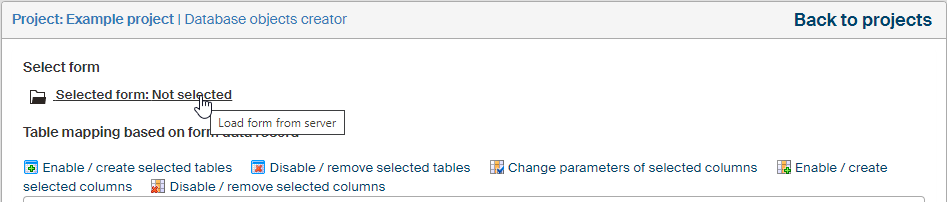
In the Project screen, click Selected form: Not selected.
In the Select form dialog, select a form in the Form name field; the form’s data record will be used to create the mapping.
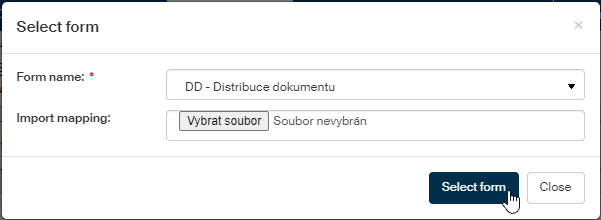
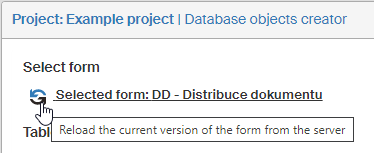
Click Select form. When the form is loaded, a confirmation message The form has been loaded successfully is displayed in a green frame.
Importing a mapping from a file
If the mapping for the selected form has been exported from another environment (there is a ZIP file available, containing a mapping.xml file), it can be imported. For example, the mapping is created and tested in a testing environment first, and after debugging it is exported and transferred to production environment.
To load mapping from a file, select it in dialog Select from and field Import mapping.
Creating database tables
To create database tables based on the loaded mapping, click Create tables in the lower part of the Project screen.

The database tables are then created based on the current setting.
Database table creation settings
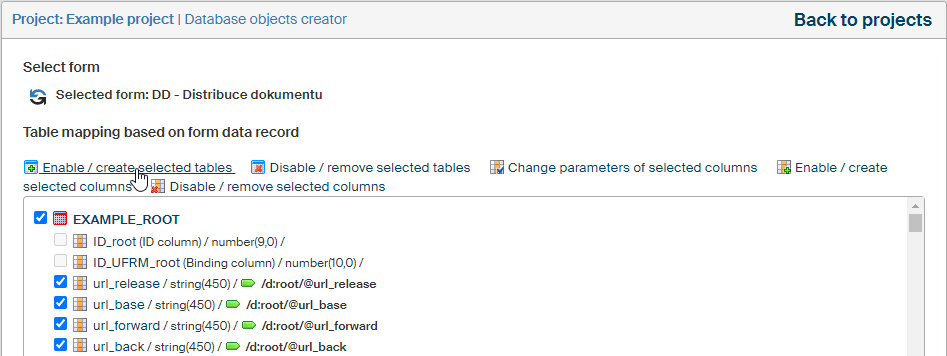
Selecting tables to enable
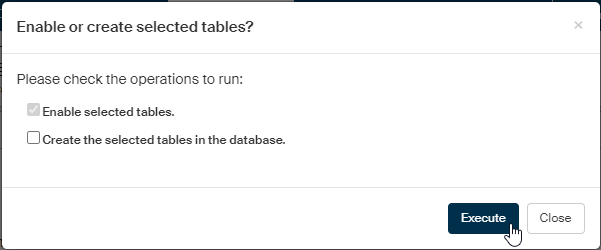
To enable creating only a subset of the tables from the loaded mapping, check the boxes next to their names. Then click Enable / create selected tables.
Then select the required action in dialog Enable or create selected tables? Simply click Execute to enable the selected table(s) in the database. If you check Create the selected tables in the database, the selected tables will be both enabled and created.
Selecting tables to disable and removing them
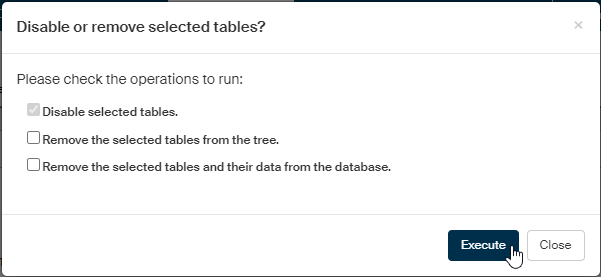
To disable creating specific tables from the loaded mapping, check the boxes next to their names. Then click Disable / remove selected tables.

In dialog Disable or remove selected tables?, select the desired action by checking Disable selected tables, Remove the selected tables from the tree or Remove the selected tables and their data from the database. Click Execute to run the selected action or actions.
Column editing settings
Changing column parameters
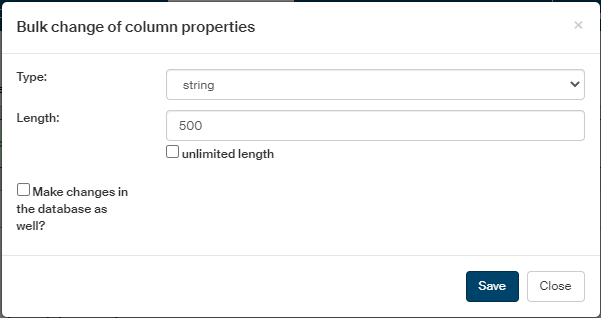
To set up (change) the parameters for several columns at once, check the boxes next to them and click Change parameters of selected columns.

The dialog Bulk change of column properties offers the following options:
-
In Type, change the database column type (string, number, datetime, date) – e.g. from string to datetime.
-
Based on the type setting, a control to specify the parameter is displayed:
-
For a string, enter the maximum number of characters in field Length.
-
For a number, you can enter the required Precision and Scale.
-
There are no additional parameters for datetime and date types.
-
-
Check Make changes in the database as well? to apply the changes to the database table.
Click Save to apply the settings.
Enabling and creating columns
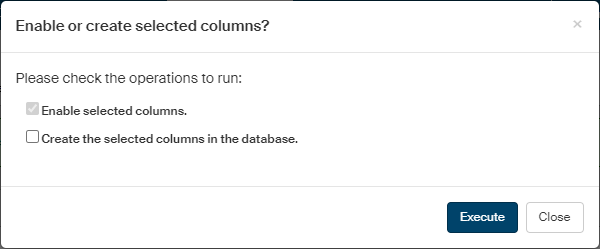
To enable selected columns and optionally also create them in the database, check the boxes next to the selected columns first, then click Enable / create selected columns.

To also created the columns in the database in addition to enabling, check in the dialog Enable or create selected columns the field Create the selected columns in the database.
Disabling and removing selected columns
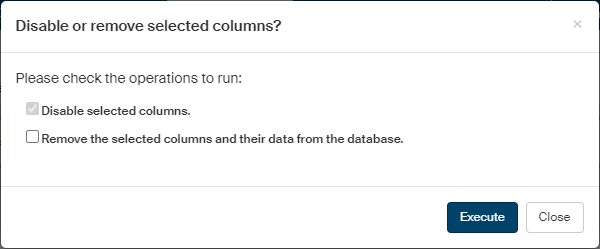
To disable or remove selected columns and their data, check the boxes next to the columns to select them and then click Disable / remove selected columns.

To also remove the columns and their data in addition to disabling, check in the dialog Disable or remove selected columns the field Remove the selected columns and their data from the database.
Saving the project
To save the project including the parameters set for the tables and columns, click Save project in the lower right corner of the Project screen.


