Bulk posting forms
Bulk posting forms allow you to prepare and print out a posting form for sending a large amount of mail. You can create these posting forms in the list of outgoing mail or selecting Bulk posting form ().

Displaying a list of Bulk posting forms
Open the Bulk posting forms window by clicking Bulk posting forms on the RECORDS MANAGEMENT tab. The window displays a list of all bulk posting forms in the system.
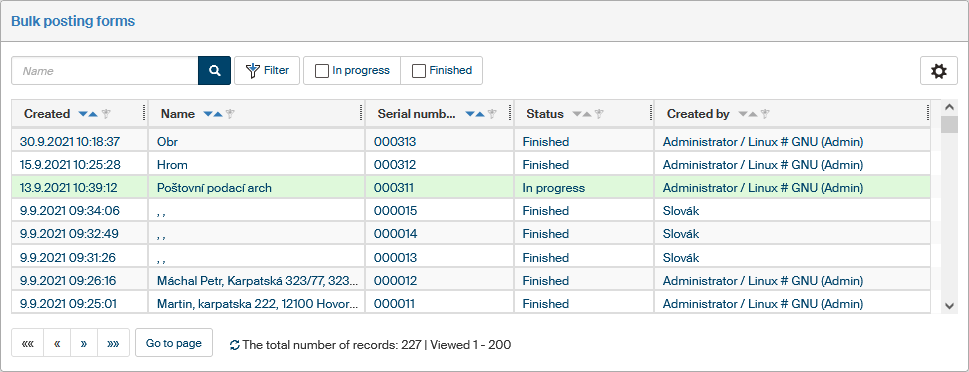
The name, serial number, creation date (Created), user who created the form (Created by) and Status are listed for each form. You can use these details to filter the forms. Click any of the details to display the bulk posting form itself.
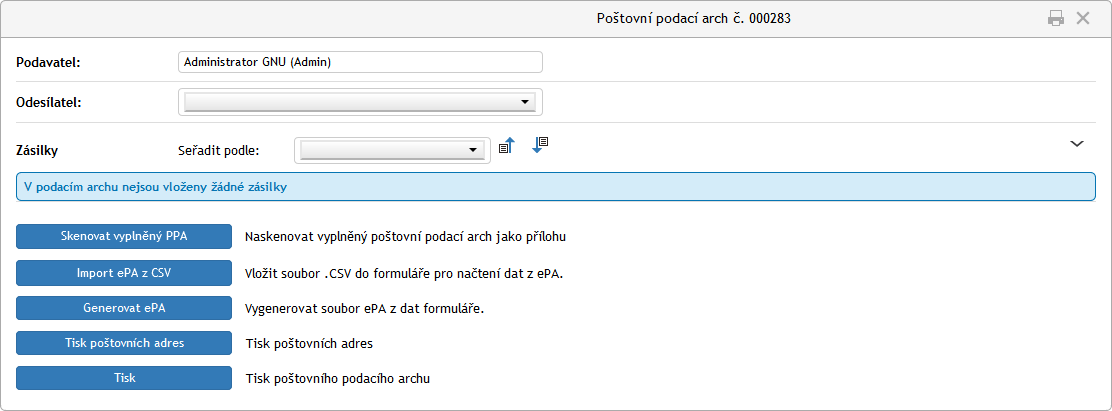
Creating a new Bulk posting form
Open the Bulk posting form by selecting Bulk posting form (). This option is only available if the Bulk posting forms window is displayed.
The Consignor entry in the form header is prefilled by the system based on the current user and the entity selected when creating the form.
Select the sender entity from the options in the Sender field. This value can be also prefilled (if there is only one entity), but if you have more than one entity available, you can change it in this field. When you select the sender, the form displays the entity’s editable details.
The Sender section also contains the Customer card ID, which can be prefilled like the rest of the details, but you still can edit it.
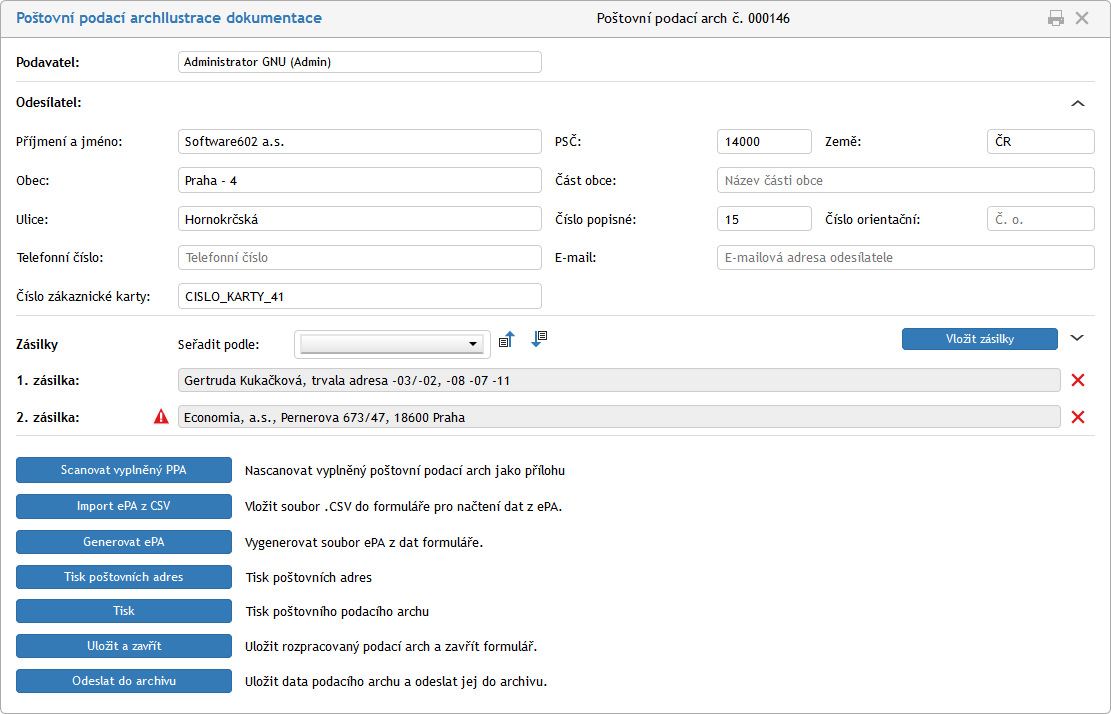
The following part of the form lists the messages included in the form. Each message is listed on a separate row and displays the recipient name and address. To change the order of messages, select one of the address details in the field Order by, placed above the list. Click ![]() (ascending) or
(ascending) or ![]() (descending) to reverse the order if needed.
(descending) to reverse the order if needed.
To remove a message from the bulk posting form, click the red cross ![]() on the right.
on the right.
Symbol ![]() displayed on the left of an address indicates that some details are not filled in correctly in the message.
displayed on the left of an address indicates that some details are not filled in correctly in the message.
You can click ![]() on the right to expand the Messages section. The expanded section displays the complete address and other entries related to its mailing – e.g. Requested services, where you can set additional services for the message.
on the right to expand the Messages section. The expanded section displays the complete address and other entries related to its mailing – e.g. Requested services, where you can set additional services for the message.
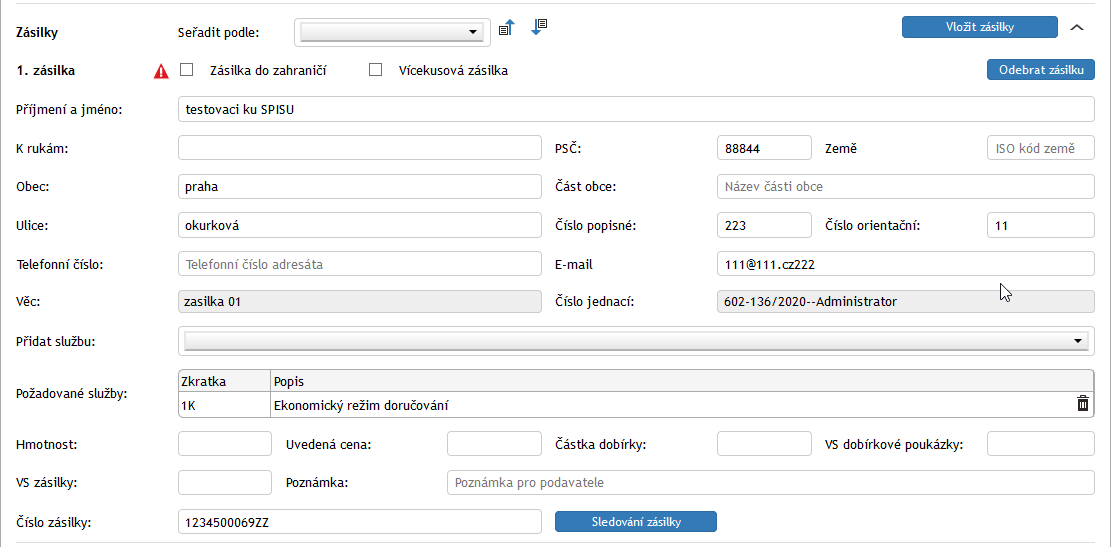
If warning of incompleteness was displayed for a message, you can check the missing detail here (it is indicated by a red background) and enter or correct it.
Starting with February 1st, 2020, the Czech Post has introduced a two-speed letter delivery system for some letter types. You can choose between faster delivery (Priority letter, marked as D1), or lower price (Economy letter, marked as 1K).
The new delivery system can be requested for the following services: Ordinary Letter, Registered Letter, Business Letter, Registered Business Letter.
To change the delivery type for selected messages in the bulk posting form from economy to priority mode, change the option Add service to Priority delivery mode.
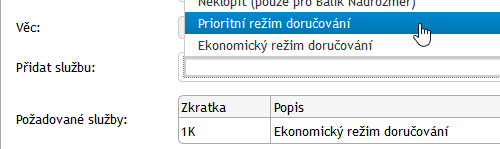
Click Yes in the Confirm query to confirm your selection and the entry in the Requested services column will change from 1K Economy delivery mode to D1 Priority delivery mode.

Note the Message tracking button next to the Message number field. If you know the message number and enter it in the field, you can click the button to the Czech Post Track&Trace page and check the message delivery status.
Creating a Bulk posting form using a barcode scanner
When you open the form and select the sender, the Messages section display an entry field with the button Insert messages.

Click the button and you can use a barcode scanner to enter an UID code of a message. You can order the inserted messages using the option Order by with additional buttons to change the order to descending or ascending.

If a message was scanned successfully, you will be notified by a message framed in green, titled Successfully entered messages and placed below the entry field. All messages loaded in the form will be displayed there. As soon as you load the first message, the button Refresh message list is displayed; click it to insert all the messages in the form and number them. You can change the list order now. You can scan more than one message in a row.
Situations you might encounter when scanning printed message UIDs:
-
If you scan a message twice, you will be notified by message The message has already been inserted into this bulk posting form.
-
If you scan a message that is already in another bulk posting form, you will be notified by message The message has been inserted into another bulk posting form.
-
If you try to scan a message that does not exist (e.g. if you remove a recipient after the addresses have been printed), you will be notified by message The message has not been found.
-
If you scan message UIDs in fast succession, you might encounter technical limitations of the hardware that will not be able to load the UIDs correctly.
Form processing
There are several buttons placed in the lower part of the form:
-
Scan filled-out form – provides the option to scan a completed bulk posting form using a scanner and attach to the form as a PDF file.

-
Details of the scanned form file will be displayed in the form along with two additional buttons:
-
Display form scan – displays the scanned bulk posting form in window Document preview.
-
Remove form scan – removes the scanned bulk posting form attachment from the form.
-
-
ePF import from CSV – if you have an electronic posting form (see below) available with details of sent messages, use this button to load it.
-
Generate ePF – creates a CSV file with an electronic bulk posting form. Click the button to attach the created file to the form and enter the creation date in the form. Click the new button Save CSV file with ePF to download the created file on your computer drive or portable drive.

You can present the electronic posting form at the post office instead of the printed form, e.g. on a flash drive. The post office employee will enter the sending details in the file and pass the file back to you. Then you can open this form again, click Load data from ePF to the form and look up the updated file to upload the sending details back to the form.
-
Printing address labels – prepares a form for printing address labels based on the addresses in this form.
-
Print – prints out this form.
-
Save and close – saves the changes in this form and closes the form window.
-
Send to archive – finishes this form and enters the send date in the documents.