File plan
Your organization’s File and retention plan sets the structure of file plan classes and corresponding file plan codes and retention policies. File plan entries created here are then available in incoming and outgoing document forms, records, and also in the DMS section.
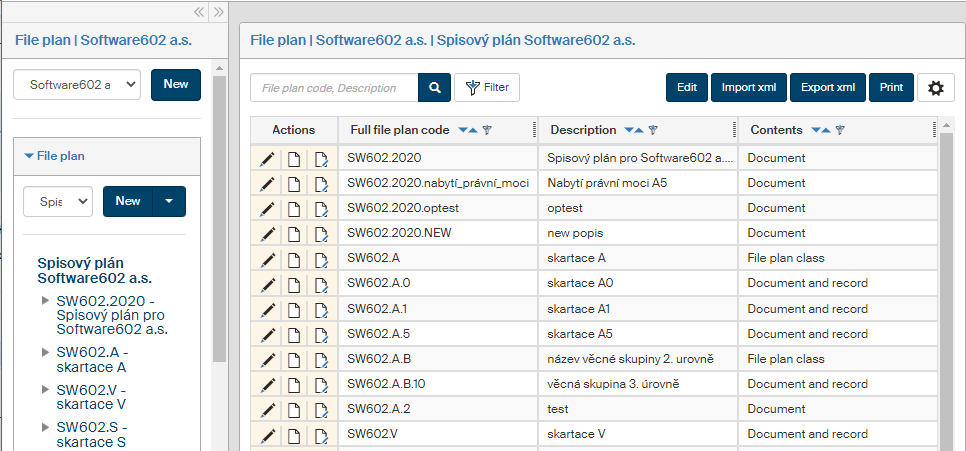
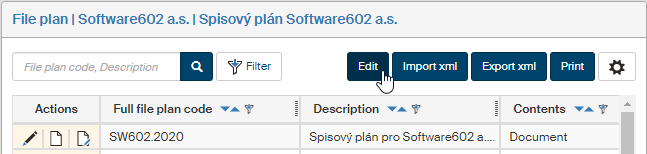
On the left panel in the Entities screen (), make sure the entity you want to edit is selected in the Entities list. Then go to Menu and click File plan. In another section in the left panel, File plan, select one of the file plans created for the entity or create a new one. The File plan (entity name) screen is then displayed on the right.
Creating a new file plan
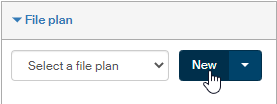
To create a new file plan for the entity, click the New button on the right from the list Select a file plan.
The dialog File plan creation: entity name is then displayed. In the upper section, enter the basic identification data for the new file plan:
-
File plan name – enter the name for the new file plan.
-
File plan prefix – the characters that will be added to the beginning of each file plan class.
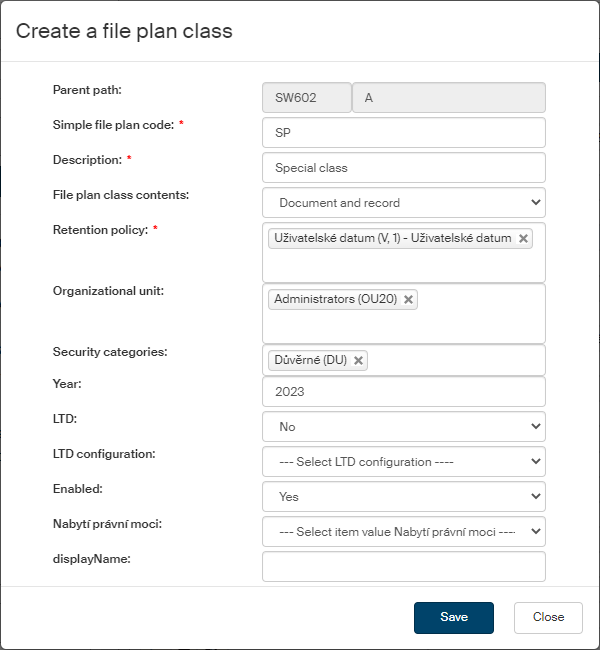
The file plan must contain at least one file plan class. Creating the first file plan class is therefore a part of the file plan creation dialog. File plan class properties are described in chapter Editing an existing file plan class.
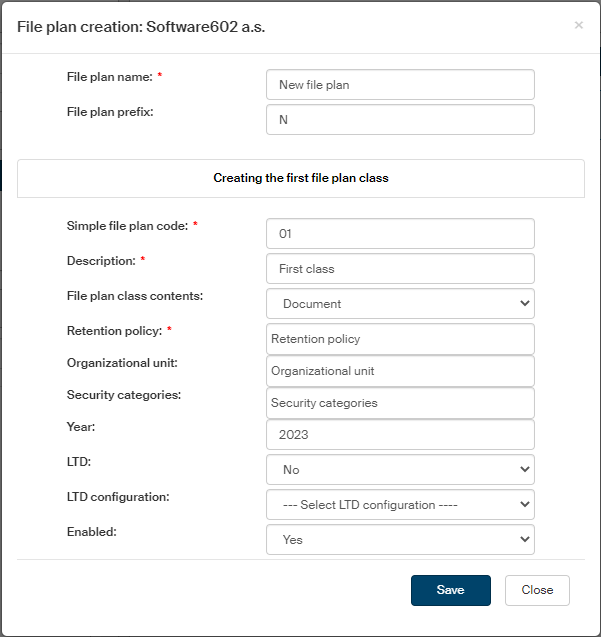
In the second section of the File plan creation dialog, fill in the fields to create the first file plan class.
-
Simple file plan code – identifies the class. The file plan class is then placed in the file plan structure.
-
You can place additional information in the Description field, e.g. the situations where this file plan class is to be used; the description is displayed in the file plan overview.
-
You can use the field File plan class contents to specify which form types can be placed in the file plan class: documents, records, standardized records or any of them (Document and record). The file plan class availability in forms will depend on this setting.
-
The field Retention policy lists entries from the Retention policy screen. Selected retention policy or policies will be available in forms when this file plan class is selected.
-
In field Organizational unit, select the unit or units that can use this file plan class.
-
In field Security category, select the security category classification for this file plan class .
-
If you enter a Year, the file plan class will be available in the specific year only; if not filled in (the field is empty), there is no time limit to its validity.
-
If you select “Yes” in the LTD field, documents assigned this file plan class will be included in long-term preservation.
-
In LTD configuration, select which preservation method to use for documents or records from this file plan class. If not filled in, a preservation configuration from the entity settings or from the long-term archive settings will be used.
-
If Enabled is set to Yes, the file plan class will be available to select in form fields.
-
In Date of legal force specifies how it will be possible to submit an outgoing document without filling in the date of legal force or the validity year. For administrative acts that come into legal force, the date when it comes into legal force might not be yet known when posting the message. For internal regulations and contracts for an indefinite period, as well as amendments, the validity year might also not be known yet at the time of posting.
For these reasons it is possible to separate the document sending procedure from the document finishing procedure: when a document is being sent only, filling out the fields related to the validity year is optional; when finishing the document, all the fields required for the shredding procedure must be filled in.
The field Date of legal force adds a metadata item to the file plan class to set the behavior during submitting:
-
No – the document will be archived immediately (and filling out all metadata will be required).
-
Yes – the document will only be sent and the process will then wait for the rest of the procedure. Only then the missing metadata (like the date of coming into force – e.g. the due date) will be filled in and the document ready to be finished.
-
When you have set up the new file plan and its first class, click Save to confirm the setting.
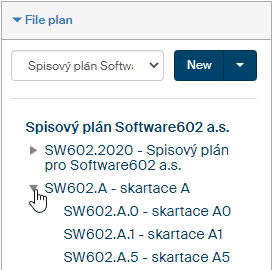
File plan structure
The structure of the selected file plan is displayed in the middle of the left panel. You can set up more than one file plan; in that case, only one can be displayed at a time. The file plan is a hierarchical structure of headings and file plan classes. Click a class name to display its details and subclasses on the right side of the screen.
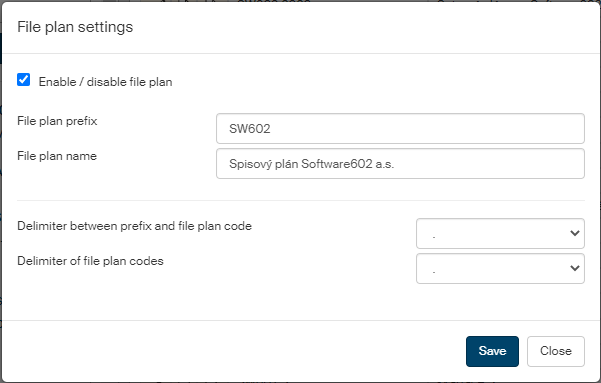
Click the file plan title on the left to display the Edit button in the upper right part of the screen. Click the button to open the File plan settings dialog.
Edit its basic properties here:
-
Check or uncheck Enable / disable file plan to make the file plan available or unavailable for documents.
-
Edit the field File plan prefix to change the prefix in file plan codes.
-
The text from the field File plan name is displayed in the list.
-
In Delimiter between prefix and file plan code and Delimiter of file plan codes, you can adjust the characters used between groups of file plan codes.
Importing and exporting file plans
If you have a file plan ready in a file, you can import it instead of recreating it manually.
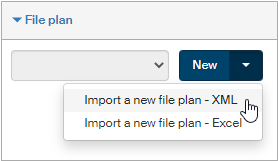
To import a file plan, click the arrow on the right of the New button in the left panel. Select from the menu whether to import an XML or XLS (Excel) file.
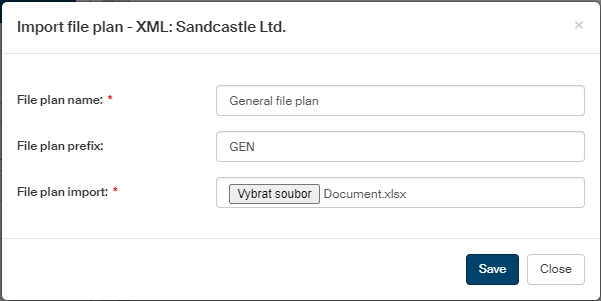
A dialog opens; similarly to creating a file plan manually, enter the file plan name and file plan class prefix. Then look up the file with the file plan description.
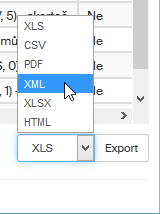
Conversely, you can export existing file plans from FormFlow: the corresponding field and button are available in the lower right corner of the screen. First, select the file format from the list on the left, then click Export to create the export file.
Based on your browser settings, you might find the file in the Downloads folder, and the name will be e.g.: Export_2024-08-26_11.44.25.xls.
List of file plan classes
File plan classes and their details are listed in the right part of the File plan screen. Each table row corresponds to one class.
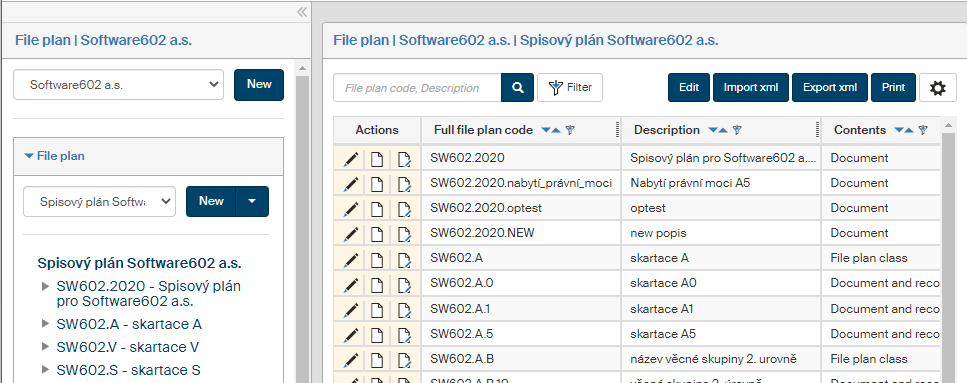
Use the buttons in the Actions column to edit the list:
-
Click
 Edit file plan class to display the edit dialog for the corresponding class.
 -
Click
 Create a new file plan class (subclass to the current class) to create a new class as a child to the class listed on the row.
 -
Click
 Create a new file plan class (class at the same level as the current class) to create a new class at the same level as the class listed on that row.
The class creation/edit dialog is described in chapter Editing an existing file plan class.
Creating more classes and subclasses
Creating new classes – either at the same level or child classes – always takes place within the class selected in the left panel, in the class structure list. The Actions column in the list on the right provides two buttons:
-
Click
Create a new file plan class (subclass to the current class) to create a new class as a child to the class listed on the row. -
Click
Create a new file plan class (class at the same level as the current class) to create a new class at the same level as the class listed on that row.
Clicking either of the buttons displays a window to create a new file plan class. The fields in the dialog are identical to those when creating the first file plan class.
Editing an existing file plan class
Click Edit file plan class to open the Edit file plan class screen. Use the dialog to change and save the file plan class properties.

The first field is read-only (gray background). A file plan class is unambiguously identified by a code consisting of the codes of its parent classes (they are displayed in the field Parent path).
All the other fields have the same meaning as when creating the first file plan class.