Documentation creation: process-based, sequential process
There are many features and controls common to both process-based and document-based document creation and also to other processes.
| If you are not sure, take a look at the difference between process-based and document-based documentation creation, or between sequential and parallel approval processes. |
Let us look in more detail at the workflow for a process-based document creation with sequential revision.
-
The author creates a request for a Document creation – process-based process with sequential revision.
-
The author selects the revision group and submits the filled-out form to the workflow.
-
Because it is a sequential process, the form will circulate the revision group members one after another in the order set up in the form (it is a sequential process).
-
When the workflow ends, the form will return to the author who can then choose what to do next. The author can finish the process or run a follow-up process.
Opening a form
To run process-based documentation creation, you will need the Documentation creation – process-based form. To open the form:

-
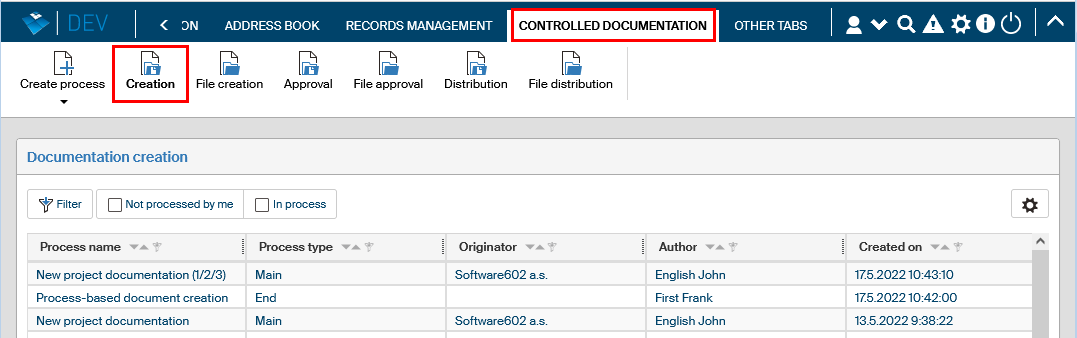
Open the CONTROLLED DOCUMENTATION tab.
-
Click Creation.
-
Click Create process.
-
Select the option VDP – Documentation creation - process-based from the menu.
The form window for process-based documentation creation is displayed.
| If you cannot see some controls you need, contact your administrator to adjust your permissions. |
Form history and printing
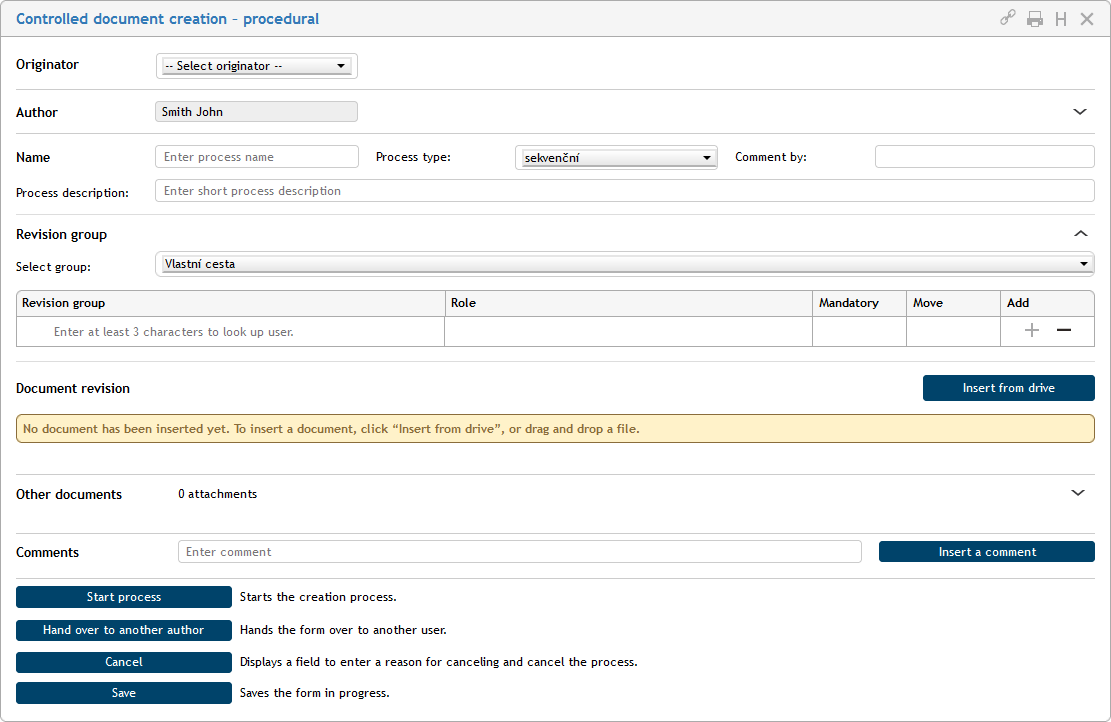
Let us start with the buttons near the top right corner. The button with the “H” symbol – Document history – will display a window with a chronological list of events in this process. The window contents are for your reference only.
The button with the printer symbol will open a window with print preview and the controls to set up printing parameters and print out the form. The usual X-sign button is available to close the form window.
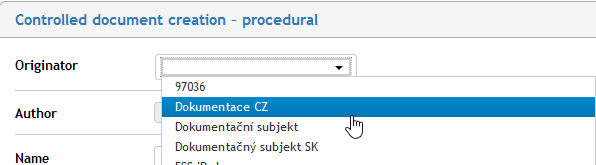
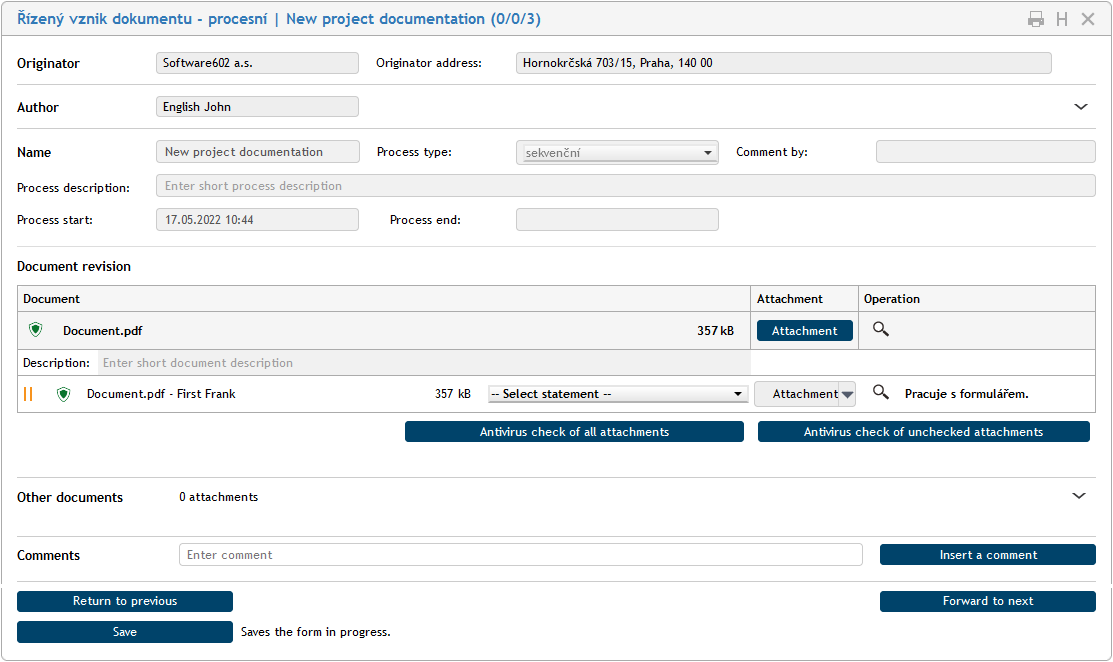
Originator details
A form usually begins with the Originator option. Here you can select the process originator, that is, the entity related to the whole Controlled documentation form (organization, company, e-mail, department, etc.). This option is mandatory.
As soon as the originator is set, additional fields Originator address is also displayed, containing the address from the originator settings. Both the fields are now read-only.

General notes for all forms:
-
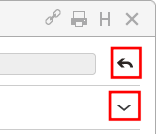
You can click the back arrow
 on the right of a control to cancel the selection and select again. This will make the gray fields available for editing.
 -
If there is a down-pointing arrow
 at a section heading, it means the section can be expanded to display additional controls. If you do not see all the controls described in this manual, the section is probably collapsed. Click the arrow in an expanded section to collapse it again (to simplify the form view).
The Originator section is only present in the form if the controlled documentation is connected to the records management service.
| A user with administrator permissions can enter a new originator to FormFlow, if it is needed. The procedure is described in chapter Creating a new entity. |
Author details
Who is the author
Read-only section Author lists your details as the person who starts the document process. You cannot edit it; the details are taken from user data that is managed by the administrator. You can click the vertical arrow symbol on the right to view other author details – department name, telephone number, e-mail address and section name. Click the arrow again to hide the additional details.

Handing a form over to another author
A form author can hand the “authorship” over to another author. It may be useful for example when a manager tasks an employee with setting up the form and then takes over the form to continue processing it.
To change the author, click Hand over to another author.
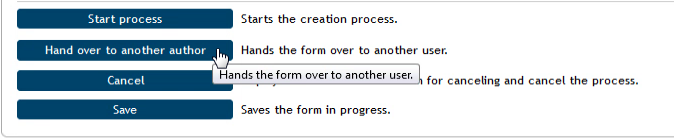
Then select the user who will become the author in the field Hand over to user.
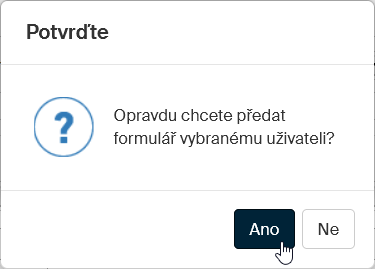
Then click Yes in the confirmation dialog to complete the handover.
The usual system message on form handover will be displayed. The new author will receive an e-mail notification of the handover and the form will be placed in their folder To Be Processed by Me.
Process name and description
Enter process description in the next section.
-
Text filled in the Name field will be displayed as a name of the process provided by this form. The name will be displayed in process lists (e.g., To Be Processed by Me, In Process and others). This field is mandatory.
-
You can add more details on the process in the field Process description. This field is optional.

-
You can also enter a date in the Revision deadline field.
-
When the process starts, additional fields Process start and Process end will be displayed here; they are filled in automatically.
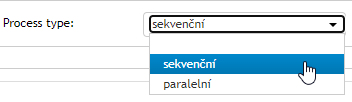
Sequential or parallel process types
Use the Process type option in the same section to select whether to run a sequential or parallel process. In a sequential process, the form is passed from one revision group member to another, while in a parallel process all revision group members receive it at once.
The workflow is based on a revision group – a set of users who will receive the form during the process. In both cases (sequential and parallel types) the process author fills out and submits the form to start the process.
-
If a sequential process type is selected in the form, the first member of the revision group will receive the form for processing after it is submitted. When the user processes the form, FormFlow will forward it to the second revision group member and these steps repeat until the form reaches the last member of the revision group. After the form is processed, the workflow completes by returning the form to a specific user – typically it is the process initiator again. The user then finalizes the form based on the received comments and finishes the process.
-
In a parallel process type, a copy of the form is forwarded to each revision group member at the same time, as soon as the workflow is started. They all edit the form as they see fit and return it to the process initiator. The initiator can check at any point to see who has processed the form already and who has not. When all the forms return, the initiator finalizes it again and finishes the process.
Setting up the revision group
Set up the list of users who will review or comment on the form creation in the section Revision group. You can add users to this list one by one or use a preset group to add them all at once.

Choose a preset group from the list Select group. Click OK in the confirmation dialog and the system will add the group members in the revision group table.
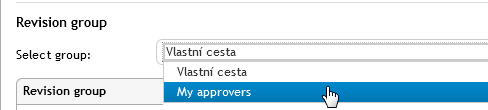
| If you are managing documentation for more than one originator, the list of groups available in the list depend on the originator selected for this form. |
|
How to create a revision group? This is an administrator’s task. You need access to the ADMINISTRATION tab. Then click the Controlled documentation button and select User-defined groups (to create a group available just to yourself) or Global groups (to create a group that will be also available to other users). In the following screen, click Create a group and name the group. On the right, click Add entities to attach the group to entities – these are the entities to choose from in the Originator field in forms. Click Add processes to create a list of form templates for processes where this group can be selected. Then click Add users to create a list of users to be included in the revision group. If the ADMINISTRATION tab and the Controlled documentation button are not available to you, ask a user with administrator permissions to set up the group or adjust your permissions. |
If you select a named revision group, a table listing its members is displayed. The first column lists their names. If they are members of a preset group, the names cannot be edited. The second column states their Roles within the group. This entry is editable and optional.
You can also combine both methods by adding a preset group and then adding or removing some users manually.

You can adjust the contents of the table with revision group members as you need.
-
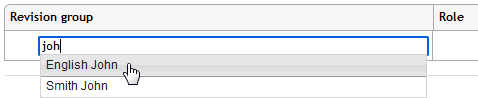
Adding another user to the revision group: Click
 in the Add column to add an empty row in the table. The row will be placed just below the row where you clicked the button. Enter the user’s name or a part of it in column Revision group – after the first few characters, the form will start suggesting a list of matching names; select and confirm the required name.
 -
Removing a user: To remove a user from the revision group, use the
 button to delete the corresponding table row.
 -
Changing the order of entries: In a sequential process, the order of revision group members is important. It is the order they will review the form. Use the arrows in the Move column to adjust the order as needed.
-
The Mandatory field is copied from the group settings. If a user is marked as mandatory, they are required to comment on the document. When the revision group is set up and edited manually, it is not possible to set this value.
If you do not want to use a preset group, leave the option Select group set to User-defined path and add users to the revision group manually. The method is the same as when adding a user to an existing, named group; you will only need to insert all the group members manually. The autocomplete function is available for you here too.
| Only users with document procesor (or, previously, document officer) permissions can be placed in the revision group. |
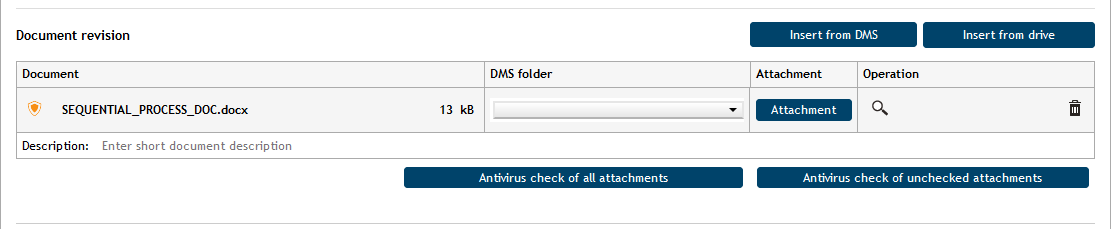
Attaching document files for revision or approval
Add the documents for the Controlled documentation process in section Document revision. If you have started the process from specific documents in a document folder, the documents are already included in the form.

| The availability of document insertion options depends on the form template. Usually it is possible to load a document from a file on your computer drive. Some processes – e.g. Document creation – document-based also offer the button Insert from DMS to load a document directly from FormFlow document folders (loading from DMS). |
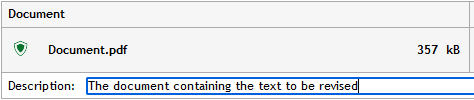
Click Insert from drive to open the system dialog for file selection. When the document is inserted in the form, it is displayed as an item in section Document revision.
For some form, this method is all that is needed. The document item is displayed in the section.
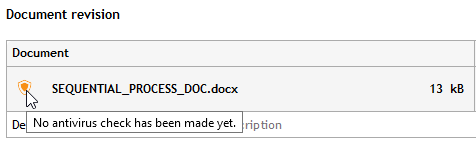
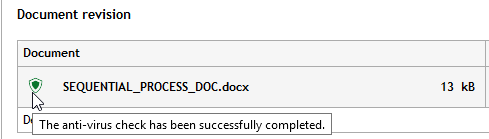
Antivirus check
Make sure to check the document for viruses before you start handling it in any way. If a green checkmark is not displayed on the left from the file name, you need to start a check.
You can choose from two buttons; Antivirus check of all attachments and Antivirus check of unchecked attachments.

When a document is marked safe, you can start working with it.
More options for loaded documents
For a better overview of the documents you can enter the Description field for each of them.
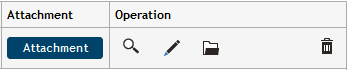
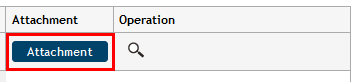
You can click the blue Attachment button to save the file to the drive or open in an associated application to view it. If you as a process author find it odd to save a document you have just uploaded, remember that the form will be circulating among other users who might to save the document for themselves.
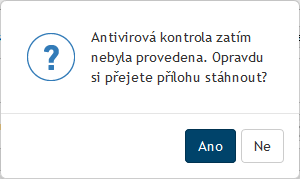
If, despite the warning above an antivirus check has not completed for the document, you will be notified about it with a query asking whether you are sure you want to handle an unchecked document.
The magnifying glass button ![]() Display attachment preview in another window in the Actions column can be used to display a document preview – this function is again more useful to the revision group members during the workflow. You can remove the document form the form using the trash bin button
Display attachment preview in another window in the Actions column can be used to display a document preview – this function is again more useful to the revision group members during the workflow. You can remove the document form the form using the trash bin button ![]() Remove attachment.
Remove attachment.
To attach another document, simply repeat the steps. If there is more than one document attached, you can adjust their order similarly to the Revision group section above using arrows in the Actions column.
Attaching other (supplementary) documents
Apart from the documents intended for processing (revision, approval, comments), you can attach additional documents as simple attachments – for reference. You can place them in a separate section, Other documents, which is collapsed by default. To attach documents here, expand it by clicking the arrow on the right.

Use the Attachment button to open a system dialog for file selection, then look up and attach the required file. To add more files, click ![]() ; it will add a row to the table where you can insert another file.
; it will add a row to the table where you can insert another file.
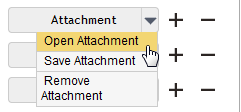
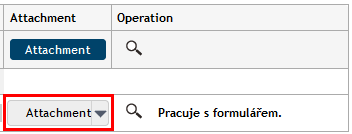
For inserted files, the right side of the Attachment button (with arrow) is enabled. Click it to display a menu of three commands to open the attachment file (Open attachment), save the file to the drive (Save file) and remove the file from the form (Remove attachment).
To remove a row along with the file from the form and process, click ![]() .
.
Inserting comments
Use the Comments section to add one or more comments to the process. Enter the comment in the corresponding field and click Insert comment to confirm. The comment will be displayed in the form along with your name and the time of posting. Other users who take part in the process will be able to comment in the same way.

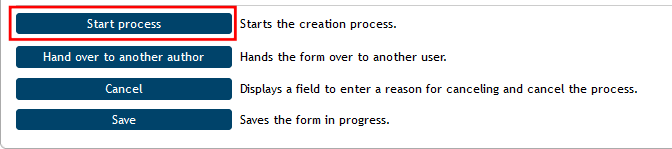
Operations available before submitting the form to the process
Saving a form mid-work
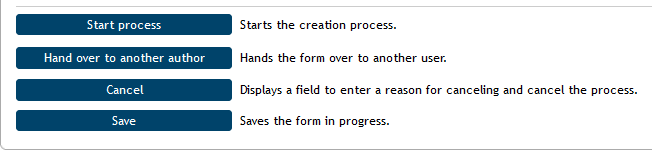
You can click Save at the lower part of the form any time during your work to save your progress.
You can then find the form again in the folder Documentation creation () and open it to continue your work. Another way is using the window To Be Processed by Me ().
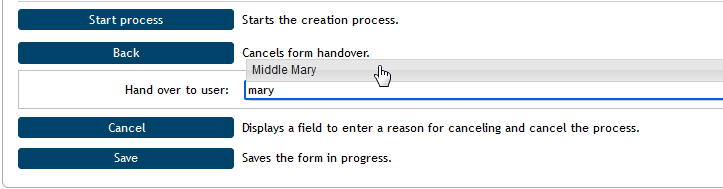
Handing a form over to another author
Before you start the process, you can hand it over to another author. You can use this step for example when an assistant fills out the form and prepares the process for their superior. The superior then takes over the process, submits it and proceeds to act as its author.
To hand over the document, click the button Hand over to another author, placed at the end of the form.
Look up the new process author in the field Hand over to user by entering a part of their name; then you can select from the list of matching entries. Click Hand over to user to confirm the selection. The form will be closed, and the new user will find it in their folder To Be Processed by Me.

Canceling a form
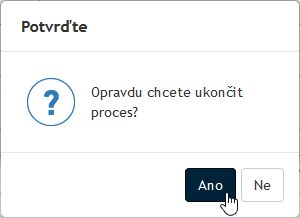
A form in progress can be canceled. To cancel a form, click the Cancel button placed at the bottom left in the form.
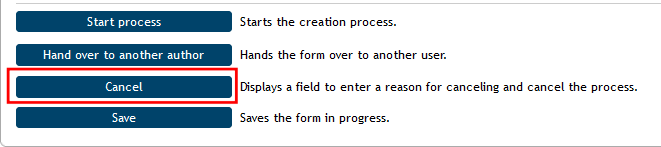
Then enter a reason in the Reason for canceling field. Click Cancel the process to finish working with this form. A canceled form is stored in the original folder where the process started. From now on, you will be only able to open it in read-only mode – it cannot be processed anymore. If you change your mind before you confirm the cancellation, click Do not cancel to keep the form in process.

Form workflow process
Submitting a form to the process
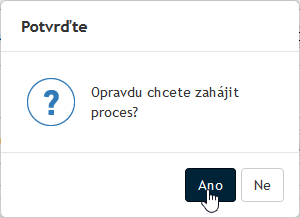
When the form is ready and contains all required details and attachments and the revision group is set up, click Start the process to run the revision workflow. Based on the process type the document is then forwarded either to the first person on the list or the whole revision group at once (in parallel).
If all the mandatory fields are not filled in correctly, the corresponding controls will highlight in red and the author will not be able to submit the form until she corrects the errors.
When submitting the form, a confirmation dialog is displayed; click Yes.
A message in a Process window will then confirm that the process has started successfully.
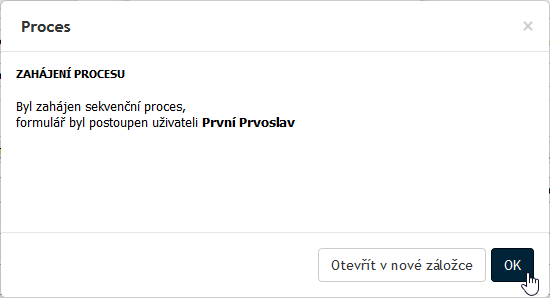
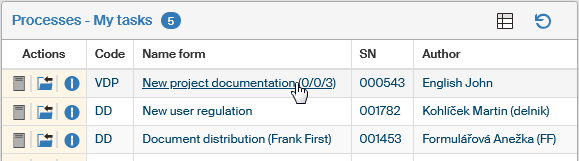
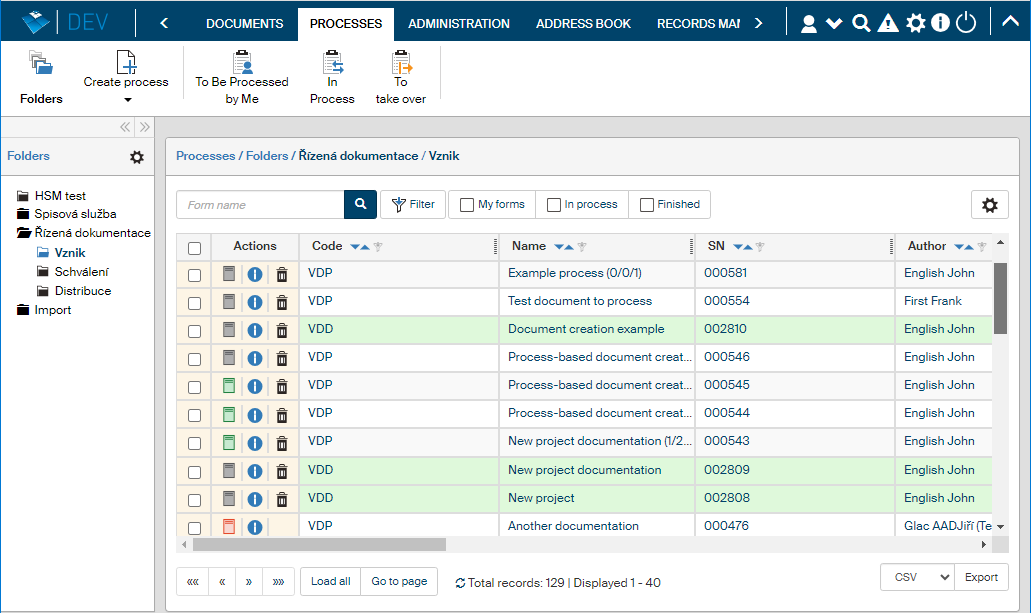
The form window will close for the author and the form will be forwarded to the first revision group member. The form author can see the process form in the screen Documentation creation or on the PROCESSES tab in the folder In Process.
The process name is followed by a numerical indicator – the form has been submitted to three users and none of them has processed it yet.

The first member of the revision group receives and processes the form
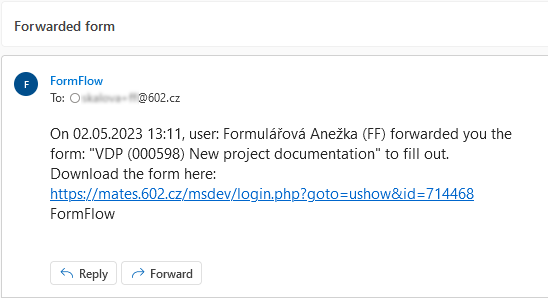
Form forwarding notification
The first member of the revision group receives a notification on form forwarding by e-mail. They need to have e-mail notifications enabled to receive them.
Opening a forwarded form
The reviewer can see the form they have been forwarded listed in section To Be Processed by Me. The easier way to reach it is by visiting the DASHBOARD tab and clicking the form item in section Processes – to be processed by me.
Similarly, they can use the PROCESSES tab and then click the button To Be Processed by Me. The third way of locating the form is in the working folder, selected in section Folders opened by the button with the same name.
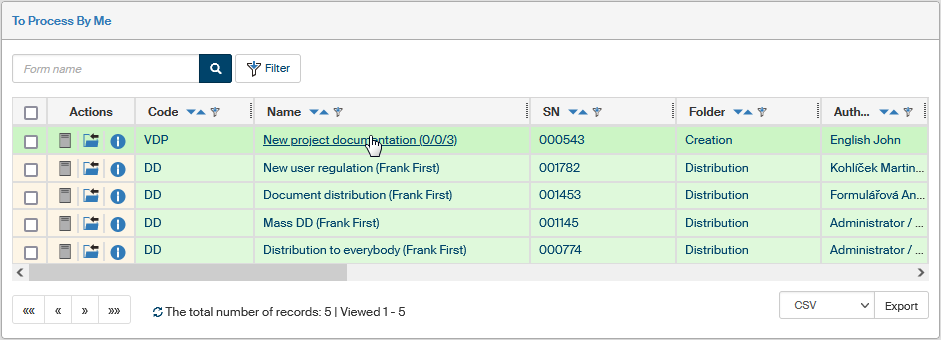
Whichever way the user chooses, clicking the form item will open the form and display in a new browser tab/window.
Reviewing a document
The controls in the upper part of the window, in sections Originator, Author and Name, are grayed out – they are for reference only and cannot be changed at this stage. The reviewers will be mostly interested in section Document revision.
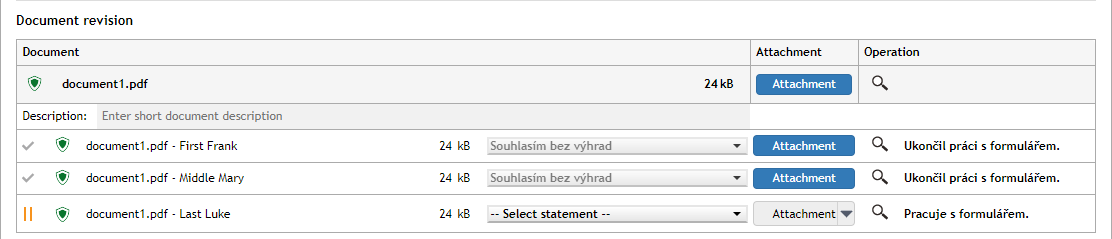
The last row in the table, marked by a pair of yellow vertical lines on the left, is waiting for the reviewer.
The first row in the table lists the document as it was submitted for revision by the author. Click the magnifying glass button in column Actions to open a window with preview of the document contents – it is a read-only view.
Save and back up
Let us consider for a moment what to do when a reviewer wants to leave mid-work and, for example, have lunch. Safety guidelines do not recommend leaving the form open on the computer. The reviewer clicks Save instead and then can close the FormFlow window. Back from lunch, the reviewer can log in again and look up the form. The reviewer can load the form again now and continue working. We also recommend saving the form from time to time just to be sure, like you would do with any document – in a case of e.g. power failure you will not lose all your work.
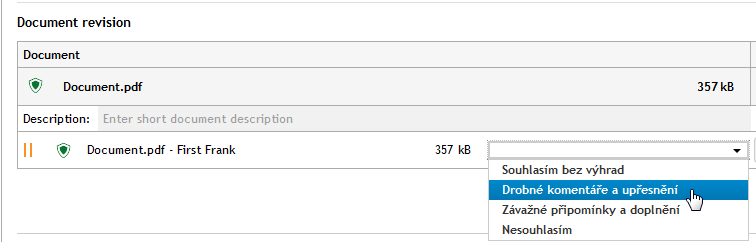
The reviewer’s statement for the document
To review the document, the reviewer needs to select their statement using the option in the center of the row. Let us say that in our example, the reviewer does not have any serious objections and selects Minor comments and clarifications.
The reviewer can use the Attachment button download the document original. Generally speaking, the button opens a dialog (varying based on their browser) where they can either save the document to their drive (to keep their own copy of the document) or open it (read-only) in an application associated with the file type.
If an antivirus check has not completed for a document, the user will be notified about it with a query asking whether you are sure you want to handle an unchecked document.
If the file is for example in DOCX format, the document will open in MS Word – and note that the default state is “read-only”. To write in the document, you need to click Enable editing in the upper part of the Word window.

Then enter your comments in the downloaded document. If you make any edits, you will need to save the document on a local drive before uploading. Then click the gray area of the Attachment button, outside the arrow, to upload the edited document back to the form.
The file selection dialog opens. Look up the revised file. Confirm the selection and the file is uploaded to the form. The selected file will be displayed in the last row in the table.
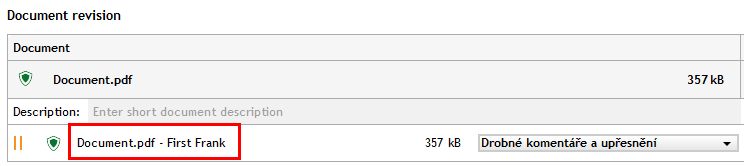
To recheck the edited document, you can click the magnifying glass button (in the Actions column) to open a preview window. The form now contains two rows, one with the original document and one with the first reviewer’s revisions.
The final edit and submitting the form to the process
Each reviewer can choose to attach comments and additional files to the form.
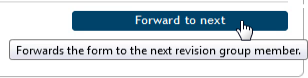
Because the first reviewer has not found any serious errors that would require rewriting the document, they can click Forward to next to submit the form to the second revision group member. After clicking the button, a confirmation dialog is displayed and then the form is forwarded to the next reviewer.
Where to find the form
The first reviewer can see the submitted form in the folder In Process. Note the (1/0/3) indicator on the right from the process name – it means that out of three reviewers, one has already completed their revision.

The process entry is displayed in the same way to the process author.

The form at the other reviewers
The document form grows with each reviewer by their statements and other details.
This is the Document revision section for the second reviewer:

And for the third reviewer:
| If one of the reviewers selects I do not agree as their statement, the process does not end; it will continue anyway. |
Returning to the previous reviewer
In this example, the reviewer decides the document needs to be returned a step back in the workflow (to the previous reviewer) for more editing.
The reviewer explains the reason for returning by setting the option to I do not agree and entering the reason in the comment. Then the reviewer clicks Return to previous.
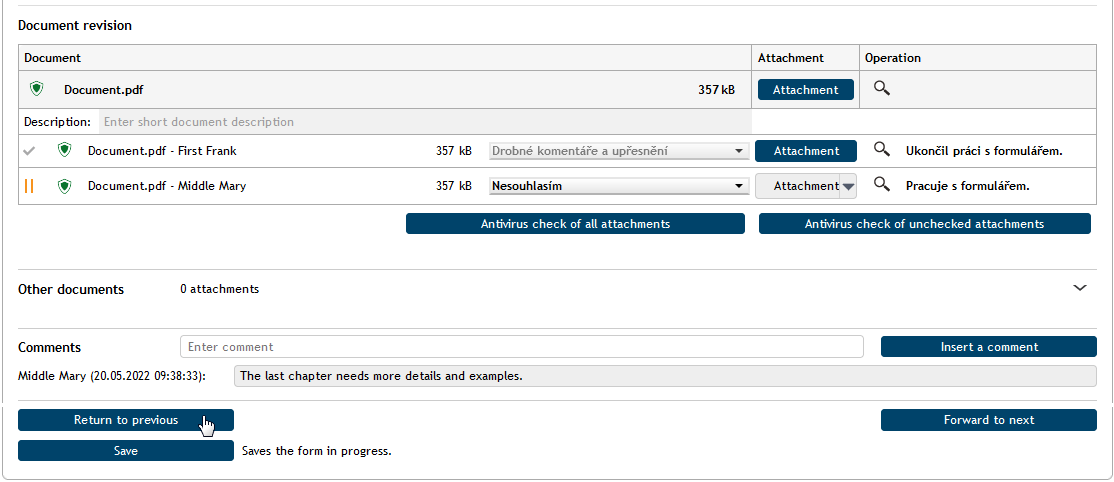
The user who receives the form will open it the same way as when they received it for the first time. The reviewer makes the required changes and resubmits the document to the workflow.
Note that this reviewer also can also return the form to the previous reviewer, and this way the form can gradually return all the way back to the author.
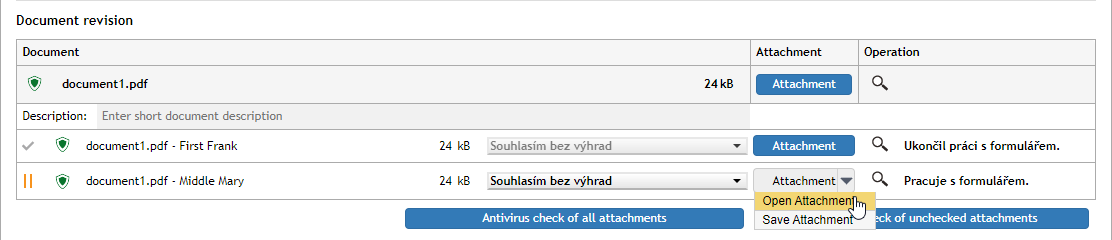
The user making the required changes needs to download the document version they have edited before. Click the arrow on the right of the Attachment button and select Open attachment.
The author taking over the form
The process author can take over the process while it is still running, stop the revisions and end the workflow. When the author opens the form, the Revision group section shows how far in the workflow has the form passed.
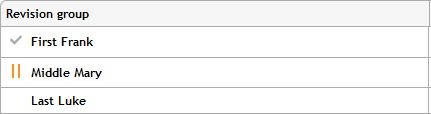
The form will be removed from the user who has the document “on their desk” right now (marked with ![]() ) and from all the following users.
) and from all the following users.
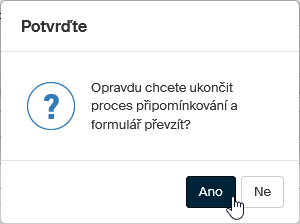
To take over the form, the author clicks Take over.

Then confirm the dialog notifying about ending the revision process early.
The Document revision section for the current reviewer (and all the following reviewers) will then display the message "Byl vyloučen z procesu" (Removed from the process).
The process author can then create and attach the final document version as if the process followed through normally, and then finish the process.
Note the middle number in the indicator next to the process name – it states how many users were removed from the process.

Finishing the process
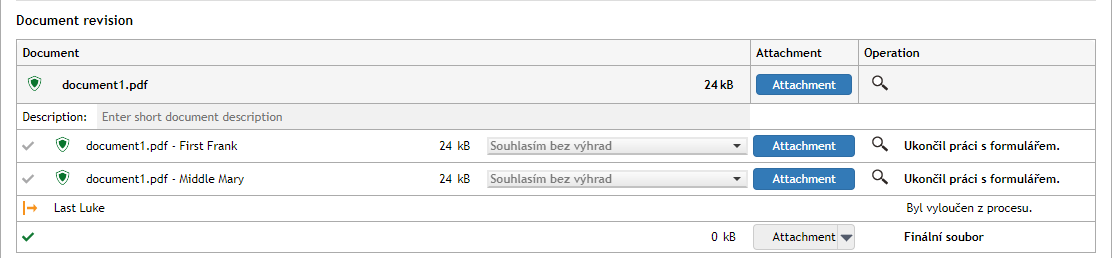
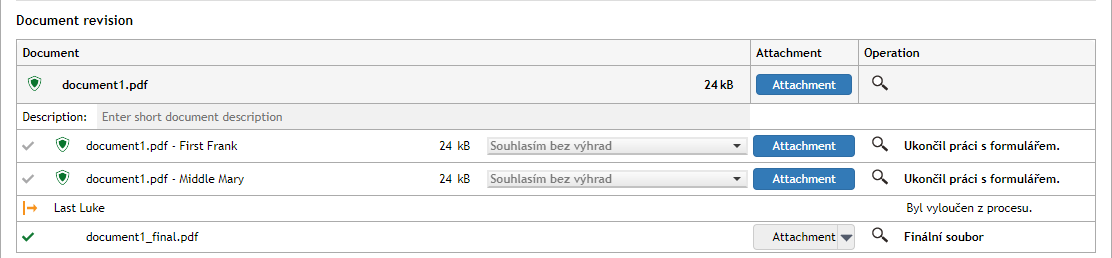
When the revision process passes through all the reviewers in the list, the form returns to the author. The process author can download the document for editing and edit it the same way as other process participants.
Section Documentation revision displays details of the users who took part in the document revision, as well as the Final file entry. Enter the final version of the document here; this is the version that will be archived.

End the revision process one of the following two ways.
Publishing the final version and finishing the process
Publish the final version of the document by clicking End process, the document will be saved and the process finished.
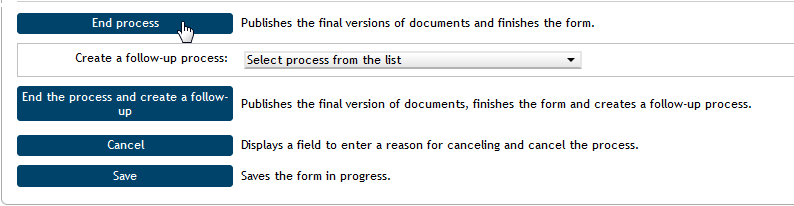
After clicking the button, you will need to confirm the action in a confirmation dialog. Then the form window closes.
The entry for a finished form is available in the process folder Folders – Controlled documentation – Creation, or the folder where the process had been started.
To make lists clearer, the process result is displayed in the Actions column using colored form icons:
-
 green is used for approved processes.
 -
 red for rejected processes, which means approval processes interrupted by the initiator.
 -
 gray is used for forms in progress.
| For process-based document creation, the final document is not stored in a document folder in FormFlow, you can find it in the archived process form. |
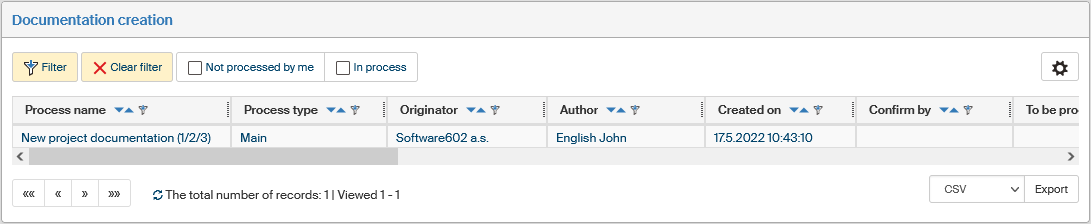
The individual process entries are also available in the Documentation creation screen.
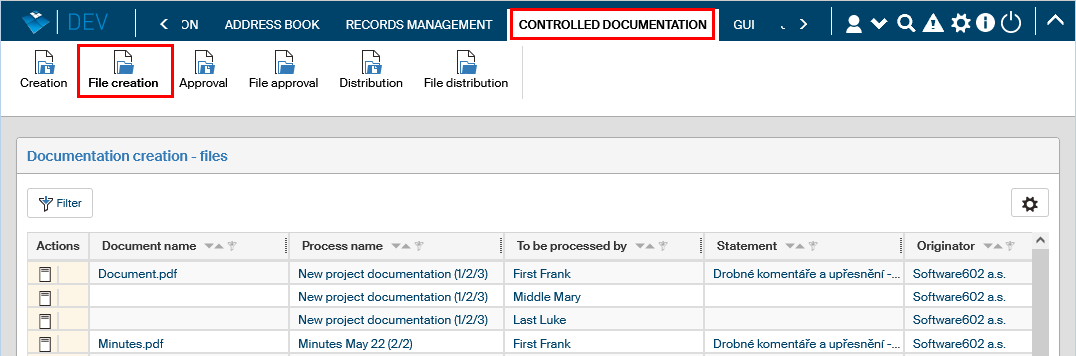
The screen Creation – files contains the entries for individual files created during the process.
Finishing the process and creating a follow-up process
If it is convenient, you can create a follow-up process (e.g. an approval one) along with the archiving, and the recently created final document will be used in the new process. Start by clicking Create follow-up process.
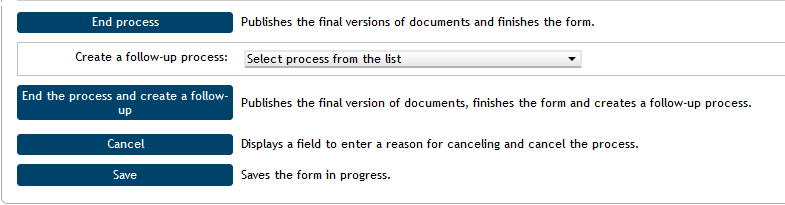
Use the Create follow-up process option to select the process to open for the revised documents. Select the user who will be the process author in the next field.
Click Finish process and create follow-up to archive the document and also automatically create a new form for the selected process.
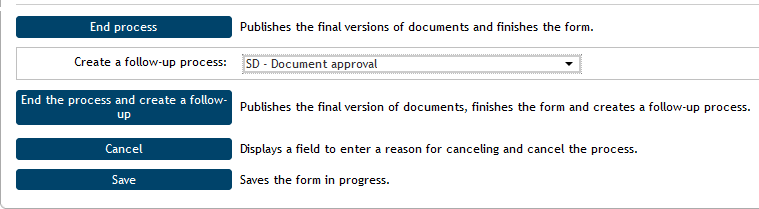
Let us assume that you want to open an approval process for a document created using the form Document creation – process-based. The corresponding form is SD – Document approval. Select it in field Create follow-up process and then click Finish process and create a follow-up.
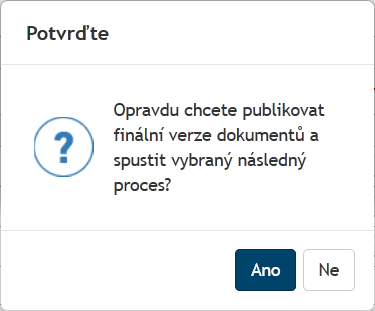
First click Yes in the confirmation dialog.
You will be informed about the start of a new (follow-up) process by another window – Process start. Click OK to start the process.
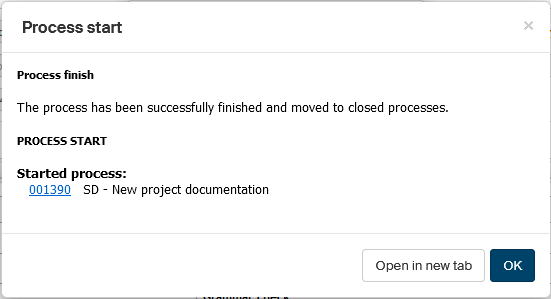
A form based on the Documentation approval template is created, with the same name as the original document creation process.
When the form opens, section Document approval already contains the document that was the final version of the previous process.

Fill in the form and set up its workflow as described in the separate chapter on documentation approval.
The process entry will be available in screen Documentation creation – files ().
A similar entry is also available in screen Processes / Folders / Controlled documentation / Creation (). To make the lists clearer, the process result is displayed using colored form icons:
-
green is used for approved processes.
-
red for rejected processes, which means approval processes interrupted by the initiator.

Reopening a finished form
The form can be opened as usual by clicking the corresponding item in a list of folder contents. If you open a saved and closed form, the corresponding message is displayed in the header.

You can open a finish form again by clicking Reopen. Click Yes in a confirmation dialog and the form will be displayed as it was before the process was finished (before archiving).

When it is reopened, you can edit the document again and add comments or other files. Then finish the form again. It is also possible to create a follow-up process based on the form contents.