Message sorting rules
When data messages from data mailboxes and e-mail messages are downloaded in the Electronic records management, they need to be assigned to a user to process them. They can be assigned manually, or automatically using sorting rules.
Use this section to set up the rules for the Electronic records management to determine the recipient/user. If no recipient/user is found using existing rules, it is assigned to the default recipient set up in section Groups and users or in Common settings. The rule can be applied to a specific sender or a Sender group, to make the list of rules simpler and easier to manage.
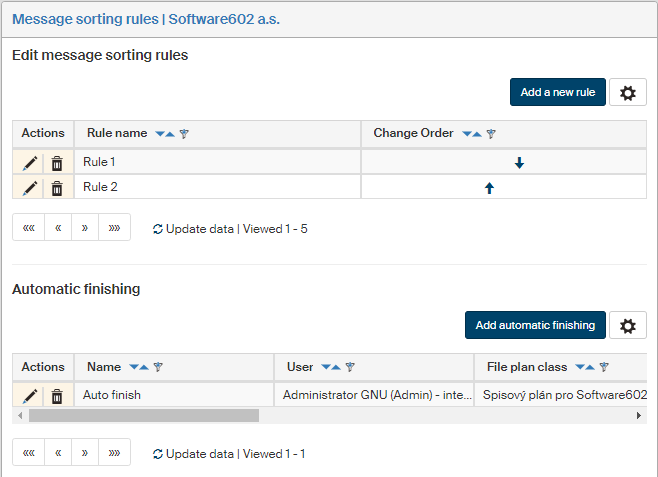
On the left panel in the Entities screen (), make sure the entity you want to edit is selected in the Entities list. Then go to Menu and click Message sorting rules. The screen Message sorting rules (entity name) is displayed on the right. The section contains a list of existing message sorting rules, which you can edit or add to.
Creating and editing message sorting rules
Click Add a new rule on the right above the list of existing rules to open the window Add a message sorting rule.
-
The Name field is mandatory; the name will be used to display the rule in the list.
-
In Recipient’s org. unit, filter the messages by the name entered as the recipient’s organizational unit.
-
In Recipient’s org. unit number, you can similarly filter by the organizational unit number.
-
In the following field, search text, specify the filter behavior, that is, whether the message is considered a match when it Contains the searched text, Starts with the text, Does not contain it or it Matches exactly. Check or uncheck Ignore case to disable or enable case sensitivity in matches.
-
If you are managing more than one data mailbox, select one in the Recipient’s DM to filter by a specific data mailbox.
-
Use the option Sender group to filter by the sender’s placement in a Sender group.
-
In Sender’s DM, filter by the sender’s data mailbox ID.
-
In Sender’s org. unit, filter by the sender’s organizational unit or its number similarly to the recipient’s organizational unit – based on the text in the field or the organizational unit number. You can also select how to match the entered string and whether to Ignore case.
-
Use the fields Message subject, Sender name, Our ref.no., Our file no. and To the attention of to filter by the corresponding data message fields. For each one of them, you can again specify whether the search text contains the entered value, starts with it, does not contain or matches it exactly. Check or uncheck Ignore case to disable or enable case sensitivity in matches.
-
Check To the addressee only, Notification e-mails and/or Postal data message to only apply the rule to the data messages of the given type. The entries can be combined.
-
In field Message recipient’s e-mail address, filter by the address the e-mail was sent to.
-
In E-mail sender’s e-mail address, filter by the address from which the e-mail was sent.
-
To use a different form for the incoming document than the default one, select it in the Form field. If not selected, the form specified for incoming documents in the Form templates section is used.
-
Check the fields Data message and/or E-mail to only apply the filter to the selected message type (data message, e-mail message or both).
-
In the following fields, set who will receive matching messages for processing. First, use the switch to select whether to look for a Role or a User, and then select a role or a name in the corresponding field.
-
You can adjust the process so that incoming documents are not placed in the Electronic records management, but in a selected folder instead. Fill in the field Folder where to save the file to place the documents in this folder; they will not be registered in the records management. If no folder is selected (the field is empty), the document will be registered in the Electronic records management.
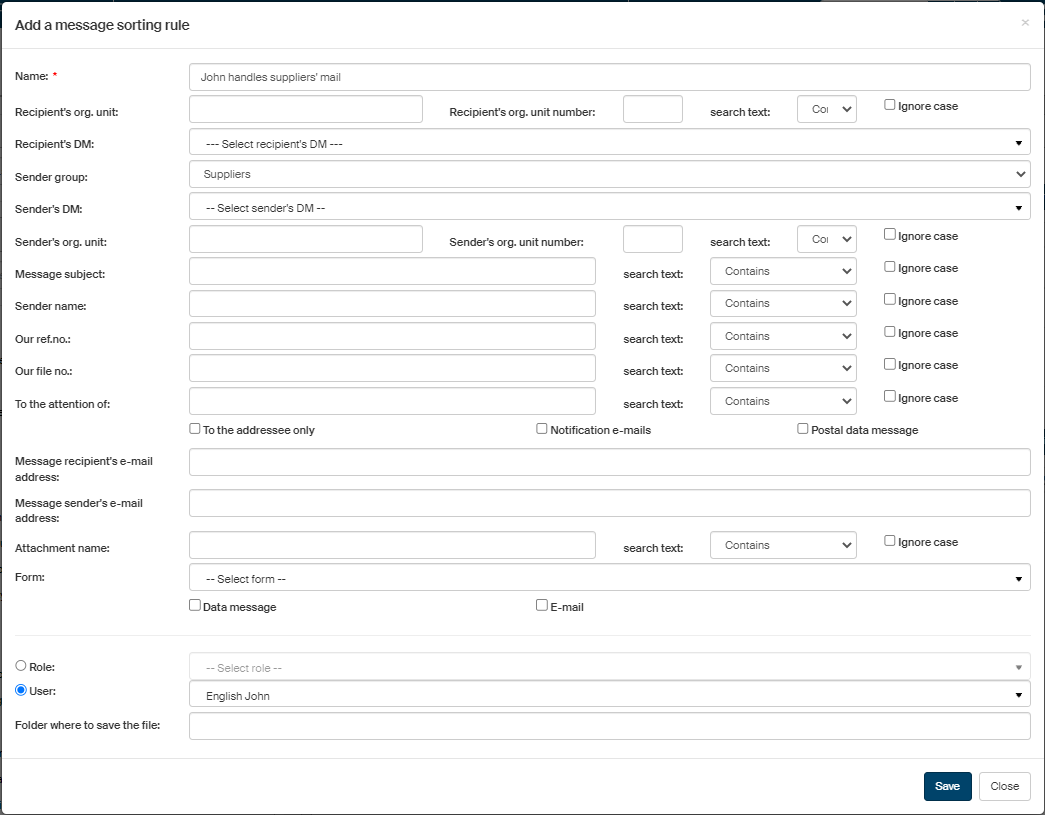
Click Save to confirm all changes. Or click Close to leave the dialog without saving any changes.
Displaying and editing message sorting rules
Existing message sorting rules are listed in section Edit message sorting rules in the Message sorting rules screen.
To edit a rule, go to the Actions column and click  Edit sorting rule. The window Edit message sorting rule opens, similar to the one where you created the rule. Edit the parameters or add new ones.
To remove a rule from the list, click  Delete sorting rule.
Rule evaluation
The rules are evaluated as follows:
-
The rules are evaluated one by one, from the top down. If the rule conditions overlap, it is important to pay attention to the rule order.
-
For example: If the checkbox To the addressee only is unchecked, it matches all messages; checking the box means a stricter rule, that is, only messages marked to the addressee only will match.
-
To process messages not to the addressee only separately, create two rules as follows: in the first rule, check To the addressee only – the recipient will only receive messages marked to the addressee only. In the second rule with another recipient, do not check this box – this recipient will only receive messages not intended to the addressee only (they pass through the filter, while messages to the addressee only were filtered out by the first rule).
Reorder the rows using the arrows in the Change order column to change the order in which they are evaluated.
Sending notification on a received document
When sorting messages automatically, it might be important to let the user know they have received a document. FormFlow can send a notification e-mail message. Enable the notifications separately for each rule by checking the field Notification e-mails.

Automatic finishing
In the Message sorting rules screen, you can also set up automatic finishing of incoming documents assigned to a specific user. Values mandatory according to the automatic finishing settings will be filled in the incoming documents.
| The selected user can be either a standard internal user or an external user – for more details, see chapter User details. |
To create a new finishing rule, create a message sorting rule first, to assign the incoming messages to the selected user. Then, in section Automatic finishing, set up finishing for the same user as the sorting rule recipient.
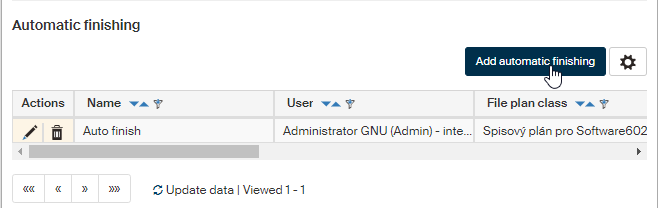
Click Add automatic finishing to open a dialog.
-
Check the corresponding boxes to set whether enable the rule immediately, whether to long-term preserve attachments and whether to preserve the data or e-mail message original.
-
Name the finishing rule in the Name field.
-
In User, select a user from the list to automatically finish all incoming documents for the user. Usernames on the list are followed by information whether the user is internal or external.
-
Select the File plan class to be filled in the incoming document before it is finished (see chapter File plan).
-
In Retention policy, select the retention policy assigned to the file plan class.
-
In Processing, select the processing method for the incoming document (see chapter Document processing).
-
Check Enabled to start the automatic finishing immediately after confirming the dialog.
-
In Preserve LTD attachments and Preserve data message or EML original, enable or disable long-term preservation of the message originals and the documents themselves.
-
Check hand over to the archive after finishing to automatically archive the message when it is finished.
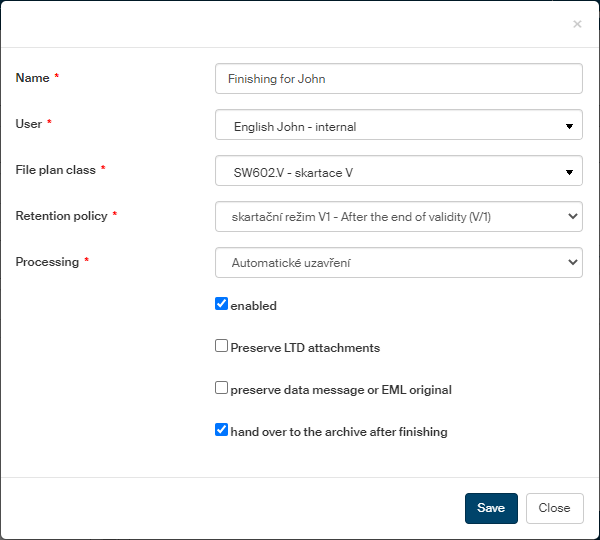
Click Save to save the rule.
The rule is added to the list of rules in section Automatic finishing.
You can edit or delete rules from this list:
-
Click
Edit automatic finishing to open the Edit automatic finishing dialog where you can adjust the rule parameters. The screen is identical to the one when creating a new rule. -
Click
Delete automatic finishing to remove the rule from the list.