Inserting a new document
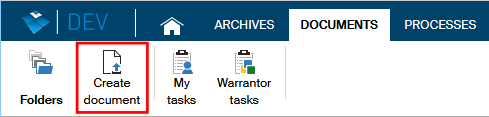
To insert a new document to FormFlow, start by selecting a folder where to place the document. Click Folders on the toolbar of the DOCUMENTS tab to display the corresponding screen, then go to the Folders section on the left and click on the selected folder name.
Now go to the toolbar on the DOCUMENTS tab again and click the Create document button.
The screen Create a new document in this folder is then displayed.
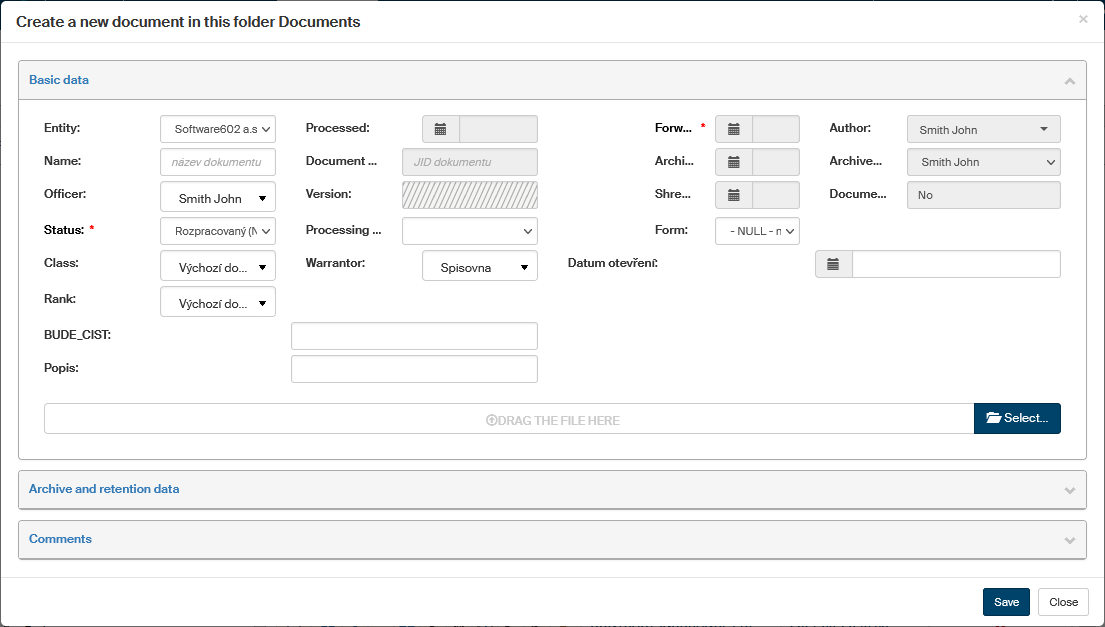
Now you can specify the required metadata for the new document and select the document file itself. The metadata controls displayed depend on the folder where you are placing the document.
Entries marked with an asterisk are mandatory, and you will not be able to insert the document without them. Fill in the rest as you need.
There are two ways to insert the document file: either click Select and look up the file containing the document on your computer drive or click From template and create the document by selecting one of the preset templates.
Then click Save to save the document and metadata in the folder you have selected.
Inserting a prepared document
If you have a document file ready to insert to FormFlow, click Select. The system dialog for file selection is displayed; use it to look up your document. Or you can drag the file using the mouse cursor from another application to the area marked drag the file here.
If you attach a wrong file by mistake, you can click ![]() to remove it from the dialog and then look up the correct file and attach it again.
to remove it from the dialog and then look up the correct file and attach it again.

When you have selected the file and filled in the metadata, click Save to confirm the dialog. The document will be saved in the selected folder and ready for further processing.
Inserting a document from a template
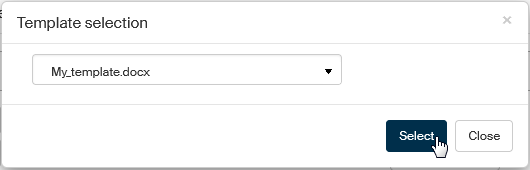
Another method of inserting a document in the FormFlow environment is using a template. These templates are prepared and set up in FormFlow by users with administrator permissions.
The button From template is only displayed if there are any templates available in the selected folder. Click the button to display a dialog with a list of templates; select your preferred template and click Select to confirm it.
If you have selected a wrong template by mistake, you can click ![]() to remove it from the dialog and then look up the correct one.
to remove it from the dialog and then look up the correct one.
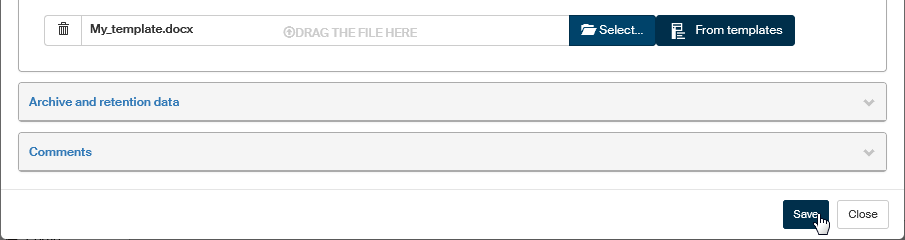
When the template and metadata are ready, click Save to confirm the dialog. The system will adjust the template based on the metadata you have filled in and create the resulting document. The document will be saved in the selected folder and ready for further processing.
Inserting a new document with a link
Filling out the metadata for a new document can be easier, if you use a link to a source with pre-filled data. This method can be used e.g. to receive data from external systems that will prepare the link.
A link to insert a document may be composed like this: https://companyserver.com/ff/create_docu.php?sid_fldr=DOCLI&ESX_DOCLI_DOCTYPE=1100&ESX_DOCLI_BCID=1257
Such a link can be displayed e.g. in an external application or sent by e-mail. If you click it, a document insertion dialog is displayed, with some metadata already filled in. Check whether it is correct and continue inserting the document as usual: fill in other data as needed and then attach the document file.
| If you have not been logged in to FormFlow before clicking the link, the login screen is displayed first. After you log in, you will be redirected to the document insertion dialog. |