Standardized record
Standardized records are special records related to one or more process types. Their structure is preset and organized into logical parts.
On the left panel in the Entities screen (), make sure the entity you want to edit is selected in the Entities list. Then go to Menu and click Standardized record.
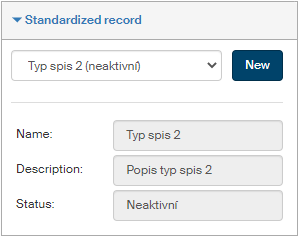
A section is displayed in the same left-hand panel, where you can select a standardized record from the list.
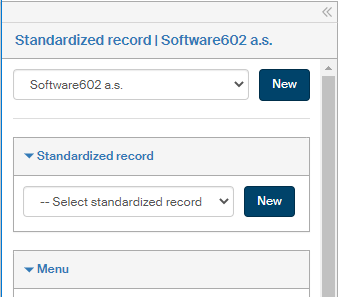
The section then displays read-only fields with basic details: Name, Description and enabled/disabled Status.
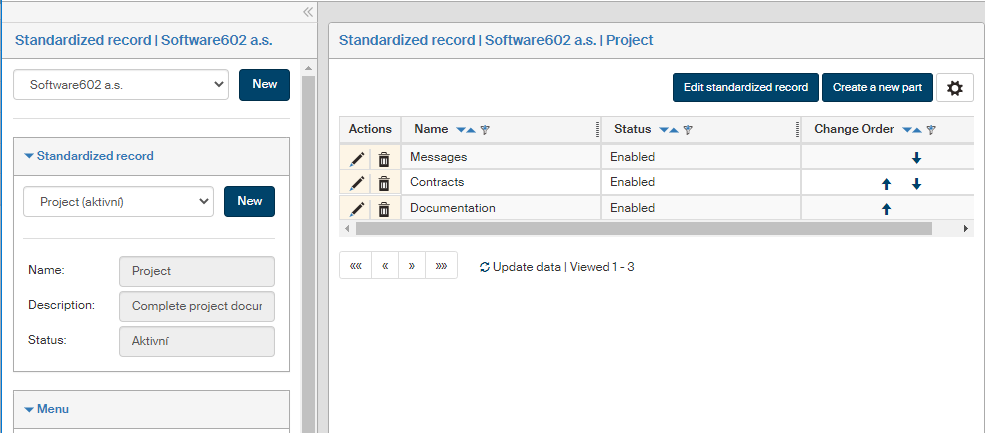
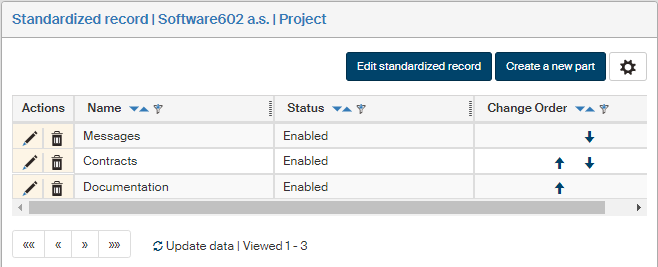
The screen Standardized record (entity name) is displayed on the right. The section contains a list of parts of the standardized record, which you can edit or add to.
Creating and editing a standardized record
The left panel of the Standardized record screen contains the New button. Click it to create a new standardized record. A dialog to create a new standardized record definition is displayed.
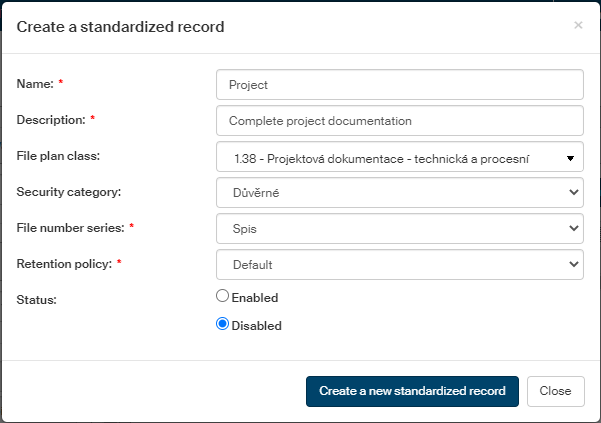
Enter the following details in the dialog:
-
Name – the text displayed in forms when selecting a standardized record.
-
Description – optional details of the standardized record to distinguish it from others.
-
File plan class – placement of the standardized record in the file plan structure.
-
Security category – the standardized record will be placed in this security category.
-
File number series – a file number from the selected series will be assigned to the standardized record.
-
Retention policy – the record will be shredded or archived based on the selected retention policy.
-
Status – only a standardized record marked as “enabled” will be included in lists displayed to users. Only standardized records that contain at least one part can be enabled (for more details on creating such parts, see chapter Standardized record structure).
Click Create a new standardized record to create the record with the given parameters and list it in the standardized record overview.
Use the button Edit standardized record, placed on the upper right, to change the standardized record’s basic properties that were set up in this chapter. The dialog Edit standardized record is identical to Create a standardized record.
Standardized record structure
A standardized record consists of one or more parts. They are listed in the right section of the screen.
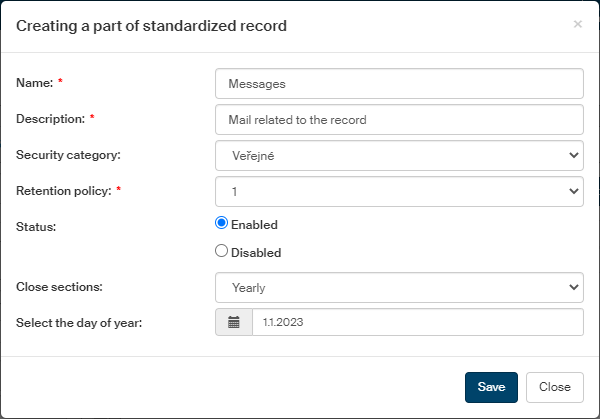
To add a new part to the standardized record, click Create a new part. The dialog Creating a part of standardized record opens.
-
In fields Name and Description, enter the name to be used in lists and, if needed, any additional text.
-
Like for the whole standardized record, assign the Security category, Retention policy and Status.
-
The next two fields determine the conditions of closing record sections based on this part. First, select one of the options in the list Close sections, the other field depends on this selection and is used to add corresponding details:
-
When reaching a number of documents – the section will be closed when the number of inserted documents reaches the number set in the following field, Number of documents.
-
When reaching an attachment size – the section will be closed when the overall size of inserted documents reaches the value set in the following filed, Attachment size (MB).
-
Daily, Weekly, Monthly – the section closes when the given time interval passes. Once you have selected the unit, set the number of days/weeks/months in the following field, Closure interval after.
-
Yearly – the section will be closed once a year, on the day set in the following field, Select the day of year.
-
Click Save to confirm the part and its properties.
Use the buttons in the Actions column to edit the existing standardized record parts:
-
Click
 to display the Edit part of standardized record dialog; it is identical to Creating a part of standardized record.
 -
Click
 to delete the part entry.
 -
Change the order of rows using the arrows in the Change order column.