Incoming document
A document incoming to the Electronic records management service can be a data message, e-mail message or common paper mail (digitized using a scanner).
Electronic records management loads the message from a data mailbox or electronic mail box and places it in the Incoming document form. The message is delivered to a user selected based on preset message sorting rules. The message form follows the workflow in Electronic records management to circulate among its users. During the workflow, a user attaches their electronic signature to confirm taking responsibility over the received data messages and processing its contents (if using electronic signatures is set).
Starting January 1st, 2023, it is possible to receive data messages with attachments in ASiC format (with container structure). When a message with ASiC attachment is received, FormFlow separates the attachment components and inserts them in an Incoming document form.
If the incoming message is delivered on paper, an operator will digitize it using a scanner. Then places the scan file in the form Electronic records management – Incoming document; the workflow then continues the same way as for a message from the data mailbox system.
Messages coming from the Slovak data mailboxes use a separate form with some entries different. The differences are described in chapter Incoming messages from Slovak data mailboxes.
| An Administrator can adjust the form layout and control availability (at ). |
New and existing incoming documents
Creating a new incoming document
Messages arriving in digital – either by e-mail or the data mailbox system – are automatically processed by the Electronic records management and their forms are handed to users with some fields already prefilled.
The procedure differs for paper mail, which first needs to be manually scanned and placed in the Electronic records management. A mail room employee is usually responsible for this part.
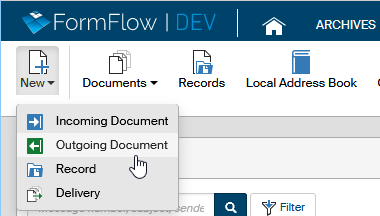
To insert a new Incoming document in the Electronic records management, open the RECORDS MANAGEMENT tab, click New and select Incoming document.
The Incoming document form opens in a new window. First of all, select the Originator (for more details, see chapter Selecting the originator). Enter the sender and recipient details, reference numbers and other details from the incoming document (for more details on these fields, see chapter Incoming document form). Scan the message and insert it in section Attachments.
You can use a similar method for not just paper mail but also other documents you have received in other ways, like in person or to an unmonitored e-mail address.
Creating the incoming message, you will become the person processing it. If it should be the responsibility of someone else, hand the document over to them.
Existing incoming document
A new incoming message can be created by some else (e.g., a mail room employee) who then hands it over to you. You will find such messages on the tab , or on the tab . If you take over a document and confirm the takeover by the corresponding button in the form, you become the person responsible for processing it.
Some documents can be presented to you by someone else during their processing. You will find these files on the tab - as well. In these cases, just attach what is needed – for example a signature or a comment – and Electronic records management will return the message to the processor or to another user for statement.
You can also click the Documents button on the RECORDS MANAGEMENT tab to look up any documents being processed or finished, outgoing or incoming. Use the filter button placed above the list to refine your search based on the name, processor, processing status or other details. You can find more details on searching the document list in chapter Filtering.
Click the name of the document to open the Incoming document form. You can view or edit the message here.
Incoming document form
If an incoming message has been processed automatically, either from an e-mail account or from the data mailbox system, some form fields have been already filled in. You cannot edit such fields anymore. If you are inserting the incoming paper mail or e-mail message manually, you will need to fill in all the fields yourself.
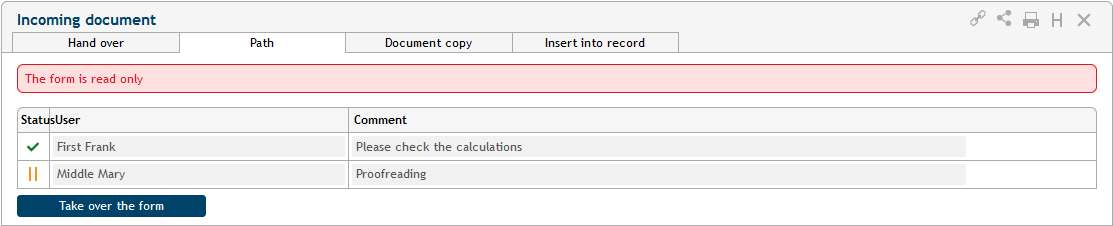
Form window header
The tabs in the document header (Hand over, Path, Document copy and Insert into record) relate to its workflow. See chapter Document path, Document copy and Inserting an incoming document in a record).

There is a group of buttons placed in the upper right corner of the form:
-
The
 Relations button opens a window where you can create parent and child relations to the document.
 -
The
 Document sharing button allows you sharing the document with other users. Sharing is described in chapter Sharing documents and records.
 -
Use the
 Print form button to print out the form. Printing is described in chapter Printing documents and records.
 -
The
 Document history button displays the document history, which is a list of operations run on the document since it was created – creation, insertion in a record, viewing, handovers, etc.
 -
Use the
 Close form button to close the form window for the moment. If you have made any changes, remember to click Save in the lower part of the form first to confirm them, otherwise you will lose all changes since your last save.
Selecting the originator
The Originator of a document is your organization, the recipient of the incoming message. If your Electronic records management manages documents for more than one originator (e.g., for large organizations who have more than one data mailbox), you will need to select the correct entity. Some parts of the form are not available until you select the originator, for example assigning the UID and Reference number (see chapter UID and Reference number).

If you need to edit an incorrectly selected originator, you can click the ![]() button placed after the entity name to cancel the selection.
button placed after the entity name to cancel the selection.
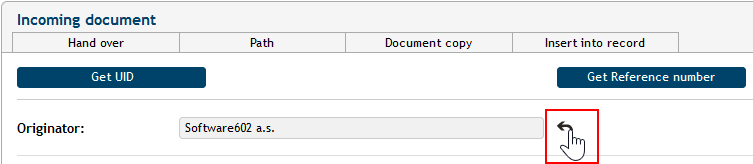
Clicking the arrow button on the right side of the window will expand the Originator section to display read-only details of the originator’s address and data mailbox.

UID and Reference number
To process a document in the Electronic records management, it needs to be assigned a UID (unique identification number, an unchangeable number) and a Reference number. The buttons to generate these values are available as soon as the originator is set for the document. The way the buttons are displayed depends on the records management settings by the administrator:
-
If the type is set to Document linking, selecting the Originator will only display one button: Get Reference number. Clicking the button will set both the UID and the Reference number at the same time. Such a document will keep its reference number assigned at the beginning throughout its lifecycle and can be inserted in more than one record (as long as the record is of the same type – document linking).
-
If the type is set to Collection sheet, there are two buttons displayed: Get UID and Get Reference number. Click the button Get Reference number to assign both the values or click Get UID to assign the UID only. You can assign a reference number or not, it depends on its insertion in a record. If you place this document in a record, it will accept the record’s reference number with a preset mask. Such a document can only be placed in a single record.
The format of both numbers is preset by the Electronic records management administrator. It may differ for different originators.

Sender
The Sender section is used to enter identification details stated in the message (letter, data message, etc.) itself. If it is received automatically, the Electronic records management checks whether the sender is already in its address book, and if not, inserts the sender in it. Incoming documents from downloaded data messages or e-mail have the Sender field already filled in.

If Simplified recipient creation is enabled, the button New entrepreneur is left out from the button set.

Looking up the sender in the Address book using autocomplete
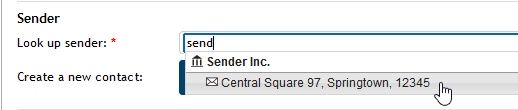
When creating the incoming document manually, you can select the sender directly using autocomplete – enter three or more characters from a part the address (name, surname, city, street, etc.) in the field Look up sender. Select the correct address from the displayed list.
| There may be up to three addresses listed for each sender. |
-
With the blue “at” sign (
 ) – for e-mail messages.
 -
With a black envelope (
 ) – for paper mail.
 -
With a yellow half-envelope (
 ) – for messages sent using the data mailbox system (DMIS).
When selecting a legal person, the options include its representative(s), and vice versa.
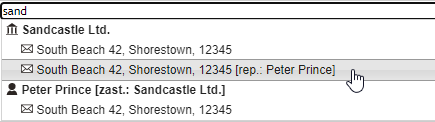
If there is a representative recorded for the company, it is displayed in the autocomplete list along with the company. The representative name is then filled in the field To the attention of if you select the corresponding contact. If there is more than one representative available, you can change their selection by entering the name or with the help of autocomplete – enter three spaces to display all representatives. If the company is edited to create a new version of the contact entry, the autocomplete for the company or its representative will only suggest the current version.
Inserting a new sender address in the Address book
If the sender is not recorded in the Address book yet, you can create the entry now using the buttons New natural person, New entrepreneur or New legal person. A window is displayed where you can insert the new address book contact of the selected type.
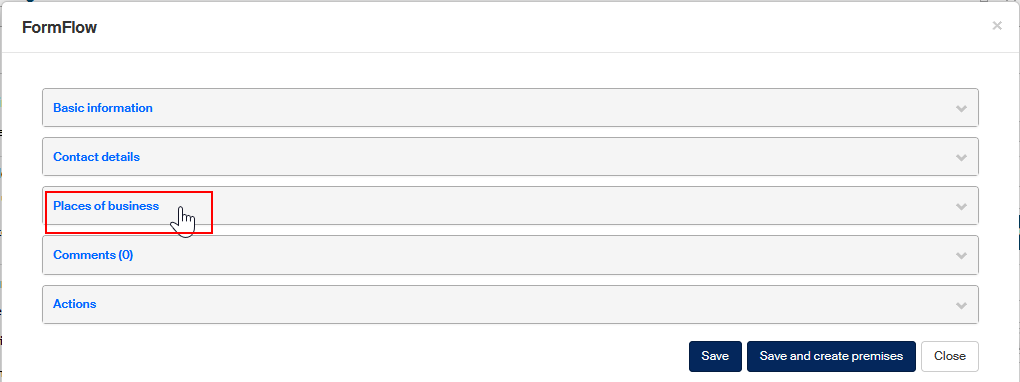
Note the section Places of business – you can use it to insert an entry for the sender’s premises without having to enter it as a separate contact.
| Creating or editing contacts is only available when a UID has been assigned. |
Simplified recipient creation
If Simplified recipient creation is enabled, clicking New natural person or New legal person in the Incoming document (or Outgoing document) form does not open the standard Address book window to create a new entry. A modal window is displayed instead with the controls to enter the basic contact details. The details will then be transferred to the Address book as a new contact.
If you have selected a legal person, the window displays a switch for contact type (Legal person and Premises), and you can also add a representative for these types.
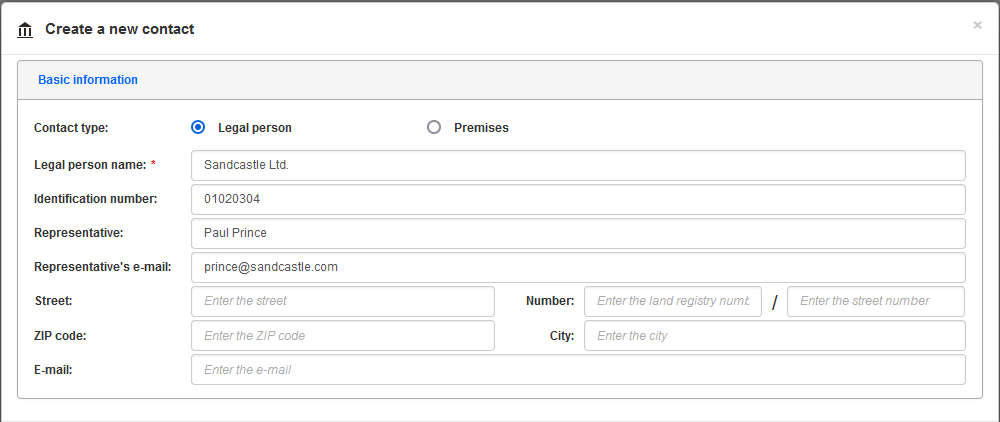
When you fill in the details and save them to the Address book, the values will be transferred back to the form (to display the recipient details). If you would like to edit the recipient details further, visit the standard Address book screen.
| An Administrator can enable or disable simplified recipient creation in Electronic records management configuration. |
Looking up the sender in the registers
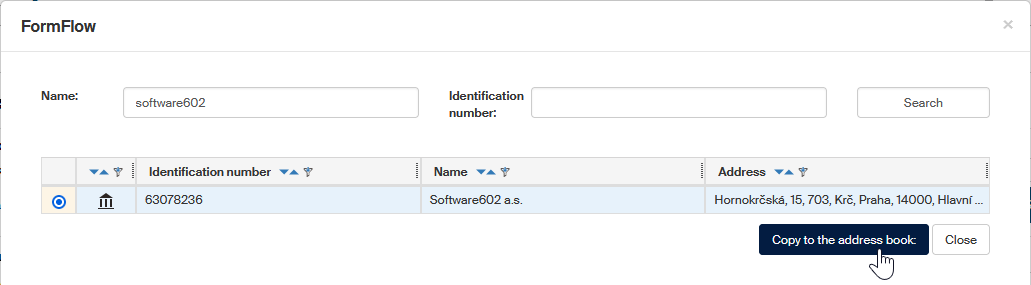
You can also look up the sender in one of the registers available using the corresponding buttons, Search in ARES, Search in DMIS, Search in ROB and Search in ROS.
More details on searching the registers are available in chapter Looking up the contact in ARES, ISDS, ROB and ROS.

Document information
When an incoming document is created automatically, selected entries in section Document information are filled in automatically from the data message or e-mail. The pre-filled details cannot be edited. The Subject field is mandatory, and the document cannot be processed and finished without it. Other details include the Submit date and time. The Submit method specifies how the document was delivered – e.g. by registered mail, courier, etc.

You can expand the section by clicking the button ![]() placed in the upper right corner of the section to view more details; or you can click
placed in the upper right corner of the section to view more details; or you can click ![]() to hide it again. These details include submit method, reference number and file number assigned by both the sender and the recipient; this section also includes fields for delivery To the attention of, To the addressee only or disabling fiction of delivery. The Format entry is used to specify whether the document is electronic, analogue (paper) or hybrid; the preset value is analogue.
to hide it again. These details include submit method, reference number and file number assigned by both the sender and the recipient; this section also includes fields for delivery To the attention of, To the addressee only or disabling fiction of delivery. The Format entry is used to specify whether the document is electronic, analogue (paper) or hybrid; the preset value is analogue.
Some entries in this section are only displayed for some message types. For example, if it is an e-mail, the section also contains the whole Message body. For paper mail, the section lists the Posting number and Post office of posting.
If the document has been handed to you by a different user, the Document information section contains a prompt to take over the document. Only then you will be able to make any changes to it.
Attachments
An attachment file (or several attachments) can be now attached to the incoming document. For data messages, an attachment is mandatory. Go to section Attachments; the number in brackets after the title shows the number of already attached files.
There are several methods of attaching an attachment: the corresponding buttons are available in the upper part of the Attachments section.
Inserting an attachment from a document folder (DMS)
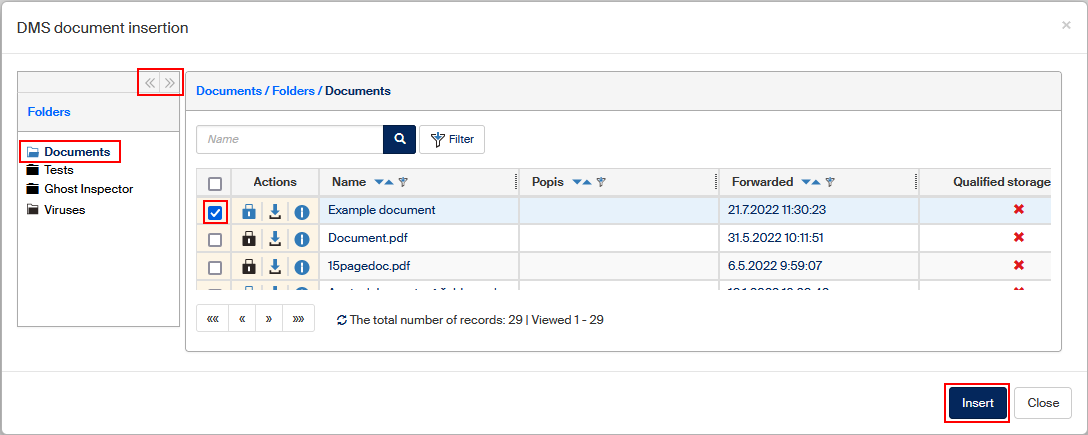
To load a document from a FormFlow document folder, click Insert from DMS. A modal window DMS document insertion is then displayed.

-
The left side displays the document folder structure. Select the required folder and click it. You can narrow down or minimize this part of the screen using the double arrow icons in its upper right corner.
-
On the right, look up the file(s) you want to insert in the form and check the boxes in the left-most column to select them.
-
Click Insert to place the selected files in the form.
The selected document might be already placed in another process. Then it depends on FormFlow settings whether you can insert the document in this process too. A query might be displayed to confirm placing the document.
Inserting an attachment from a storage medium (drive)
To attach a file from your computer drive or a similar storage medium (e.g. a memory stick, flash memory, etc.), click Insert from drive.

Use the file selection dialog to look up and insert the required file.
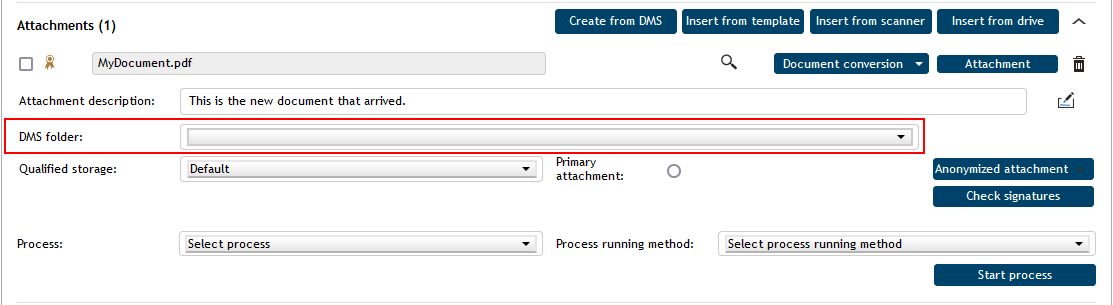
Once the file is uploaded to the form, you can choose to save it in a DMS folder – select it in option DMS folder.
Inserting an attachment by scanning a paper original
If you have a paper document to scan and attach in the form as a file, start by clicking Insert from scanner. You can also use this button to load image files, convert them to PDF and insert in the form.

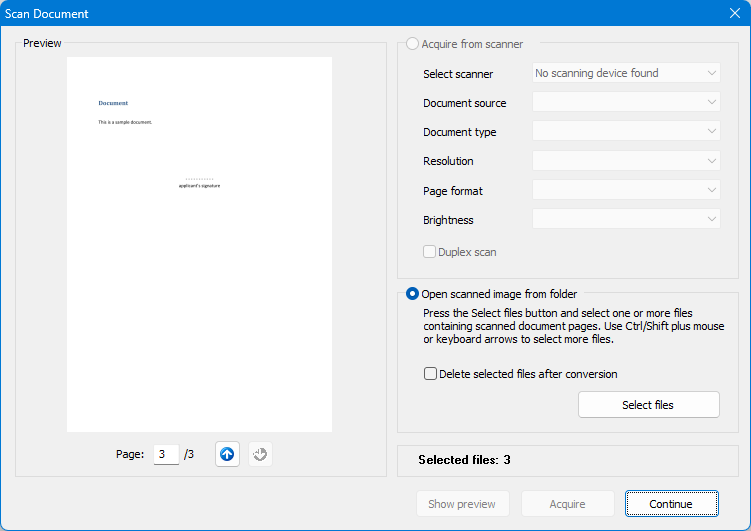
The button opens the Scan document screen where you will create a file from your original.
-
If you have a scanner at hand, you can use it directly to create a digital version of your paper document.
-
Switch the option on the right to Acquire from scanner.
-
Set or check the scanning parameters.
-
You can click Display preview to run a provisional scan and display it on the left.
-
Now adjust the parameters if needed and repeat the preview.
-
If everything is in order, click Scan to run the final scan. The scanned original will be attached to the form as a PDF file.
-
-
To create a PDF file from images (already scanned pages, photographs, etc.) saved on your computer drive, switch to option Open scanned image from folder.
Click Select files to look up the required file or files. The selected files will be combined in a single PDF document and inserted in the form as an attachment.
Inserting an attachment from a template
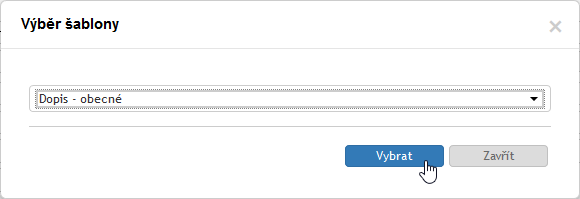
If you have templates ready for creating attachments automatically, click Insert from template.

Select a template from the list in dialog Template selection and click Select to confirm. The document will be generated automatically from details filled in the form.
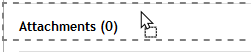
Inserting an attachment using drag and drop
You can directly drag and drop files from another application window to the Attachments section of the form. Drop them in the area marked by a dashed rectangle. You can insert more than one file at once.
Inserting more attachments
To insert more files, use the same buttons listed above (Create from DMS, Insert from drive, Insert from template, Insert from scanner) or use the drag and drop function.
Attachments exceeding the limit
There is a limit to the attachment size. If the received attachment is too large (exceeds the limit), it will be highlighted in yellow in the Incoming document form.

The framed text – "The inserted attachment is too large. Some form features will be limited" – warns, that features such as conversion to PDF, signing and conversion to paper will not be available for this attachment.
If the large attachment belongs to a data message, the Data message original frame is highlighted in yellow.
Displaying and deleting attachment files
To view the contents of an attached file, click the magnifying glass button.

A preview window is displayed next to the form with the file contents. The preview is read only.
| An attachment cannot be displayed if an antivirus check has not been run first or it has failed. |
To remove an attached file, click the trash bin icon (Remove attachment). A confirmation dialog is displayed and then the file is removed from the form. This action cannot be undone.

You can also download the attachment file from the form (e.g. to your computer drive). Click the Attachment button to download the file and save it to your Downloads folder.

If the file is in PDF format, its contents is also displayed in a browser window. You can use it to e.g. save the file where you need or print it.
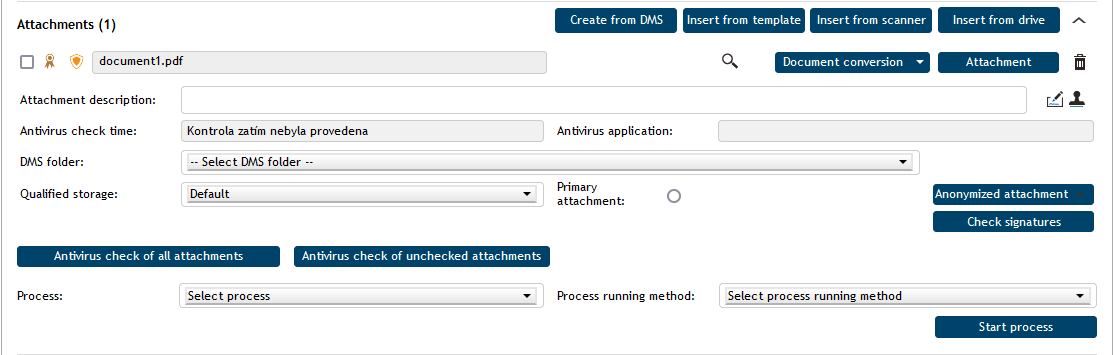
Antivirus attachment check and signature status
Before you start working with an uploaded attachment file, an antivirus check must be run on the document. Click one of the buttons Antivirus check of all attachments or Antivirus check of unchecked attachments.
| If you have your own antivirus method set up, the buttons and the indicator are not displayed. |

There are two icons displayed on the left of the filename, indicating the status of electronic signature check and antivirus check.
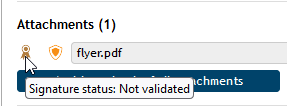
The signature status can be one of the following:
-
 a brown seal symbol indicates a file where signatures have not been checked yet. Start the check by clicking Validate signatures below in the expanded Attachments section.
 -
 a gray seal symbol indicates a file that does not contain any electronic signatures.
 -
 a green seal symbol indicates a file where electronic signatures have been checked, and they are valid.
 -
 a red seal symbol indicates a file with an invalid electronic signature.
If antivirus check is set up, an icon with the antivirus check status is also displayed on the left of the file name. If the antivirus check is disabled, the symbol is not displayed.
-
 an orange shield symbol indicates a file that has not been checked by antivirus yet. Click Antivirus check of all attachments or Antivirus check of unchecked attachments to request checking the file now.
 -
 a green shield symbol indicates a file that has been checked and is safe.
 -
 a red shield symbol indicates a file marked as infected by the antivirus check. You cannot handle such a file: its download and preview are disabled. The symbol is also used for unknown file formats.
The date and time when the last antivirus check was run is listed in field Antivirus check time.
Antivirus application specifies which antivirus program and what antivirus database was used for the check. Both fields are displayed in the expanded view only.
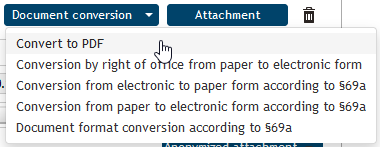
Converting attached files
There are several ways of converting attached files. They are available from the drop-down menu from the Document conversion button.

| The list of available conversion method varies and depends on your user settings (e.g. filled-in JIP/KAAS Login) set by the administrator. |
For more details on the conversion methods, see chapter Converting attached files.
More details on the attachment file
For the following operations, it is recommended to expand the Attachments section by clicking the arrow button (![]() ) on the right from Insert from drive.
) on the right from Insert from drive.

When the Attachment section is expanded, additional details are displayed for each attachment.
-
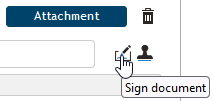
You can enter any text related to the attachment in the field Attachment description.
-
Use the buttons on the right from Attachment description to digitally sign a PDF attachment or provide it with a time stamp. The documents must be checked by the antivirus first; they cannot be signed before the check is run and a warning dialog is displayed instead.
You can find more details on document signing in chapter Signing.
-
The option DMS folder can be used to select a folder in the document section of FormFlow where to save the incoming document. Select a folder and confirm the selection. FormFlow will then display the same document insertion screen as when inserting a document directly in the DMS section. If you view this document later in DMS, the Relations section will display the process containing the document.
-
Use the field Qualified storage to change long-term document preservation settings.
Signature validation
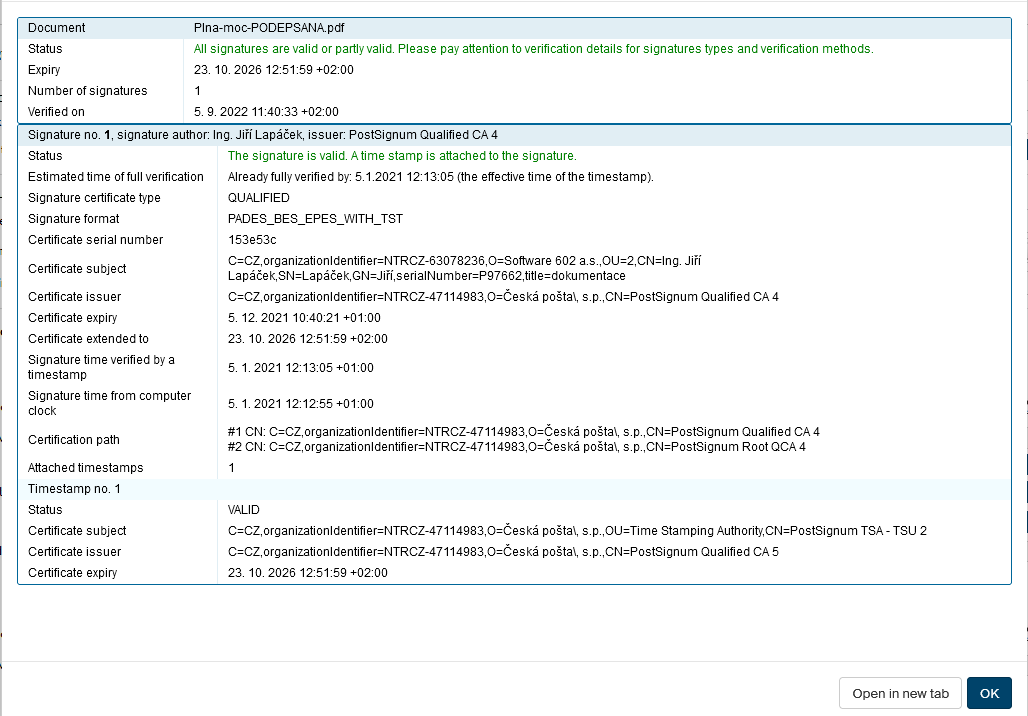
If the file is digitally signed, you can click Validate signatures to request validation of all signatures in the file. A browser window is displayed, listing the signatures including descriptions on their issuer and validity. A simple validation status is also displayed directly in the form.

To open a separate window with a detailed validation result, click Validation result. You can click Revalidate signatures to run the validation again. For more details, see chapter Signature validation result.
If there is more than one document in the incoming form, you can click Signature check for all documents next to the antivirus check buttons to validate all signatures at once.
Attachment anonymization
Attachment redaction (anonymization) means creating a version with personal details unreadable, which is suitable for publication. Note that this function does not change the attachment itself. A separate file is created instead and stored outside the Incoming document form.
Document attachment anonymization using the Signer application
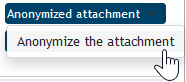
This method creates a redacted version from a file attached to a document. Click the right part of the Anonymized attachment button to open a menu; at the start, it only contains one entry, Anonymize attachment.
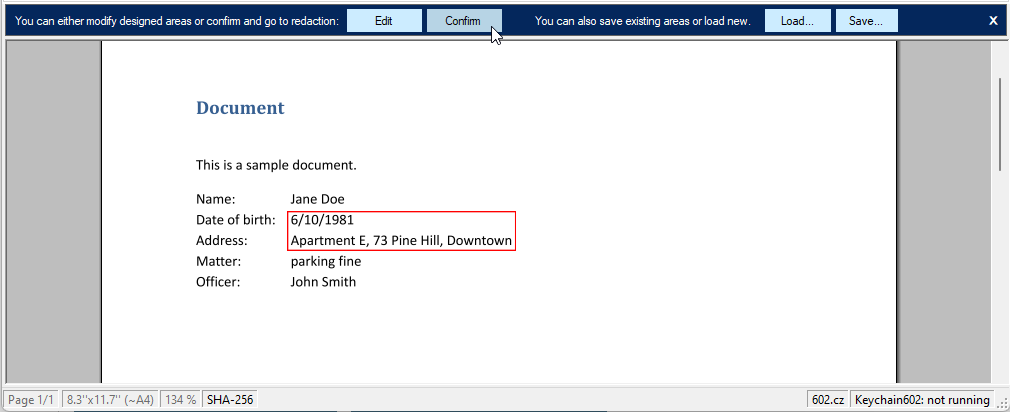
Select the entry to open a Signer window ready for document redaction. Note the warning dialog – all signatures and time stamps will be removed from the redacted document. After a confirmation dialog, drag the mouse cursor to select the area to redact (make unreadable). Then click Confirm in the toolbar on top of the document screen.
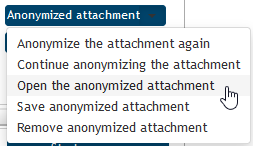
You will be returned to the Incoming document form window. Click the right part of the Anonymized attachment button to open the menu – now it contains five entries.
-
Option Anonymize the attachment again removes the selection of redacted areas and returns the document to its original status at the start of the process – when you clicked the Anonymize attachment button for the first time.
-
Option Continue anonymizing the attachment opens the Signer window again with all already redacted areas displayed, and you can select new ones to add.
-
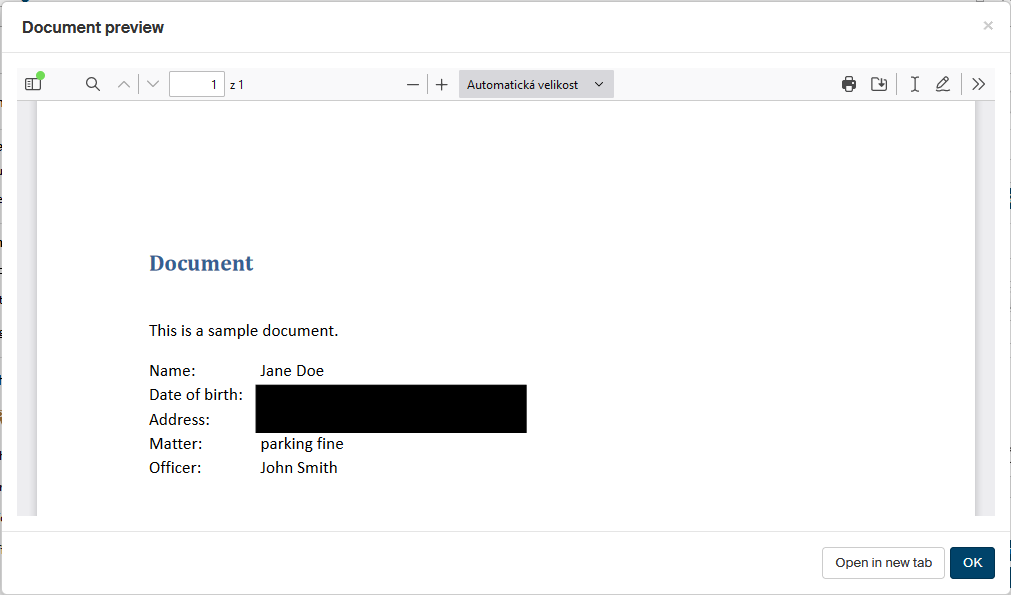
Option Open the anonymized attachment opens the redacted document in a preview window. Redacted areas are displayed in black.
-
Option Save anonymized attachment displays a dialog with options to open or save the redacted attachment as a file. The file is given the original file name with the text redacted_ added to the beginning and saved in the download folder.
-
Option Remove anonymized attachment – cancels all redaction changes.
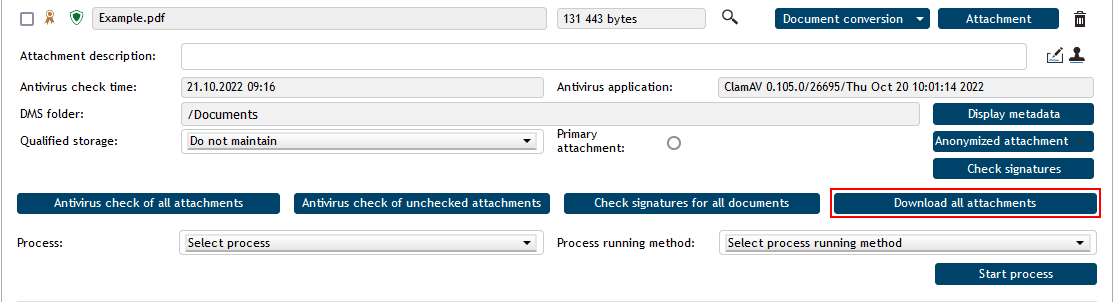
Downloading all attachments
If the incoming document has two or more attachments, you can download them all on your computer drive at once. Click Download all attachments to create an archive ZIP file from all the attachments. Then the system will offer you the file for download.
Running processes
To further process incoming attachments, you can use processes preset by the administrator and run them directly on the selected attachments. If a document is attached to an incoming message, such a process will create the corresponding new form and attach the document to it.
Before running a process, check the boxes for the attachments you want to include in the process. Use the Process option to select which process to run on the document or documents.
Then select the process type from the list. Use the option Process start method to select whether to run a single process for all the selected files or a separate one for each of the files.
Click Start process to confirm your choices. You will be notified of creating the process, the system will automatically create the form and prefill the attachment, Subject and the details on creating a document. You can find the process in section Processes – To Be Processed by Me.

If the message comes from a data mailbox or e-mail, the original form contains a separate section for Data message original or Message original. This section can be handled similarly to other attachments (LTA, insertion in the DMS section, download with the Attachment button) and there is also the button Print DM envelope available to print out the data message details. If you check the data message original along with the standard attachment when creating a process, the new process will include this attachment too.

Additional information
The Additional information section contains details that do not relate directly to addresses and attachments.
-
Category – select the category to fill in preset values to Processing period and several entries in section Document processing: File plan class, Retention policy and Processing method. These fields are described in chapter Document processing.
-
Processing deadline – time in which the Incoming document should be processed. The value can be preset from the selected category or added manually – in such case enter the numerical value as well as the time unit (days or hours). If the period expires and the document is not processed, the system may, based on its settings, send an e-mail reminder to a selected person.
-
Labels – each document can have one or more labels, which can be used when filtering documents in the document list. Click
 to display the label selection field; you can select more than one label at the same time. To remove already assigned buttons, use the same button.
 -
Number of physical pages of the document, Number of physical pages of attachments, Number of paper attachment volumes and Number of non-paper attachment volumes are fields that take note of attachment sizes.

Two additional buttons may be displayed in this section based on the document properties:
-
Related documents – the button is only displayed if there are other documents related to this one (e.g. documents created as a follow-up process, document copies, etc.) or if the document has been placed in a record. Click the button to display the list of these documents or records.
-
Display record – the button is only displayed if the document is placed in a record. Click the button to display the form for the record containing the document.
Document comments
Every user can add their own note for the document in the Comments section and, if they choose, attach an attachment or more to the comment.

In the default state, before any comments are added, the section might be displayed “collapsed”. To insert the first comment, click the ![]() button on the right to expand the section.
button on the right to expand the section.

You can use the same button later to collapse the section again.

-
New comment – input field where you can enter the comment text.
-
Insert attachments to comment – click the button to display a file selection dialog and look up the attachment file on your computer drive. You can also use the mouse to drag & drop files from your file manager to the comment section.
-
Attachment – opens a dialog where you can load the attachment in the browser or save in a file.
-
 Remove attachment – removes the attachment from the comment.

To attach more than one file, repeat the procedure. Click Save comments to save the comment contents in the form. If you do not save the comments and close the form window, the comments will not be present the next time you open the form.
Document processing
The Document processing section contains the details related to the procedure of processing the document. The document creation date and who created it (Created by) are read-only details. The person processing the document (Processed by) is also transferred from the document properties and cannot be changed directly, only by handing the document over to someone else.
The section is displayed collapsed by default – click the arrow button in the upper right corner of the section to display all its contents.

The option Select file plan class / File plan class has an autocomplete function – type at least 3 characters to look up the file plan class, the form then displays the matching options for you to select. Or press the space key three times to display all file plan classes. To display the last ten file plan classes used, enter three asterisks (*).
For clarity, the autocomplete list includes file plan names marked with the ![]() symbol. You cannot select these names. File plan classes are displayed in a tree structure based on their level and with an arrow icon
symbol. You cannot select these names. File plan classes are displayed in a tree structure based on their level and with an arrow icon  .
.

To change your selection later, click ![]() .
.
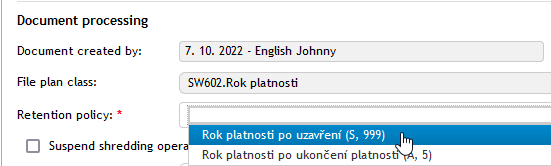
If the File plan class has only one Retention policy assigned, it is prefilled automatically based on the class; if there is more than one, select the corresponding policy from the list. The retention policy specifies how to deal with the document in the future: whether it will be shredded or archived.
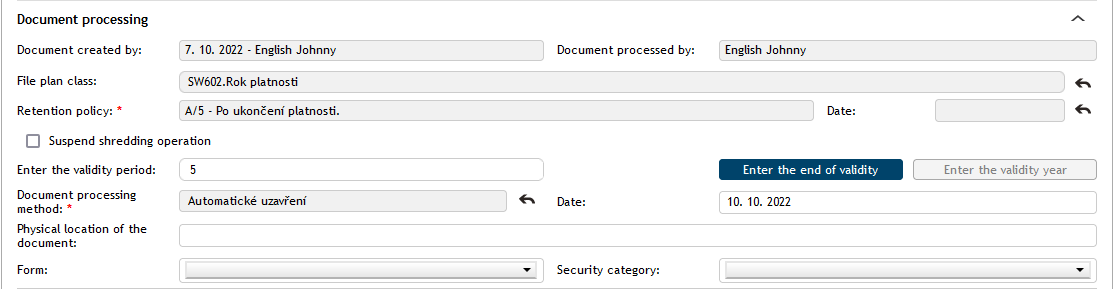
The Retention policy includes a Retention code (A – archive, S – shred, V – undecided) and the Retention trigger, which is the moment from which the retention period is calculated. Based on the retention trigger, enter one of the following:
-
User-defined date – enter the Date.
-
After the end of validity – enter the Validity date or Enter validity year, placed below. You can switch between these two methods of entering the validity end using the buttons Enter validity date and Enter validity year.
-
After the document is finished – in this case there is no need to enter any dates, the retention period starts when the document is finished/processed.
You can edit both the File plan class and the Retention policy later by clicking ![]() .
.
-
Suspend the shredding operation – if this field is checked, this document nor the record that contains it will be placed in a shredding procedure. When such a form is reopened, a note on shredding operation suspension and the date is displayed. It is also possible to filter such documents.
-
Document processing method – specifies how this document is processed. Select the processing method from a list of preset options. To change your selection later, click
 .
. -
Physical document location – for documents or attachments that have physical parts, you can enter a text description of their location (e.g. Archive A11, row 7, shelf 44, position 2019/772).
-
Form – specifies what form of the document is stored here: e.g. original, copy, summary, etc.
-
Security category – organization’s security category assigned to the document.
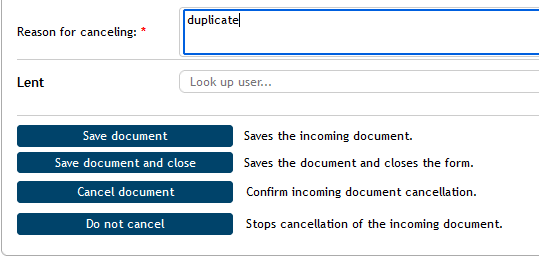
Lending a document
The Lent section allows you to look up a user to lend them the document for a specific time interval. You can enter the first three characters of the name, then the autocomplete function will list matching users.

When a user is selected, the form will display the fields Lent from, Lent until and Returned. Enter the lending time interval in the first two fields, then enter the return date in the third when the document is actually returned. All lendings are saved in the document history.

The Lent section stays visible even if the previous section – Document processing – is collapsed.
Handing over and assigning incoming documents
An incoming document can be viewed as a task that needs to be processed and finished in one of the prescribed methods. There is always one person responsible for the document who confirms (with their signature, if using signatures is enabled), that the document has been processed as the organization’s standards require.
-
You can hand a document over to another person. The recipient must confirm the handover.
-
Another option is to assign the document; in such a case the change is valid immediately, the recipient does not need to confirm it and cannot reject the document. Only users with the corresponding permission granted by the Administrator are authorized to assign documents directly (and have the corresponding button displayed in the form).
To hand over or assign a document for another user to process, click the Hand over tab in the form header.
First select the username of the person who will receive the document in the field Hand over to user. Type the first three characters of the name, the autocomplete then starts to suggest names; add more characters to refine the search.

Click Hand over to user or Assign to user to confirm your selection. The selected user will be informed and if it was a handover, they will need to confirm it. Then they take over the responsibility to process the document. If the user rejects the takeover, the document will be returned to you for processing and the rejection reason will be displayed in the form.
If the document has been assigned, the change takes place immediately.
| Handing the document over means you give up all responsibility for its processing permanently. If you want to present the document to another user for additions, comments, etc. and then continue processing it yourself, use the workflow in section Path, as described in chapter Document path. |
The handover and assigning procedure is analogous to outgoing documents and is described in chapter Handing over and assigning outgoing documents.
Inserting an incoming document in a record
When a document has at least the UID assigned (see chapter UID and Reference number), it can be placed in a record. The tab Insert into record with the corresponding controls is located in the form header.
The tab Insert into record consists of the Look up record field in the upper part, where you can locate existing records, and a button to create a new record, placed below.
To create a new record, click Create new record. Confirm your choice and FormFlow will create a new record and place this document in the new record. You can then find the new record on the Records management tab in section Records, with a name matching the document name (you can change the name later).

To place the document in an existing record, use the field Look up record with autocomplete that will help you find the record based on its name, file number or managed entity name. You can check My records only to narrow down the selection.
When you look up the record and confirm your selection, the record details (File number, Name, Entity) are displayed along with a pair of buttons:
-
Display selected record – displays the record in a modal window where you can view or edit it as usual.
-
Insert into record – places the document in the selected record.

When the document is placed in a record, the Additional details section will display the button Display record. The button to Create new record will be still available in this section.
Placing an incoming document in a record is analogous to placing an outgoing document in a record and is described in chapter Inserting an outgoing document in a record.
Document path
Although there is only one person responsible for processing the document at any point in time, more users can participate in the processing during the document’s lifecycle. Set up a document workflow to present the document for statement to a list of selected people.
Click the Path tab in the upper part of the form. A table is displayed where you can set up the document workflow.
Every table row corresponds to one user. Select who will receive the form for statement in the User column: enter the name or a part of it in the field and select the user from the list. You can enter text in the Comment column; it will be displayed to the user.

You can set up the document this way to be presented to more than one person. Use the + buttons to add as many list entries as you need and select more users to receive the document in turn. You can click – to remove any rows you do not need.

When the workflow is set up, click Start workflow to submit the document to the first user on the list. The document will be displayed in their folder To Be Processed by Me, and they will be able to edit it: add some details or notes, attach a comment, etc. Then the user clicks the button Forward to next, placed in the upper right corner of the window, to submit the document to the next person on the list. If a user who is part of the workflow finds there is something lacking in the document, they can return it to the person who processed it before them. Use the button Return to previous to return the document. They cannot change the workflow any other way.
There are icons on the left of usernames on the list indicating the workflow progress: user marked ![]() has already given their statement, user marked
has already given their statement, user marked ![]() has it on their desk right now.
has it on their desk right now.

When the document receives statements from all people on the list, it will return to the user processing it.
The processor cannot edit the form during the workflow. The only option they have is to click Take over the form to stop the workflow and return the document to their desk. Then they can continue processing it or, if needed, change the workflow, or create a new one.
Document copy
Sometimes it might be useful to create a document copy: a new document with its own reference number but the contents identical to an existing document. You can use the section Document copy to create one. Click the tab of the same name to display the section.
Enter a part of the name of the user who will be the new document author (processor) in the field Users and select the person from the list. You can click + to add more rows and create more copies at the same time.
Then click Copy to create a document copy (or copies); they will be displayed to the selected Records management users in section To Be Processed by Me.

Document processing
Processing a document means completing and finishing the whole form. The processing method depends on the document contents – some messages only need to be acknowledged, some pass through an approval process or are processed by a signature of the person responsible.
The person responsible for the processing is always the user listed in field Processed by. This person is the only one authorized to mark the document as processed and therefore to take responsibility for the document correctness and for completing all requirements. To leave the document processing to someone else, hand the document over to them.

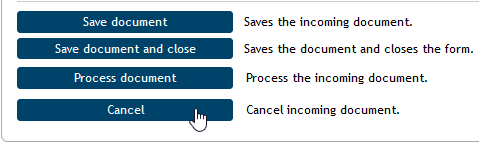
If the document meets all requirements, click the button Process document placed at the end of the form. If the form requires an electronic signature, attach it in the following dialog. Then the document is marked as processed.
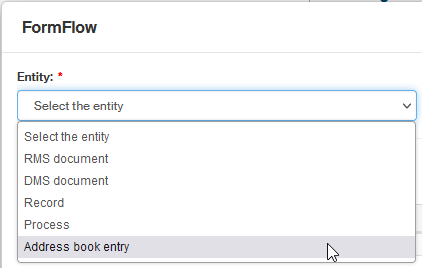
Incoming document relations
Relations are used to specify how a document is related to processes, records and address book contacts – e.g. superiority and subordination, connections, importance, etc.
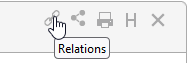
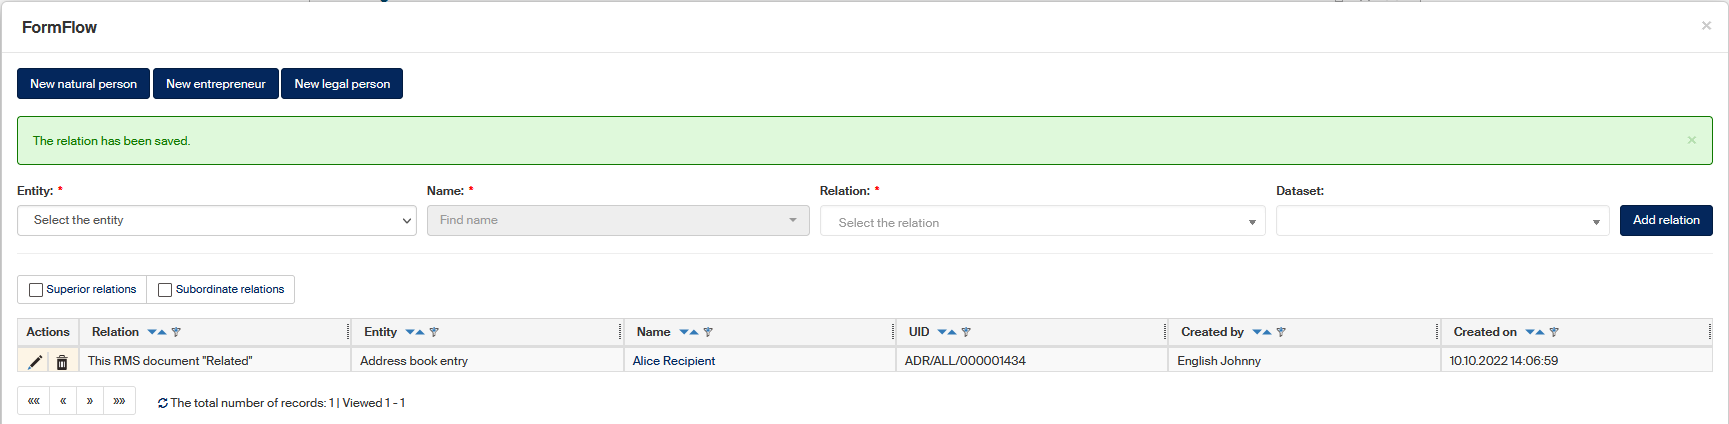
Click Relations to open the window to create and edit relations. It is placed in the upper right corner of the Incoming document window.

Use the Entity option to select the entity, meaning the type of entry to connect: it can be a document from the DMS section, records management document, record or process, or an address book contact.
Enter at least the first three characters in the Name field and click the magnifying glass icon. A list of matching items is displayed. Click on an entry to select and confirm it.
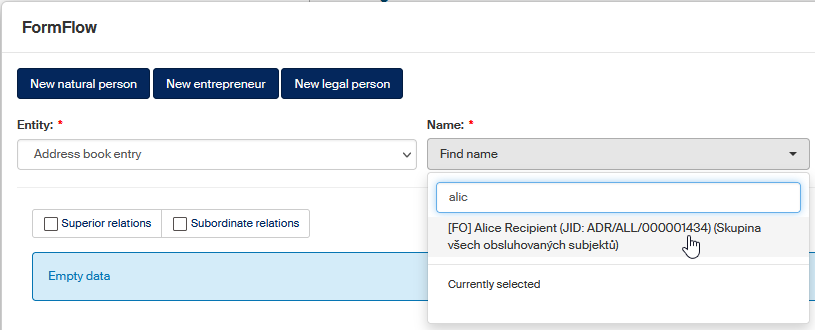
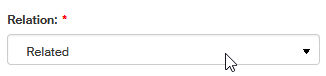
Note the three buttons New natural person, New entrepreneur and New legal person. It is displayed when you select the option Address book contact and allows you to create a new contact if needed and save it in the Address book. Then select the relation type (e.g. subordinate, superior, etc.) in the Relation field.
Click Add relation to confirm your selection. You will be notified about the successfully added relation by a message The relation has been saved. Relation details are displayed in the window as a table. There are two buttons available in the Actions column for each entry:
-
Edit – displays the Edit relation window, where you can add or edit details for the relation.
-
Delete – deletes the whole relation entry.
You can filter the list of relations in the table to display the superior relations only (check Superior relations on the left above the table) or the subordinate relations only (check Subordinate relations).
More document options
Save
If you make any changes in the document, click the Save document button in the lower part of the form to save the changes. The changes are then transferred to the Electronic records management server.
Cancel
If the document has been created by mistake (e.g. unintended duplicate) and there is no need to process it, you can cancel the document. The document will still be registered in the Electronic records management with a note of the cancellation.
To cancel a document, click Cancel in the lower part of the form. The field Reason for canceling is displayed in the form, where you can enter why you are canceling the form. Confirm your decision by clicking Cancel the document. If the form requires confirmation by an electronic signature, a signature selection dialogue is displayed first, and then the document is canceled.
Reply
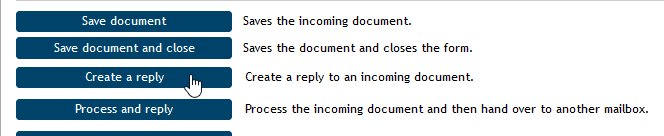
There are additional buttons displayed for documents delivered by a data mailbox or e-mail to create a reply easily.
Click Create reply to create a new outgoing document based on the details from this incoming document. Creating a reply does not change the original document. If you click Process and reply, the standard document processing steps take place first, including an electronic signature if required. Only then a new outgoing message is created from the document’s details.
Forwarding to another data mailbox
If the document is coming from a data mailbox, there are two more buttons available for forwarding the message, for example for situations when a message has been delivered to a wrong recipient by mistake. The option Forward to another DM creates a new outgoing document from the details of this document, where you will need to enter the recipient and submit the message. The other option, Forward to another DM and process, creates an outgoing message and at the same time runs the steps for processing this document.
Processed document options
You can view processed and finished documents.
Sometimes you might need to edit a document even after it was finished. In such cases the processor can remove their electronic signature by clicking Reopen. The document then returns among the documents in progress, and you will find it on the PROCESSES tab, under the button To Be Processed by Me.
Incoming messages from Slovak data mailboxes
If the electronic records management is set up for receiving electronic messages from UPVS (Ústredný portál verejnej správy), you will find them among incoming documents as a separate form type. Most of the fields, identification details and controls are identical to other incoming documents. This chapter describes their two differences: the link to the data message form and attachments.
| The forms used for handling Slovak data messages are only available in the Slovak language. |
UPVS form
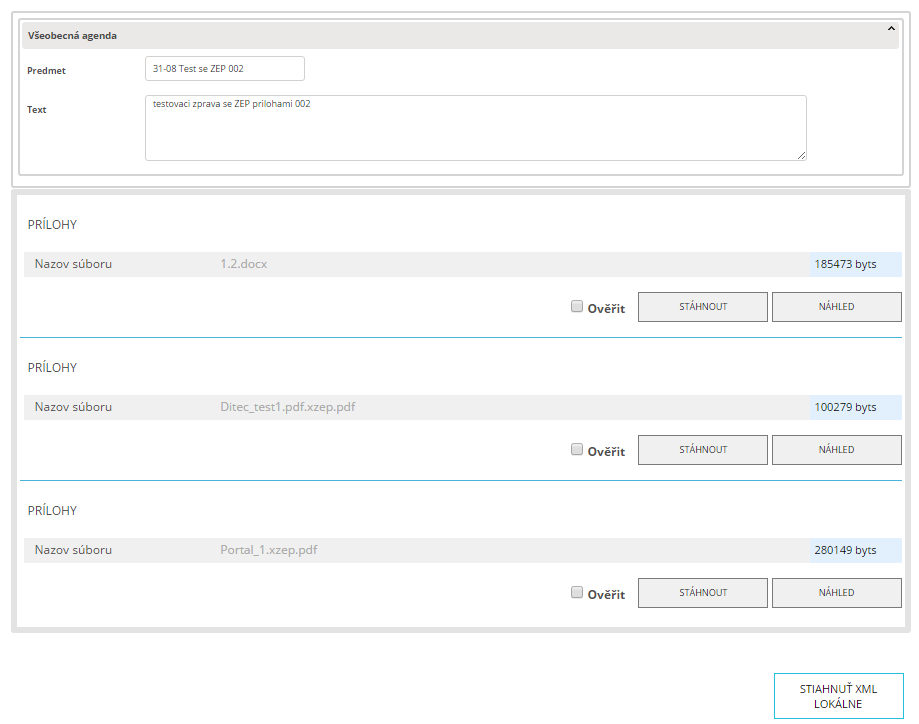
An incoming document from the Slovak data mailboxes contains the section Formulár UPVS (UPVS form). The section displays the document type as recognized by the Slovak data mailbox system, and the button Otvoriť formulár UPVS (Open UPVS form).

Click Otvoriť formulár UPVS to display the data message details. They can vary based on the data message type, but usually contain the message subject and body and a list of attachments that you can view here or download on your computer drive. Click Stiahnuť XML lokálne (Download XML locally) to save the text parts of the messages on your drive.
Attachments
You can handle the electronic message attachments directly in the incoming message form. If they are not signed, they are saved here directly, like in other forms, and you can view them or download to your computer drive or convert to PDF and save separately in one of the Electronic records management folders.

Handling signed attachments is slightly different, because signed attachments of Slovak data messages are signed in a special format, ZEP. To handle them, the Electronic records management converts them automatically to their original format before they were inserted in the electronic message. Click Attachment to get the converted file in a format you can view, but without the electronic signature attached by the electronic mailbox.
Details of this converted file and the signed ZEP file are available in the detail of the Prílohy (Attachments) section you can expand by clicking ![]() . Each attachment lists the details for the converted (viewable) file version first. You can click Príloha (Attachment) to download the file on your computer drive. Or use the button Konvertovať do PDF (Convert to PDF) to convert files of other formats to PDF; select a records management folder in the next field and the resulting file will be saved there. Following are details of any signatures in the original file. You can click Znovu overiť podpisy (Revalidate signatures) to refresh the details. To view detailed signature data, click Výsledok overenia (Validation result).
. Each attachment lists the details for the converted (viewable) file version first. You can click Príloha (Attachment) to download the file on your computer drive. Or use the button Konvertovať do PDF (Convert to PDF) to convert files of other formats to PDF; select a records management folder in the next field and the resulting file will be saved there. Following are details of any signatures in the original file. You can click Znovu overiť podpisy (Revalidate signatures) to refresh the details. To view detailed signature data, click Výsledok overenia (Validation result).
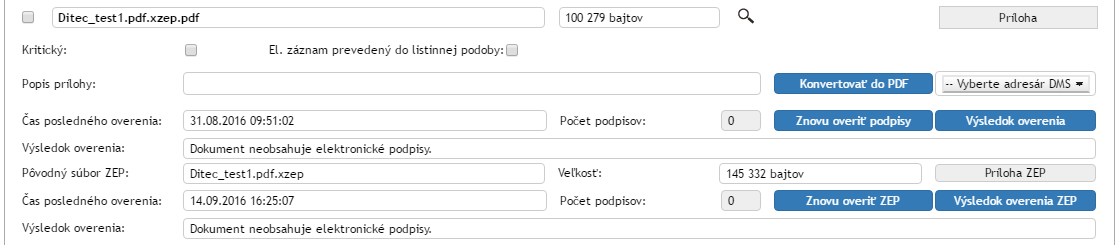
The next section are details of the ZEP file, that is, the attachment as it is stored in the data message. Click ZEP attachment to download the file on your computer drive. The basic validation details follow. You can request new validation by clicking Znovu overiť ZEP (Revalidate ZEP) and then click Výsledok overenia ZIP (ZEP validation result) to display the details.