Hybrid mail
Hybrid mail allows sending a document by traditional mail in paper form without the sender having to physically carry a printed letter in an addressed envelope to be sent. The outgoing document is created as any other outgoing document. Then it is sent to the data mailbox of the Czech Post. They receive the document, print out the attachments, insert them in an addressed envelope and send the letter physically to the recipient. All summed up, this method can be simpler and cheaper than the sender having to do all the preparation tasks manually.
To use hybrid mail, you need to sign a contract with the Czech Post first, and receive access details from them. An Administrator then enters the details in the corresponding section in entity settings.
Creating a document to send by hybrid mail
Creating a document to send by hybrid mail starts with the same steps as in previous chapters. Open the Outgoing document window by going to .
Basic settings
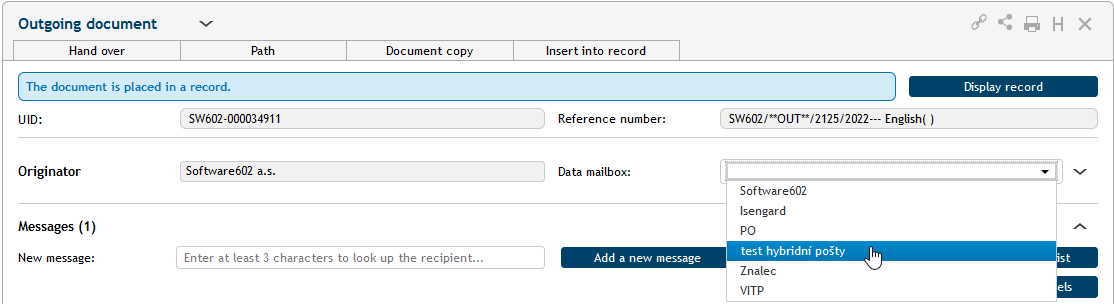
Select the Originator and assign the UID and Reference number. Now you need to select the correct data mailbox in the Data mailbox option. Select the data mailbox registered with the Czech Post for hybrid mail.
Recipient addresses
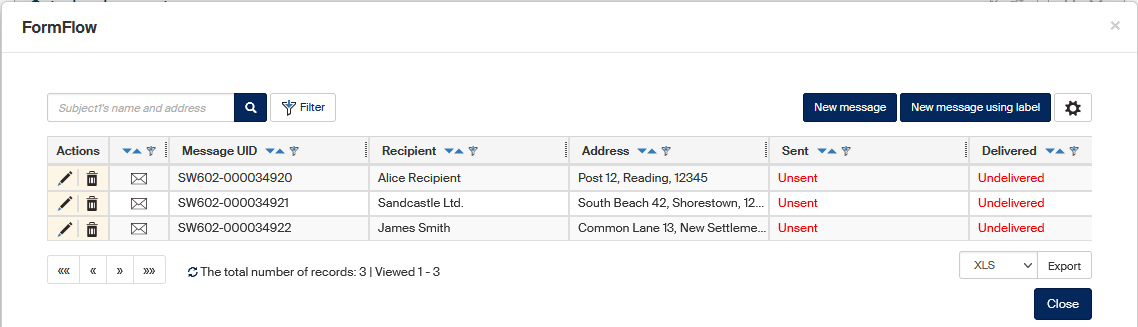
Enter one or more recipients for the messages. You need to select an address suitable for traditional paper mail (with the envelope icon).
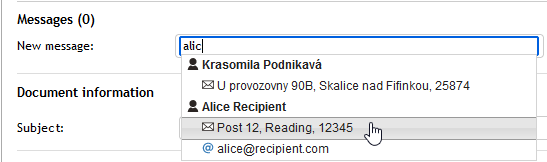
When looking up the address directly, you can use the autocomplete function – enter three or more characters from a part the address (name, surname, city, street, etc.) in the New message field. Select the correct address from the displayed list.

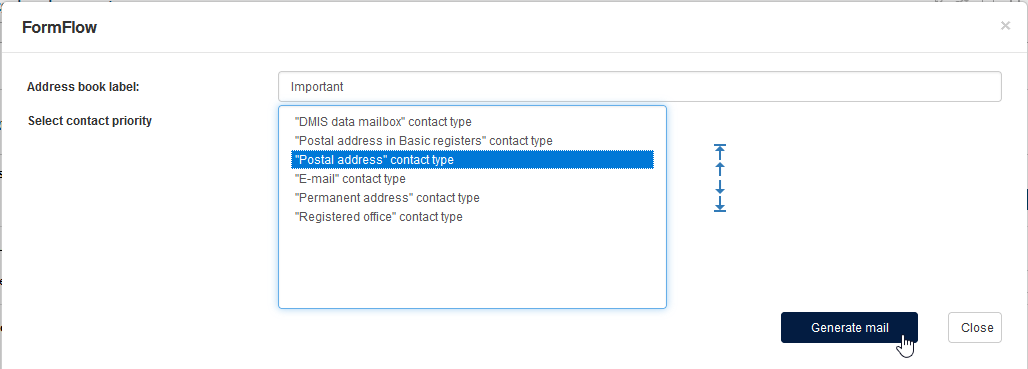
Another option is to select the recipient with the New message using label button. This way you can make use of labels entered in the Address book. Click the button to open a window with the Address book label field and select the label with the help of autocomplete. For example, if you enter “im”, the labels Important or Important client can be displayed. When you have selected the label, use the Select contact priority option to select the contact type the label applies to (e.g. Residence or Delivery address).
Click Generate mail to look up all addresses matching the criteria and insert them in the Outgoing document form in section Messages. Now you can click Remove message in the Actions column to delete unwanted entries or the combine the selection with other selection options.
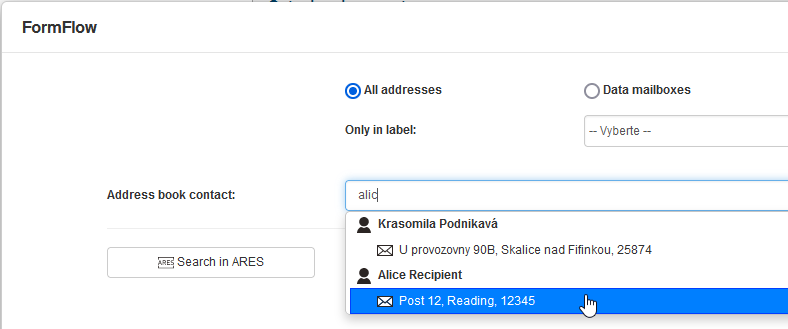
The third option of specifying the address is using the button Add a new message. Use it to look up and insert a contact address from the Address book and edit it if needed,

Use the switches in the upper part of the window to narrow down the address type – instead of looking up all addresses, you can choose to search in data mailboxes only, or traditional addresses, or e-mail addresses only.
Now you can enter the first few characters of a part of the address for the searched contact in the Address book contact field. For example if you enter the characters “wol”, you will look up any contacts named Wolf. Click to select your chosen contact. A message details screen is displayed (see chapter Selecting the hybrid mail service).
If the sender is not placed in the address book yet, click one of the buttons Natural person, Entrepreneur or Legal person. The Address book window opens, and you can insert the contact details there. When you save the entry, it will be available for lookup in the Address book contact field.
If you have set up a large number of messages, you can click Complete message list to list them in a separate window. You can also edit them here, delete, or add more.
Requesting authorized conversion of an attachment
When sending mail with the Bulk conversion mail service, you need to select which of the attached attachment to convert with a validation clause. Check Authorized conversion for Bulk conversion mail for the attachments to be converted. If the checkbox is not displayed, expand this part of the form by clicking the arrow button on the right from Insert from drive.

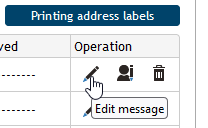
Selecting the hybrid mail service
The hybrid mail offers more than one service. In the Actions column, click Edit message.
A window with the message detail is displayed. The first part contains an option where you can request hybrid mail services. The following options are available:
-
Without hybrid mail – the hybrid mail service will not be used to deliver this message.
-
Letter Online – the message will be delivered by hybrid mail using the Letter Online service in economy mode.
-
Letter Online + checked Priority mode – the message will be delivered by hybrid mail using the Letter Online service in priority mode, which means that it will be printed out, packaged and sent on the same day you have submitted it to the Czech Post data mailbox.
-
Bulk conversion mail – the message will be delivered by hybrid mail using the Bulk conversion mail service. If a PDF document signed by a qualified certificate is included in the message, a conversion clause will be printed out with the document to certify that the document has been printed out from a file signed by a valid qualified certificate. You can choose the Priority mode for this service as well.
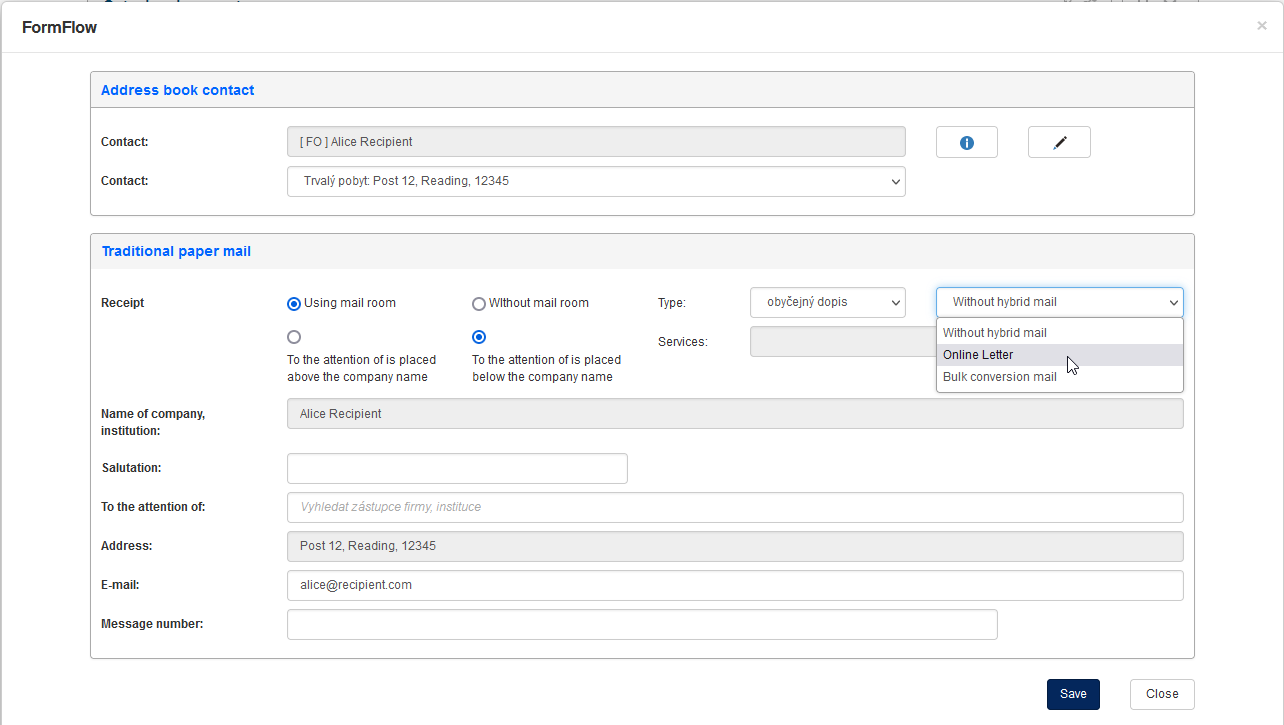
For bulk conversion mail, you can choose the envelope to be used for the attachments. Use the option C4 envelope to select one of the two options (a C4 size envelope is such that can contain an A4 sheet without folding):
-
Use a C4 envelope based on the number of sheets – if the number of sheets is 1–15, a C5 size envelope will be used; between 16 and 99 sheets, a C4 size envelope will be used.
-
Always use a C4 envelope – a C4 size envelope will be used for any number of sheets (up to 99).
Select one-sided or duplex printing in the field Print type.
You can also request sending a paper mail as registered mail or with a certificate of receipt. To use this option, set the Type to Registered letter (Letter with a receipt) and only then select the hybrid mail service.
Process status information
Note the blue Information button. You can click it to open the process status information.
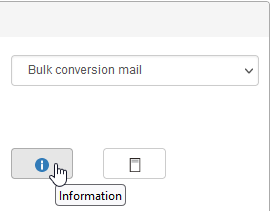
There is no data available yet at this point because the message has not been sent yet. When the message is submitted to the Czech Post data mailbox, this window will automatically (without the need for interaction from the sender) display details on the status of its processing, conversion, etc. (also sent using the data mailbox system). They are the details displayed on the certificate of delivery.

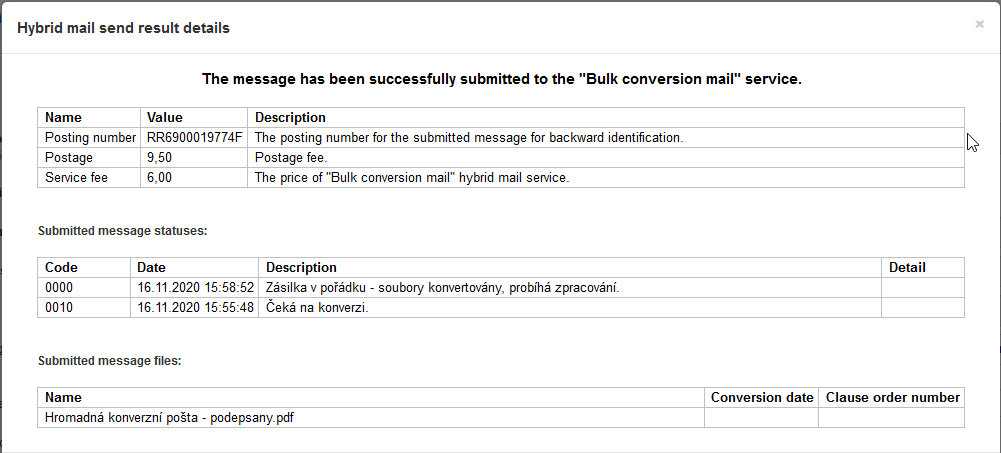
The following image shows an example of these details for a message sent by the Bulk conversion mail during its processing, when the message is waiting for the PDF file to be converted to paper.
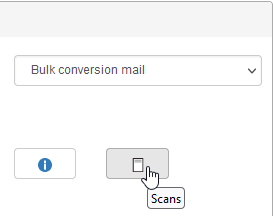
After the conversion, the window displayed by the Scans button displays a scanned certificate of delivery to verify that the message has been sent.
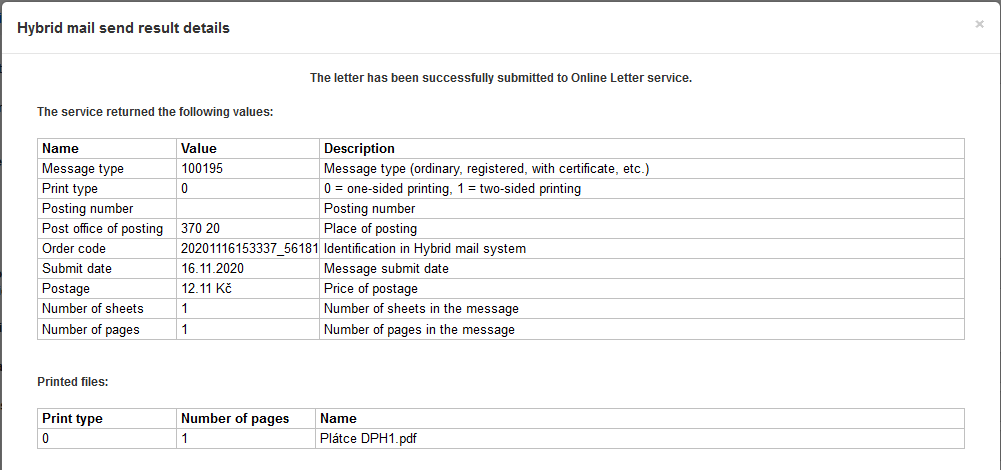
The information window for a message sent using Letter Online is slightly different – see the next image.
When you set up all parameters in the message detail dialog, click Save. You will return to the Outgoing document window.
Attachment format restrictions
When sending a message using Letter Online or Bulk conversion mail, make sure the attachment is in PDF format, A4 size and in portrait orientation. Otherwise, the message will be rejected.
A rejected message is marked in the Outgoing document form by a yellow background in the recipient field with a red warning triangle.

Click Edit message in the Actions column to open the information window; the reason for message rejection is displayed below – the example shows a message where the attachment file is not in A4 portrait format.

In this case you can still remove the file from the message and replace with one in a correct format. Note that this is only possible before the message is submitted. You cannot manipulate the files after submitting the message. If you did and the messages to be submitted by electronic mail had already been sent, the other messages would contain a different file.
Submitting the message
Enter the usual mandatory details (File plan class, Processing method …) to the message with attachments and submit it. After you confirm the submission, the message entry is available in the ERMS documents window.
| Messages are not sent immediately, but in a set interval, for example every thirty minutes. This interval is set by users with administration permissions. They can also speed up the sending using a one-time send event. Otherwise, you need to wait for the sending interval to complete. |
If you go to the Actions column, click Edit message and in the following window click Information, you will be notified that the message does not exist, along with a corresponding error code. This means that your data message has been submitted, but no response has arrived yet from the Czech Post.

Now request loading a response message. As with sending, reading new messages also runs in set intervals. An administrator can speed it up with a one-time event as well.
List of error codes that can appear in the message detail:
| Code | Error |
|---|---|
0 |
Access is allowed using HTTPS protocol only |
-1 |
The user variable does not exist or is empty |
-2 |
The password variable does not exist or is empty |
-3 |
The dmID variable does not exist or is empty |
-4 |
Incorrect username, password or branch |
-5 |
The message with dmID does not exist |
-6 |
Error reading the data message |
-7 |
The message with dmID exists, a scan is not available |
This is an example what can message information look like when the response from the Czech Post is loaded. The following image shows an example of these details for a message already processed and sent by the Bulk conversion mail – the attachment specifications, processing description, postage and the service fee. The lower part of the window shows a date of conversion to paper form and the validation clause identification number verifying the conversion for a PDF document signed with a qualified certificate.

The posting number is a number you can use to look up the message. The entry is also transferred to the Message number field in the message detail window. You can use the Message tracking button on the right of the field to track the message from the sender to the recipient.