Requesting a signature certificate for server signing
This chapter describes how to request a digital certificate for server signing and how to receive the certificate when it is processed.
Creating and submitting a certificate request
By default, you do not have any server signing certificates available. Click the cogwheel button in the FormFlow page header (Preferences) to open the settings tab. Click Signature certificates to open a menu and select Requests.
If the button is not displayed, ask the Administrator to grant you the corresponding permissions.

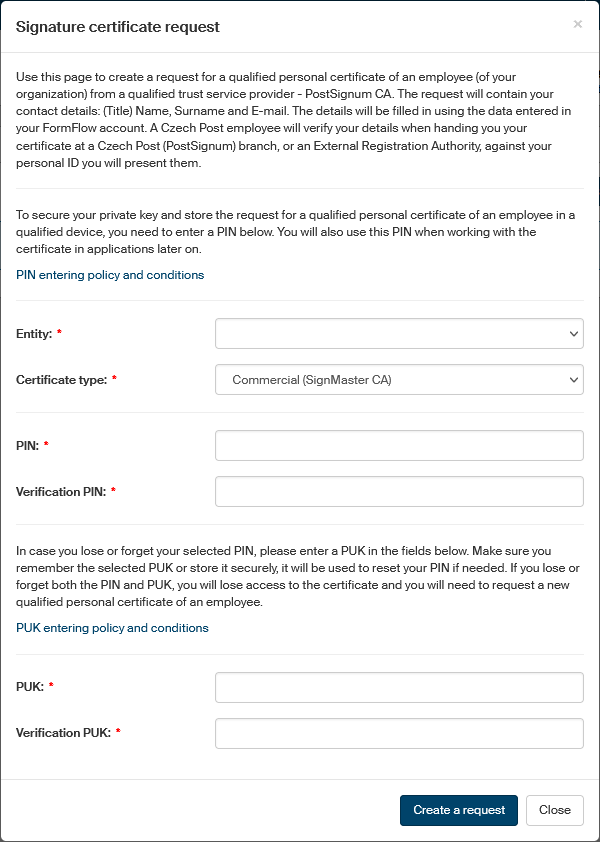
The window List of certificate requests is displayed. If you have not requested any certificates yet, it is empty. Click Signature certificate request. The signature certificate request form is displayed.
The request is for issuing a qualified personal certificate of an employee (of your organization) from a qualified trust service provider – in this case, PostSignum CA and SignMaster.
The request procedure and processing are the same for both certification authorities.
| The request needs your e-mail address to be filled in. Make sure the E-mail is specified in your settings in section Contact details. |
-
The certificate is only issued for registered entities – select one option from the list in field Entity. This field is mandatory. If the list is empty, contact your administrator.
-
In option Certificate type, select whether you are requesting a Commercial certificate from Sign Master CA or Qualified PostSignum certificate.
If you are authorized to only use one of the signing methods, the value will be preset and the field read-only. If you have both signing methods available, the Commercial SignMaster CA option will be preset. -
The following fields are PIN and Verification PIN. Enter the PIN code (Personal Identification Number) you will use to access the certificate in applications in these two fields. The code will be used to secure your private key and store your request for a qualified personal certificate of an employee on a qualified device. The PIN code must contain at least five characters, and they must not be all identical.
-
As a safeguard in case you forget your PIN code, enter another code, called PUK, in the fields PUK and Verification PUK. Make sure you remember your PUK (Personal Unlocking Key) or store it in a secure place, you might need it later to recover your PIN. If you forget both PIN and PUK, you will lose access to the certificate permanently. In that case you will have to request a new qualified personal certificate of an employee. The PUK code must contain at least eight characters and they must not be all identical.
-
Before you enter the PUK code, it is useful to study the information displayed when you click the link PUK entering policy and conditions.
Click Create a request to submit the completed request for approval
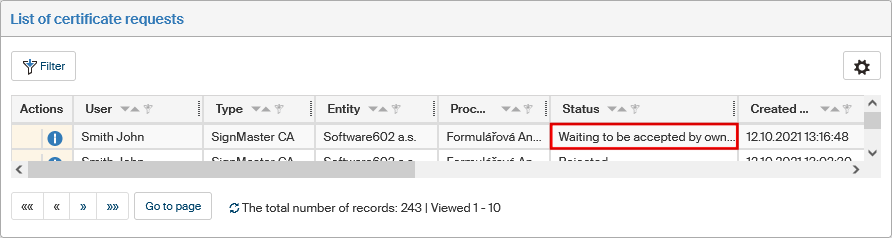
A note of the submitted request and a table with request details will be displayed in the window List of certificate requests. The Status column indicates Waiting for approval.
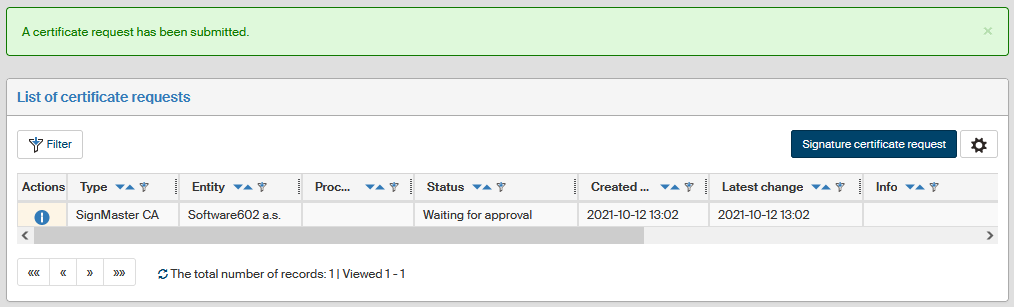
The request is submitted to the FormFlow administrator who also receives an e-mail notification of the request.
Processing the request
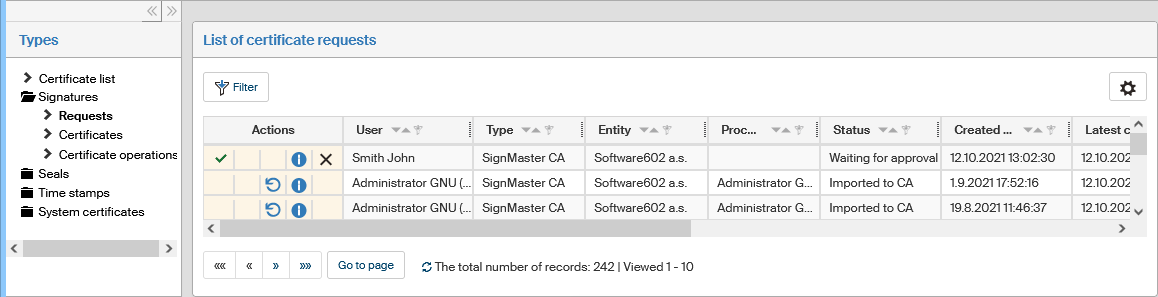
The administrator receives a notification e-mail of the request. The administrator then opens the List of certificate requests window (). On the left, in section Types, the administrator selects the view .
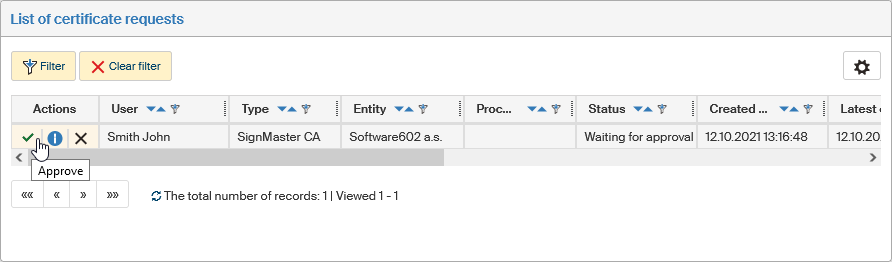
The administrator has the option to approve or reject the certificate request.
Rejecting a request
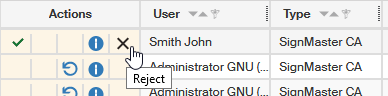
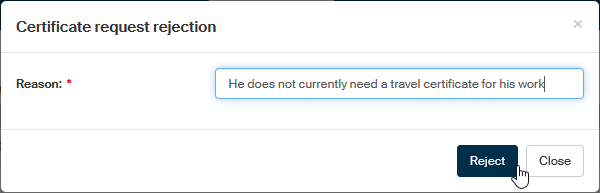
To reject a request, the administrator can go to the Actions column and click the cross symbol (Reject).
In window Certificate request rejection, the administrator enters the Reason for rejection and clicks Reject to submit the message.
In window List of certificate requests, the administrator can see the request entry with Rejected in the Status column.
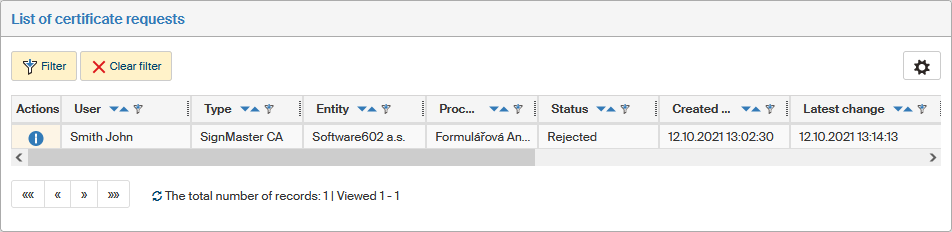
The applicant receives an e-mail notification of the rejection and can see in window List of certificate requests that the Status column shows Rejected and the Processed column contains the name of the user who rejected the request.
Accepting an approved certificate
The applicant receives an e-mail notification that their certificate request has been approved. The applicant then opens the window List of certificate requests (). Then clicks in the Actions column on the green checkmark icon (Accept certificate).
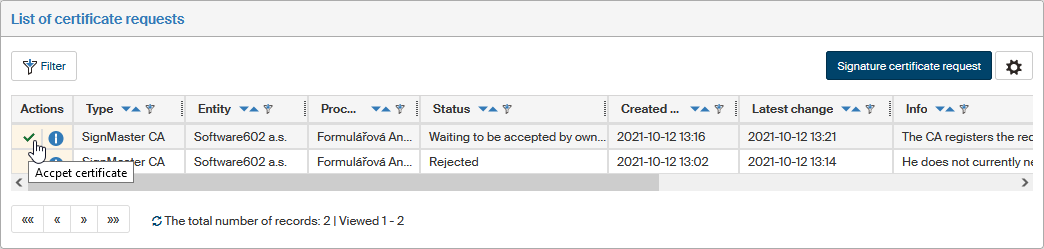
The window displays notification The certificate has been accepted.

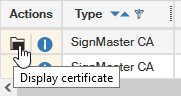
The symbol on the first button in the Actions column changes from a green checkmark (![]() ) to an index card
) to an index card ![]() Display certificate.
Display certificate.
The list can contain more than one entry, corresponding to various certificates in various states of processing.
The processing status in the Status column can be one of the following values:
-
Waiting for approval
-
Approved
-
Rejected
-
Request error in RSM
-
Created in RSM
-
CA import error
-
Invalid import to CA
-
Imported to CA
-
Waiting to be accepted by owner
-
The certificate is downloaded from CA
-
Error when creating a certificate in RSM
-
Error in certificate created in RSM
-
Finished
-
Deleted.
