Controlled documentation processes
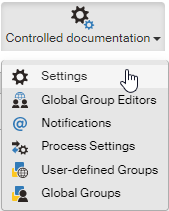
The ADMINISTRATION tab includes the Controlled documentation button with settings related to controlled documentation. Click the button to display a list of available setting topics.
Most of these settings are used to set up general process parameters, e.g. e-mail notification templates. These sections are only available to authorized users.
An option to create own approver groups is available to every user, to help create new processes more easily.
Entity selection
If you are managing documentation for more than one entity, note that some properties are set up separately for each entity. This applies to the following setting items: Global group editors, Notifications, Tasks and Process settings. Each of the items displays a list of Entities on the left. Before you start, click to select the entity entry you want to set up.

Controlled documentation remembers the entity selection when you switch to another setting section. To continue setting up a different entity, select it again in the Entities list.
Settings
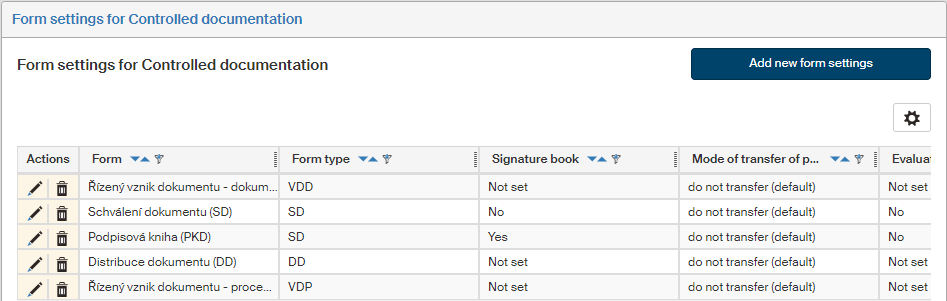
You can manage some properties of Controlled documentation forms and related processes in Form settings for Controlled documentation. The screen also includes a part of configuration settings.
The table lists all forms included in Controlled documentation.
-
Click
 in the Actions column to display a form setting dialog.
 -
Click
 to delete the form settings.
 -
The Form column displays the form name.
-
The Form type column indicates which controlled documentation process type the form belongs to. The type determines what other settings will be available for the form.
The following columns display the individual setting items:
-
Signature book – if the form is classified as a signature book (Yes), the document attachment will not be replaced by another version, the only data to change will be user data such as signatures, time stamps or initials.
-
Mode of transfer of paper attachments to parent processes – indicates how to deal with attachments during documentation redistribution, which means the situations when a distributed document is later distributed again to more users. Based on the settings, the attached documents (e.g. signature scans) can be transferred to the original distribution processes.
-
Evaluate the final statement automatically – if set to Yes, the system automatically evaluates the responses in the approval process to determine whether the document has been approved. All mandatory process members must approve the document before it is automatically approved. Optional users can either approve it or abstain from giving a statement. If these conditions are not met, the document will be rejected.
-
Add in a running process – indicates whether it is possible to add another user to a running approval process.
-
Sign when finishing – indicates whether the form will require an electronic signature when it is being finished.
-
Send notification of document sharing – indicates whether the form will send a notification (e-mail) when a document has been shared.
-
Finish rejected sequential process – indicates whether the form will finish a sequential process if the document has received a rejection.
Creating or editing form settings
Click Add new form settings to insert a new setting entry. Or click in the Actions column to edit an existing form setting.
Both the actions will display a dialog with form setting entries. In the Form field, select a FormFlow form template. In Form type, select which controlled documentation type process will the form be. The other fields displayed change based on the selected process type; their meaning is described in the previous chapter.
When you have filled in or edited the entries you needed, click Save to confirm the settings.

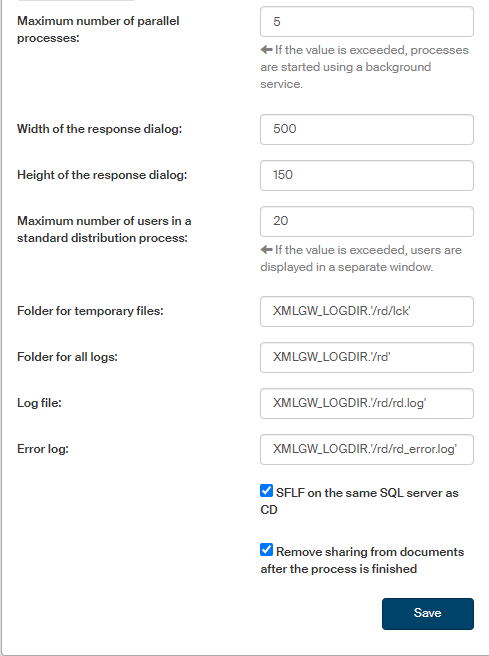
Configuration
This section contains selected Controlled documentation configuration settings. Settings not listed in this section can be set directly in configuration file config_rd.php.
-
Maximum number of parallel processes – how many parallel processes may be created from GUI (Form Filler, FAS); if the value is exceeded, processes are started using a background service. The default value is 10.
-
Width of the response dialog, Height of the response dialog – dimensions of the window that informs users on process changes (e.g. when a process has been started, forwarded to another user, etc.).
-
Maximum number of users in a standard distribution process – if this value is exceeded, users included in the distribution are not displayed directly in the form but in a separate window displayed on clicking the Display distribution group button. Must be a number.
-
Folder for temporary files – mostly will contain lock files (*.lck). The default value is
=XMLGW_LOGDIR.'/rd/lck'. -
Folder for all logs – the folder where all logs will be placed (must end with a slash). The default value is
=XMLGW_LOGDIR.'/rd/'. -
Log file – Controlled documentation log file. The default value is
=$log_adr.'rd_log.log'. -
Error log – Controlled documentation error log file. The default value is
=$log_adr.'rd_error.log'. -
SFLF on the same SQL server as RD – check if SFLF is located on the same SQL server as Controlled documentation. The queries on attachment size will be faster.
-
Remove sharing from documents after the process is finished – as soon as the corresponding controlled documentation process is finished, automatically set document sharings will be removed again.
Global group editors
Set up users who will be authorized to create and edit user groups available to all users in the screen Global group editors ().
The Users window displays a list of users and groups who are authorized to set up global groups. If there are more entries than would fit on one page, you can browse the list using a set of buttons below. The page size depends on your FormFlow settings.
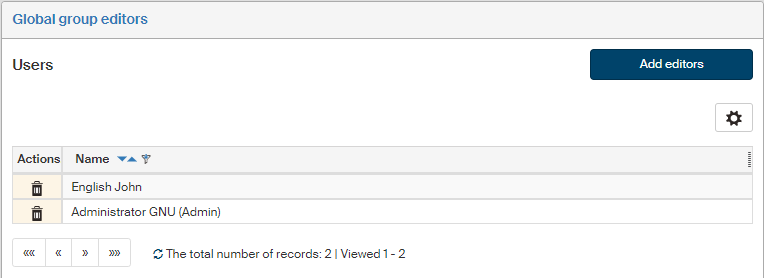
Click the button in the Actions column to remove a user or a group from the list and remove their authorization to set up global groups.
To add another user or group to the list, click Add editors.
The window Edit users is displayed with a list of all users and groups. Use the search field in the upper part of the window to look up the users and groups you need: just fill in a name or a part of it and click Search.
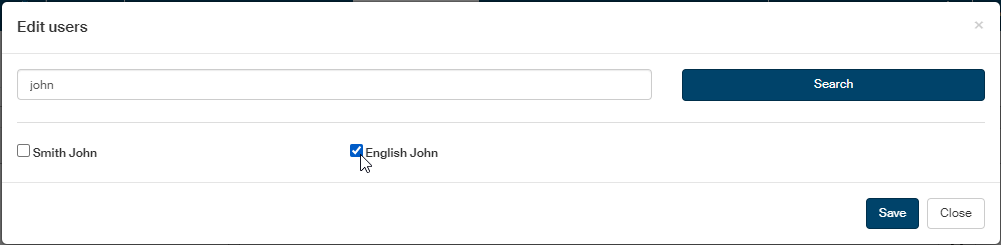
Check the field next to the user or group name to include them among the global group editors or uncheck to remove their authorization. Click Save to confirm the changes.
Notifications
Open the Notifications screen () to edit the templates for e-mail messages sent to users when changes take place in relevant forms.
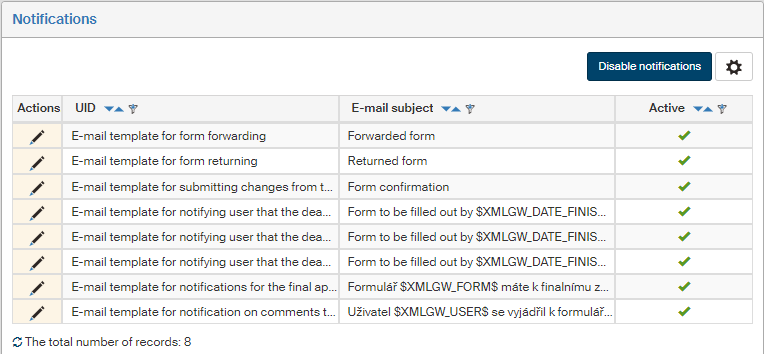
Notifications can be sent for the following events:
-
Form forwarding – another user has forwarded a form for the user to process.
-
Returned form – another user has returned a form the recipient has filled out before requesting an edit.
-
Form changes in a parallel process – another user has given a statement for a form created by the recipient.
-
Reminder of a revision process deadline.
-
Reminder of an approval process deadline.
-
Reminder of a distribution process deadline.

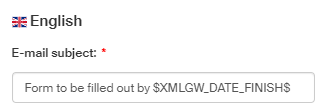
In each of these situations, you can set up the E-mail subject and E-mail body. There are macros available for both the text entries, which will be replaced by a value from the form. The list of available macros is displayed separately for each template. If you make any changes, click Save to confirm them.
For e-mails with deadline reminders, you can also set whether to send them at all and how long before the deadline.
Process settings
Every process can have its own specific settings, for example a list of Statement options for the user-approver to choose from. To display or edit the settings of a specific process, open the Process selection screen (), select an entity, then select a process from the list in section Process selection and click Load.
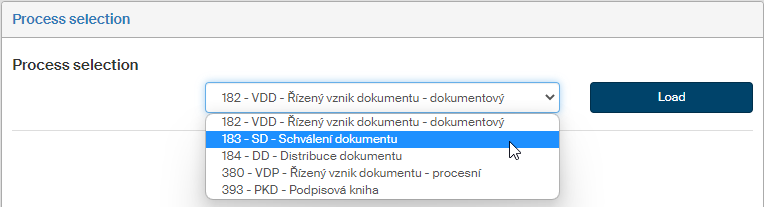
Settings for the selected process are displayed.
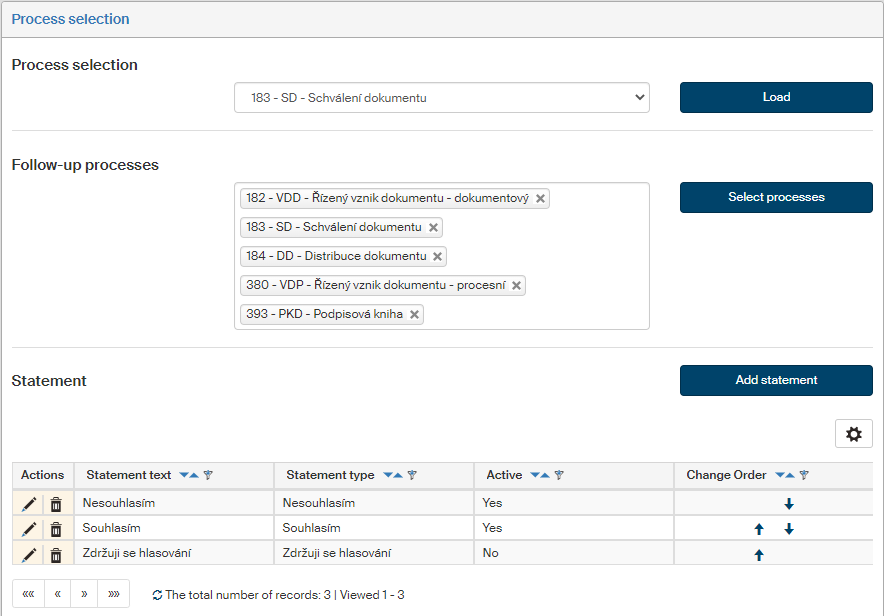
Follow-up processes
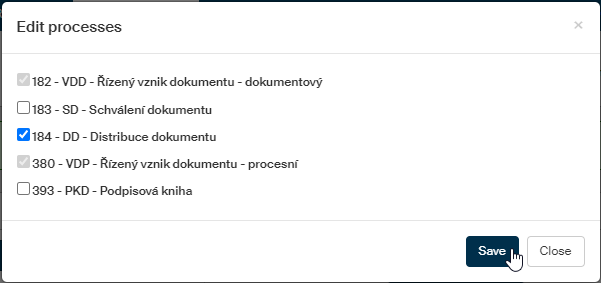
In section Follow-up processes, select which form templates will be available in Controlled documentation forms. This is a global FormFlow setting. Once you have selected a Controlled documentation process template, you will be able to select which Controlled documentation processes can be run after this process has finished.
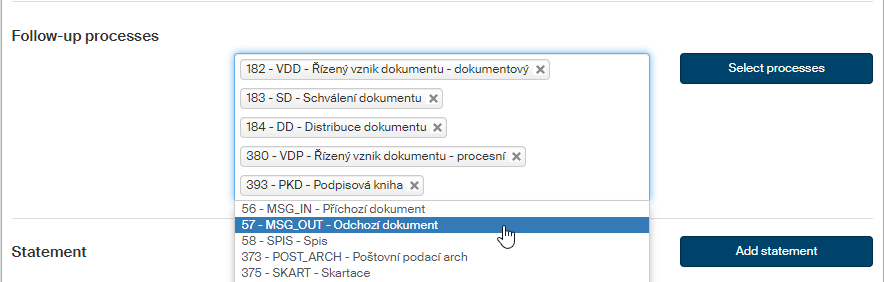
To add a follow-up process template to the list:
-
Click the template list field.
-
A list of available templates is displayed.
-
Click the template you want to add.
-
Click Select processes to save the edited list.
To remove a template from the list, click the cross in the right of the item.
Statement
When a user approves document or otherwise gives a statement, they are selecting the statement from a list of available options. You can set up this list separately for each document (process) type here.
The list of existing statements for the process is displayed as a table. Edit the columns as follows:
-
Click
in the Actions column to display the dialog where you can change the text and statement type and enable or disable this item. -
Click
in the Actions column to delete the whole table row – the corresponding statement entry. -
The Statement text column displays the statement as it will be displayed in the forms.
-
The Statement type is selected from a fixed list when the entry is created and determines how the process will continue. The Statement text is its text description.
-
The Active column entry indicates whether the option is made available in the forms.
-
Change the order of rows using the arrows in the Change order column to change the order they are displayed in the form.
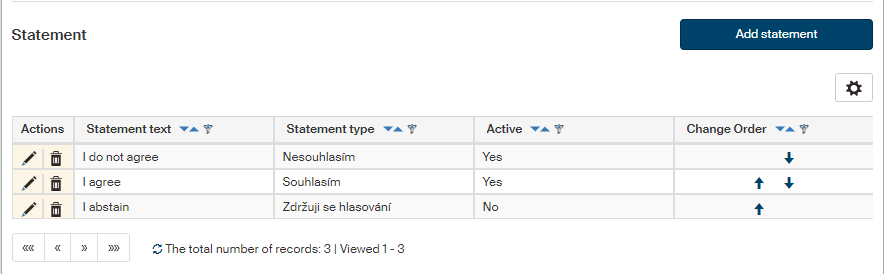
Click Add statement to add another entry to the table. A window is displayed where you can enter the details.
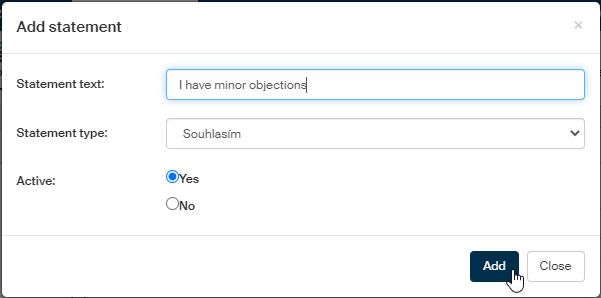
In Statement text, enter the statement as it will be displayed in the forms. Select the Statement type to determine how the form will understand the statement and the process will continue accordingly. Switch the Active option to Yes to add the new option to forms immediately.
Click Add to confirm the new entry.
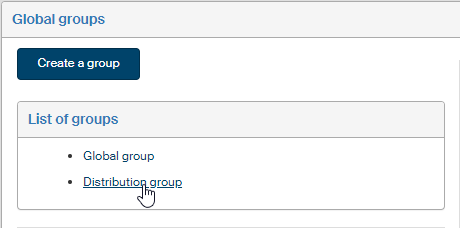
User-defined and global groups
In sections User-defined groups and Global groups, set up the groups used in document flow. Use both sections to set up user groups to create revision, approval or distribution processes more easily. Instead of adding individual users to the form, apply a pre-made list and insert the target group as a whole.
Each user can create their own groups as they choose; they are only available to the user who created them. Some users (called Global group editors) can also set up global groups available to all users. Both the categories are created and edited the same way.
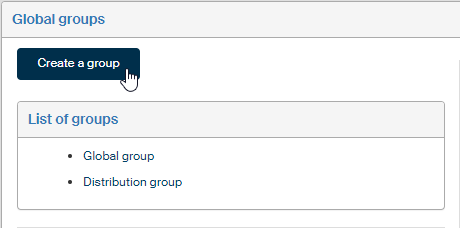
Open the User-defined groups screen by going to or open the Global groups screen by going to .
Viewing groups
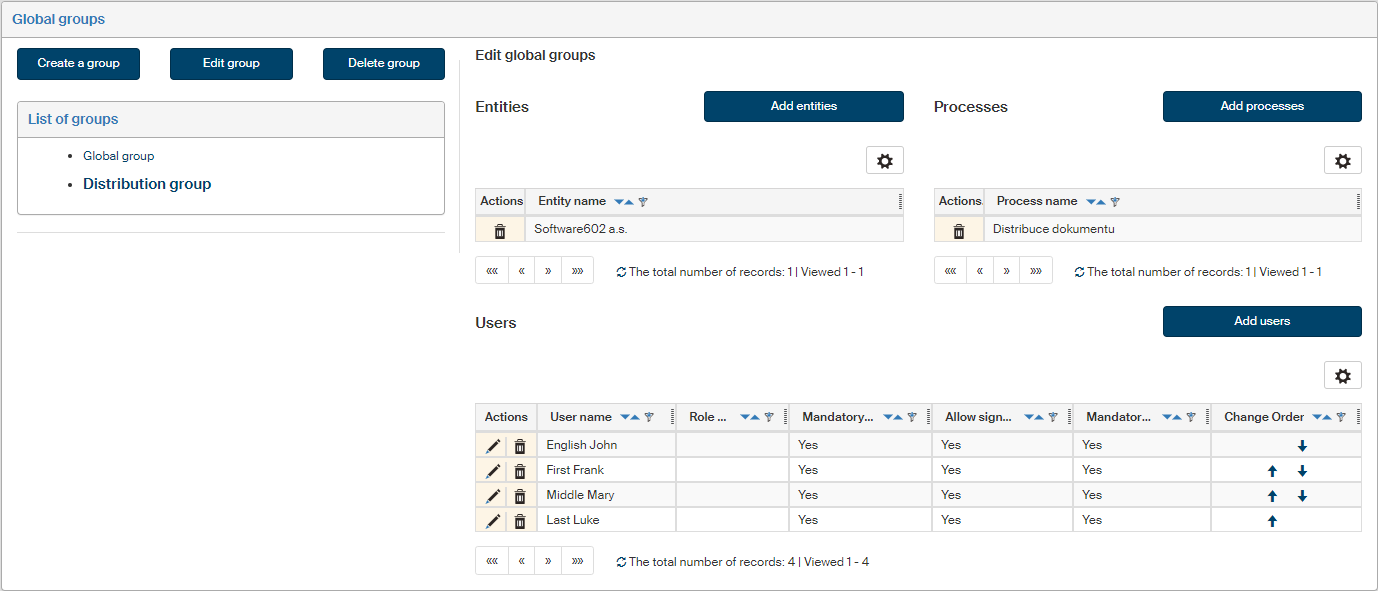
Whichever option you choose, User-defined groups or Global groups, there will be a list of groups in this category displayed on the left.
Click a group name to display its details. The right side displays a list of entities the group is attached to (if you manage more than one entity), processes where the group can be used, and a list of users included in the group. There may be other controls available if you are authorized to edit the group.
Creating a new group
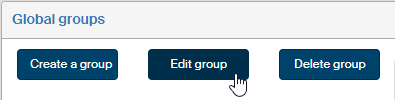
In User-defined groups (and also in Global groups, if you are a global group editor), there is a Create a group button displayed above the list of groups.
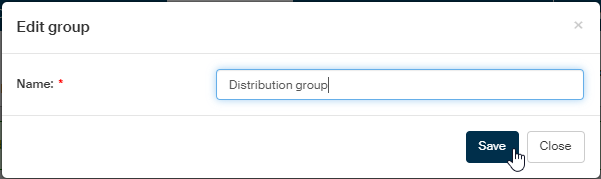
Click it to display a window where you can enter the new group name.
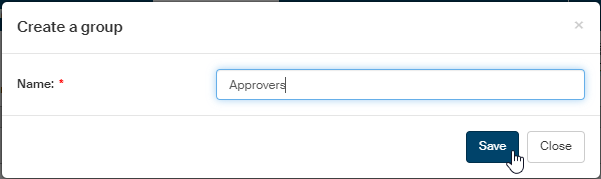
Click Save to create the group.
Attaching entities to a group
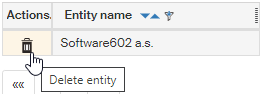
If you manage controlled documentation for more than one entity, only groups attached to the same entity as the form will be displayed when editing a form. There may be more than one entity attached to the group.
Click Add entities to attach an entity to the group. A window with a list of existing entities is then displayed. Check to select the entities for which the group will be available in lists. Click Save to confirm the changes.
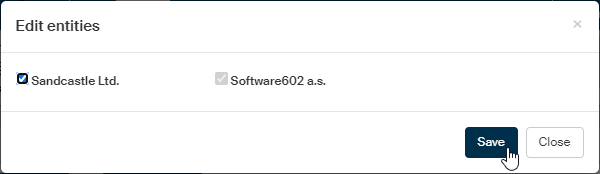
If an entity is on the entity list, you can click to remove it again.
Attaching processes to a group
For each group you can set up a list of processes where the group will be available in the forms. Go to the Processes section and add or remove them similarly as when editing the list of entities.
Click Add processes to attach more processes. A list of existing processes is displayed. Check the processes where the group will be available in lists. Click Save to confirm the changes.
If a process is already on the process list, you can click to remove it again.
Adding a user to a group, removing a user from a group
The list of users in a group is displayed as a table with several columns.
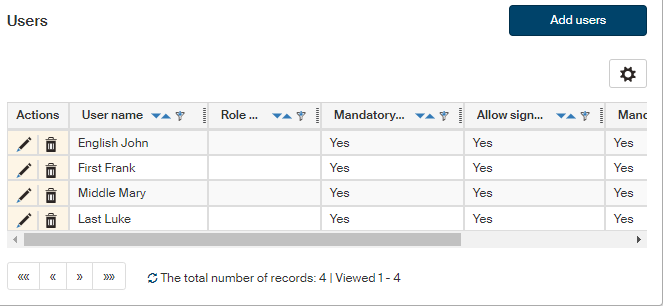
Edit the columns as follows:
-
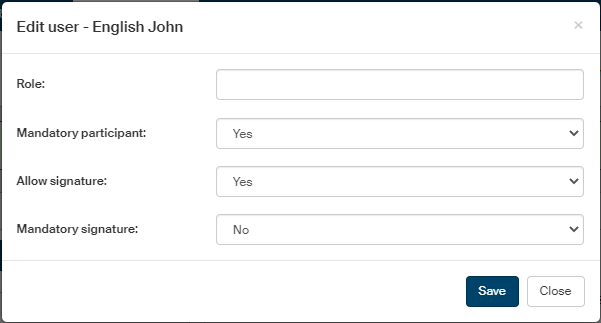
Click
in the Actions column to display a dialog where you can change user details.
-
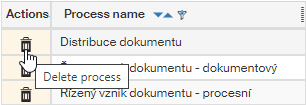
Click
in the Actions column to remove the user from the table and the group. -
If there is a group in the list of users, you can click
 in the Actions column to display a list of its members.
 -
In the User name column, the name of the user or group is displayed as it is usually displayed in FormFlow.
-
The Role description column can contain the user’s role in the process. This entry is optional.
-
The Mandatory participant column indicates whether the user’s participation in the process is required or not.
-
The Allow signature column indicates whether the button to attach a digital signature will be available for the user when inserting their statement.
-
The Mandatory signature indicates whether attaching a digital signature is required from the user.
-
Use the buttons in column Change order to reorder the group members. The same order will be used when creating a list of signers in the form.
To add another user or group in the list, click Add users. The button displays a dialog window with a list of all FormFlow users and groups.
| You can only insert FormFlow groups, set by the administrators. It is not possible to insert an approver group in another approver group. |
Use the search field in the upper part of the window to look up the users and groups you need: just fill in a name or a part of it and click Search.
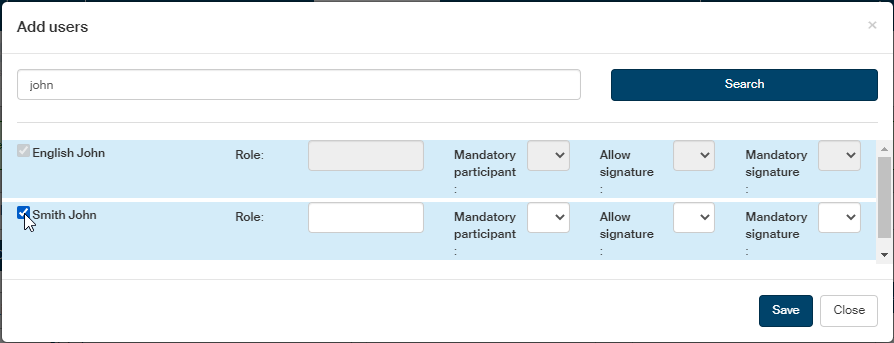
Check the box next to a name to add it to the group. Use the following fields to set up the user’s relation to the process: the role, if any, whether their participation is mandatory and whether they can or must use an electronic signature.
Click Save to confirm the changes.