Users
When FormFlow is installed, it has a single user – the Administrator. It is up to the Administrator to create and configure the structure of other FormFlow users. There are three ways to do it: manually adding the users and groups one by one (this is described in the following subchapters), synchronizing the user structure with another source (as described in chapter Synchronization) or importing a Configuration protocol.
List of users
To manage FormFlow users, visit the Users screen (). The screen displays a list of users registered in FormFlow. To narrow down the list contents, click the Filter button placed on the left above the list of users.
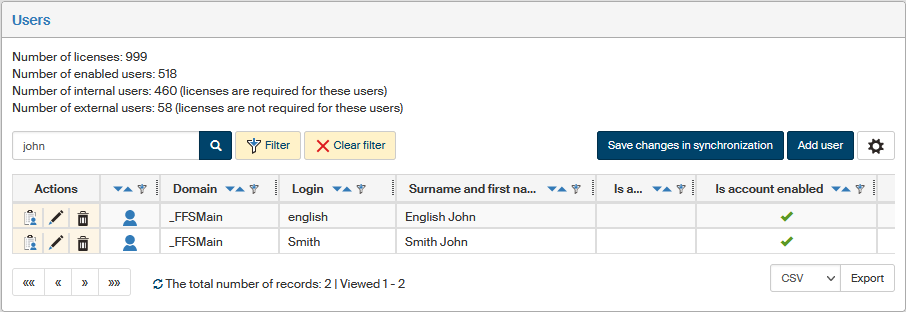
The table below contains user details; every row corresponds to one user. The Actions column on the left contains buttons to manipulate the entry, the other columns display various data about the user.
The Actions buttons offer the following features:
-
 Assigned permissions – displays the list of permissions granted to the user.
 -
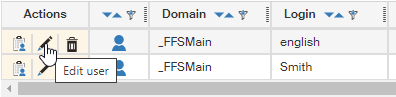
 Edit user – displays the User details page where you can check, add or edit information related to the user.
 -
 Delete user – click the button and confirm the following dialog to delete the user. You can only delete a user who has not taken part in filling out or approving any forms and does not have any permissions or other similar entries assigned. Other users can only be disabled – use the field Is account enabled in User details.
The following column specifies the User type:
-
 Enabled internal user – a full-featured FormFlow user, a license is required for each one of them. The user may log in and take part in processes, may be synchronized with a Directory.
 -
 Enabled external user – a license is not required for this user, but there are some limitations:
-
the user cannot be synchronized with a Directory;
-
is not automatically a member of the group Everybody;
-
cannot take part in form workflow as a recipient in the following steps, may only create a form in the first step and then either fill it out and sign, or just prefill and forward to another user. There are no limitations when using collection forms.
-
-
 Disabled user – may not log in to FormFlow.
Displayed details:
-
Domain – name of the domain where the user is placed.
-
Login – user’s login name.
-
Surname and first name – user’s names.
-
Is absent – if there is an absence period running, a check mark symbol
 is displayed in this column.
 -
Is account enabled – a symbol shows whether the user is enabled (
) or temporarily disabled from using the server ( ). A disabled user is also marked by a grayed-out icon in the far-left column.
 -
Bound users – number of users bound with this user account.
The list of users may contain other, additional columns, Synchronization with Directory and Uses external authentication. Their meaning is described in more detail in chapter Other details.
A navigation tool that provides pagination for longer lists is placed below the list. You can use it to go to the next page, previous page or the beginning of the list. The list header contains, for selected columns, additional buttons that allow you to order the table; click  Descending or
  Ascending to change the order.
There are two more buttons placed on the right above the list. Click Add user to display the dialog to create a new user. The button Save changes in synchronization synchronizes changes made in FormFlow with e.g. Active Directory or another server that manages user details (for more details on synchronization, see chapter Synchronization).
Adding a new user
Start adding a new user by clicking Add user above the list of users. A dialog window opens where you can enter the user details.
The dialog Add a new user consists of several sections:
-
Name – contains the basic settings and user identification. Other sections contain user details: Contact information, Personal Identification Data, Work, Notes. These sections are described in more detail in chapter User details.
-
Application preferences – corresponds to controls in the screen Application settings (which you can open by clicking My settings in the upper right corner of the FormFlow window); the settings are described in more detail in chapter FormFlow settings. An administrator can adjust the default settings of this section as needed, as described in chapter Default settings for new users.
-
JIP/KAAS Login – this section is only displayed if this external authentication type is enabled in FormFlow. For more information, see chapter JIP/KAAS authentication.
-
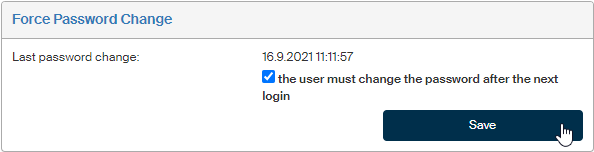
New User’s Password – use this section to enter a password for the new user to use on their first login. Check the user must change their password on the next login to force the user to set their own password immediately after logging in.
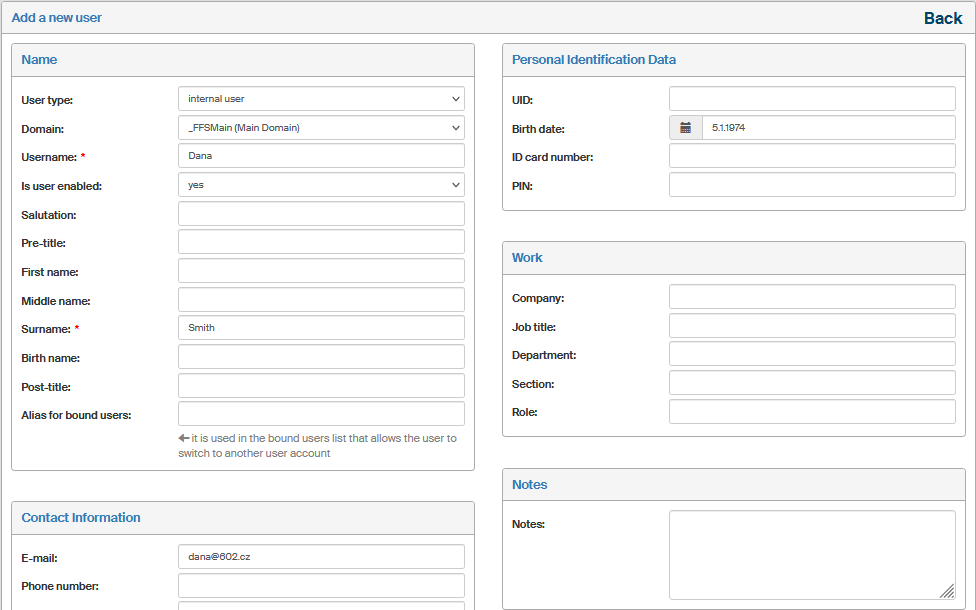
Mandatory fields are marked with a red asterisk. Click Create user to confirm the entered details.
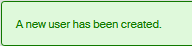
The user is placed on the user list, and you will be notified about it by a message in the upper part of the screen. The user-adding screen is then displayed again, ready for you to enter another user.
As soon as the new user is on the list, they can log in to FormFlow and start using it.
Editing user details
Click Edit user in the user list to open the User Details screen where you can check, edit or fill in any details related to the selected user.
The screen is similar to the one you used to add a user – but this one offers wider options. This is why it is separated into several tabs, which you can select in the upper part of the screen.
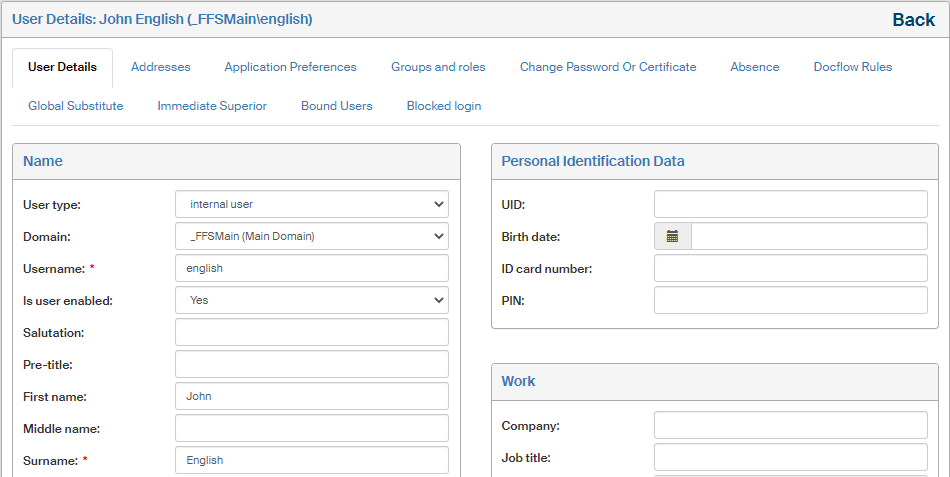
User details
The User details tab displays the user’s basic details and corresponds to the user creation dialog.
The basic details are separated into several sections:
-
The Name section contains not only the user’s name, but also some basic properties of their account:
-
User type – either internal or external.
-
Internal user is a full-featured FormFlow user, a license is required for each one of them. The user is automatically a member of the group Everybody, may log in and take part in processes, may be synchronized with a Directory.
-
A license is not needed for an external user, but there are some limitations: the user cannot be synchronized with a Directory and is not automatically a member of the group Everybody. The user cannot take part in form workflow as a recipient in the following steps, may only create a form in the first step and then either fill it out and sign, or just prefill and forward to another user. There are no limitations when using collection forms.
A newly created external user is automatically placed in group ExternalEverybody. Membership in this group cannot be changed for an external user. -
If a user is changed from internal to external or back, membership in groups Everybody and ExternalEverybody changes automatically. Users placed in ExternalEverybody are automatically assigned the same privileges as in the group Everybody.
-
If upgrading or updating the FormFlow installation, membership of external users is adjusted subsequently using an update SQL script. This script adds external users as members to the new ExternalEverybody group but does not remove them from Everybody.
-
-
Domain – select one of the existing domains to place the user in it. To edit a list of domains, go to section Domains, described in chapter Domains.
-
Login name – mandatory field.
-
Use the selector Is user enabled to enable (set to yes) or temporarily disable (set to no) user’s access to the server without deleting their data.
-
The only other mandatory identification detail is Surname, the rest is optional.
-
If a user is going to use binding with other accounts, you can use the field Alias for bound users to set a name to be displayed in the list of users available to switch to.
-
-
The section Personal identification details contains the date of birth, ID card number and birth number.
-
The section Contact details contains fields for the e-mail address, telephone number, mobile phone number, fax number and website address. The section Work can be used to describe the user’s job placement, department, section and role.
-
The section Notes can be used to enter any additional information.

The screen may also contain the JIP/KAAS Login setting section. It is only displayed if this external authentication type is enabled in FormFlow. For more information, see chapter JIP/KAAS authentication.
Addresses
The Addresses tab is used to specify one or more addresses related to the user. The right side of the screen displays a list of existing addresses.
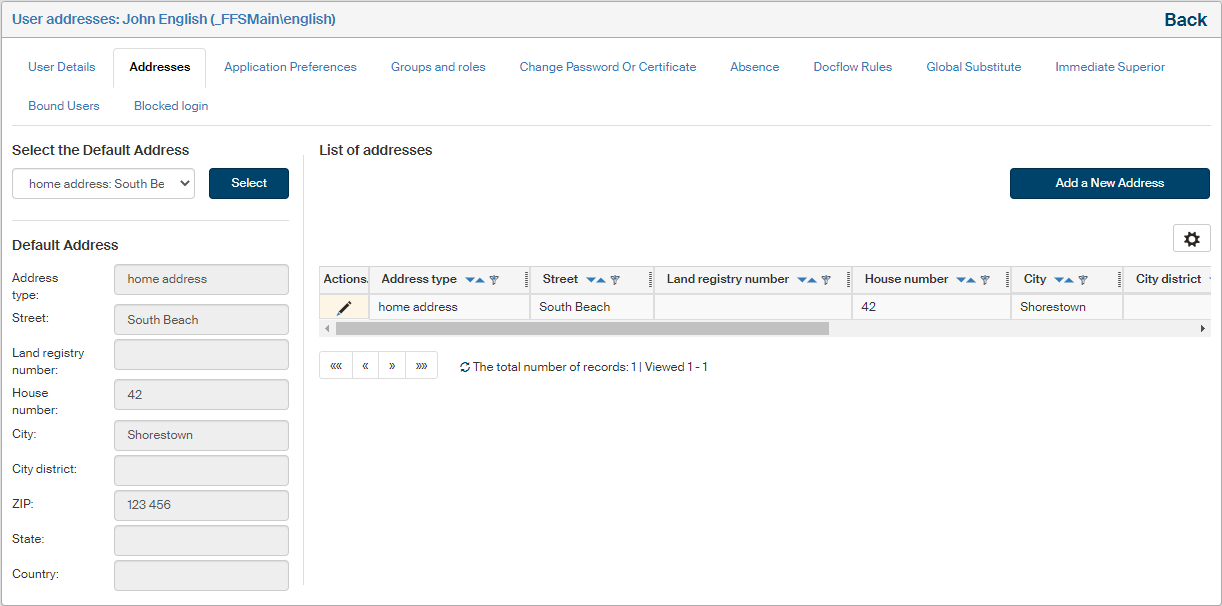
The list contains the address details as columns and the Actions column offers two buttons to manage the address:
-
Edit address – displays a dialog window where you can edit the address; it is the same as the dialog for adding a new address (as described below);
-
Delete address – this is only available if the user has more than one address in their profile.
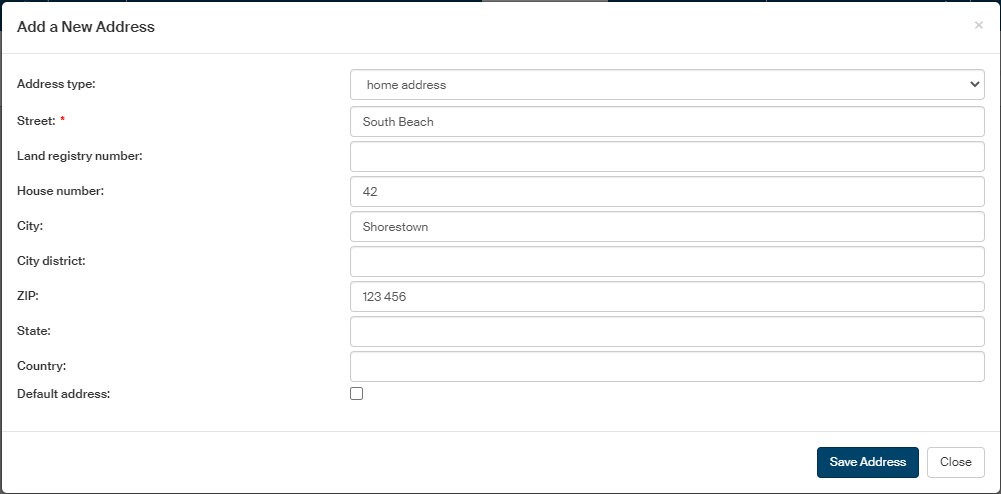
To add a new address, click Add a New Address, placed on the right above the list. A dialog window with address details is displayed.
-
Use the field Address type to specify whether it is a home address, work address or other.
-
Then fill in other address details. The Street field is mandatory.
-
One of the user addresses must be the default one and will be displayed in lists before the others. If this address is to be the default one, check Default address.
When the address is complete, confirm it by clicking Save address.
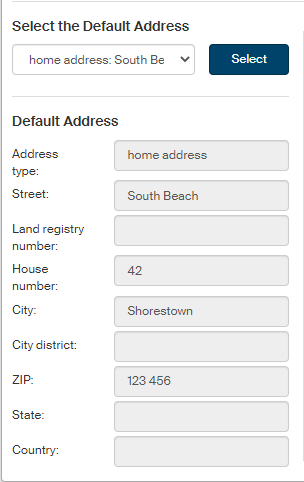
One of the addresses must be set as default, which can be determined by the selector placed on the left side of the screen in section Select the Default Address. Details of the selected address are then displayed in the fields below.
| If it is allowed (as described in chapter User detail editability), users can add and edit their addresses themselves. |
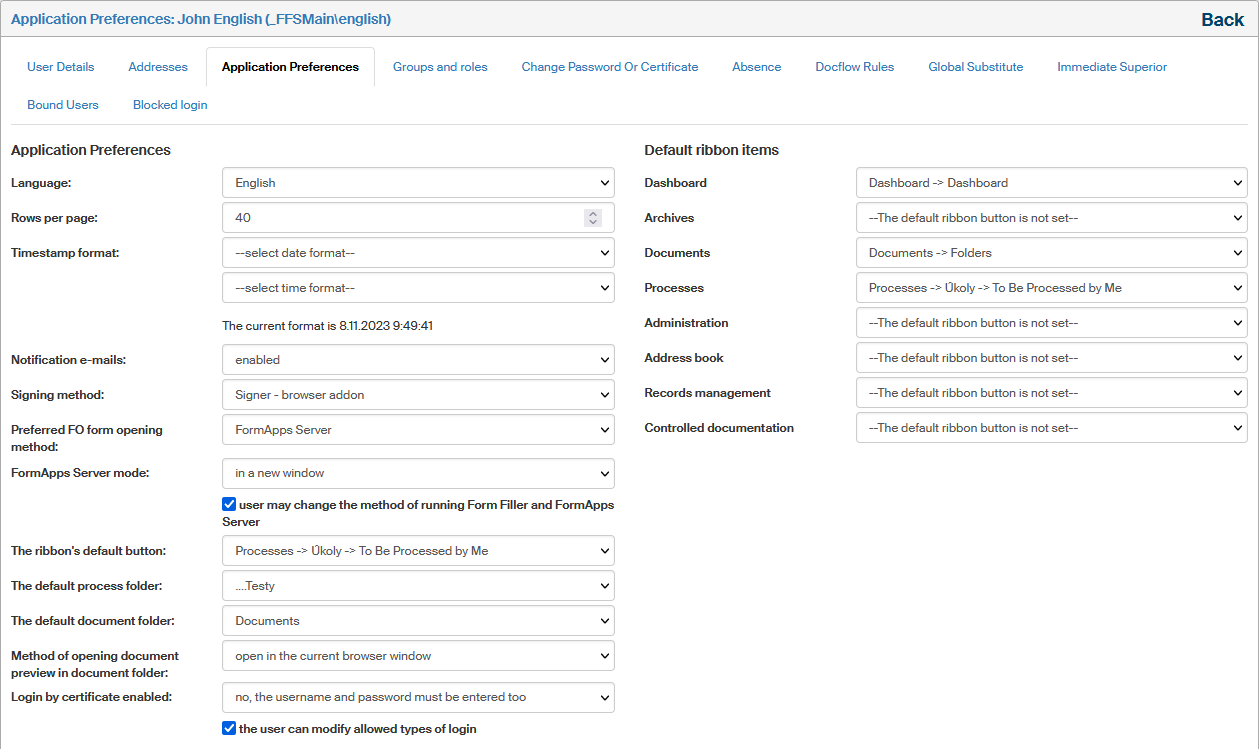
Application preferences
The Application Preferences tab contains details similar to the section with the same title in user preferences. The section contains environment settings. Users may be allowed to edit most of these settings themselves, as described in chapter User detail editability.
-
The Language item sets the FormFlow environment language.
-
The field Number of rows per page sets how many rows are displayed on one page of a list (table).
Because there are several factors impacting the number of rows on a page, there are setting priorities set up so that the number of entries displayed on a page can be lowered too:-
Filter settings.
-
User settings for a grid.
-
Group settings for a grid (if there are settings for more groups where the user is a member, the highest value applies).
-
General grid settings.
-
User’s personal settings (must be equal or lower than system settings, and higher than 0).
-
FormFlow system settings.
-
-
The pair of fields Timestamp format can be used to set how date and time entries are displayed. The current format is displayed below for clarity.
-
Use the selector Notification e-mails to enable or disable sending notification e-mail messages – notifications of status changes in forms in whose workflow you are taking part.
-
There are two ways of signing documents, based on the location of the signature certificate.
-
Using an installed browser extension – Signer. The signature certificates are in this case stored locally – in the Windows store or on the user’s qualified device (token).
-
Now the documents can be also signed using the server signing service – the certificates are stored in a remote store, on a server. The advantage is independence from a specific computer of physical presence of a qualified device.
Select the signing method using option Signing method in Preferences ().
-
-
Preferred FO form opening method allows you to select whether to open forms using Form Filler or FormApps Server. This setting will only apply to forms suitable for both the applications, other forms are always opened in the application they are designed for. The following settings specify the manner in which the forms will be opened in either of the applications.
-
FormApps Server mode allows you to set whether a new window is always opened when loading a form (the option “in a new window”), or whether the form is displayed over the FormFlow page, that is, the rest of the page will not be accessible until the form is closed again (the option “in a modal window”).
-
If you want to allow users change the form running settings themselves, check user may change the method of running Form Filler and FormApps Server.
-
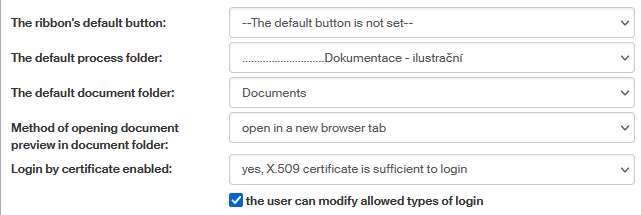
The option The ribbon’s default button allows you to set which of the FormFlow tabs or sections will be displayed after login. You can select from both standard tabs and other options added to the FormFlow by the administrator.
-
The default process folder allows you to set which of the folder structure on the Processes tab is to be selected when the user displays the tab.
-
Similarly, the field The default document folder can be used to set a folder on the Documents tab.
-
In Method of opening document preview in document folder – select whether clicking the document item on the list should display the preview in the same browser window or on a new tab.
-
The field Login by certificate enabled sets which details will be required to log in to the application. If set to yes, X.509 certificate is sufficient to login, the application will not require the name and password to log in, unlike the stricter option no, the username and password must be entered too.
| For detailed settings description of this authentication method, see chapter Login using a certificate. |
-
If you want to allow users change login settings themselves, check the user may modify allowed types of login.
-
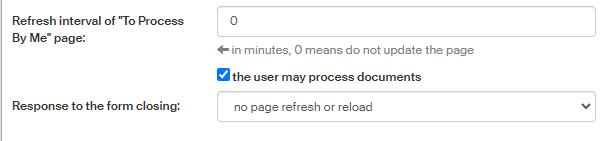
Use the field Refresh interval of “To Process By Me” page to set the page to refresh regularly after a given number of minutes. If you set the field to 0, the page will not refresh automatically.
This setting depends on the previous setting items Preferred FO form opening method and Form Filler mode or FormApps Server mode. Page refresh will only be enabled if you have set opening forms outside FormFlow, that is, “in a new window”. If you have set to open forms in a modal window, the page will not refresh automatically regardless of this setting. -
If the field the user may process documents is left unchecked, the user will not be offered in autocomplete fields when looking up users for creating and editing forms and will not be able to be added to a revision group.
-
Use the selector Response to the form closing to set the reaction of a form list page after closing the window with a processed form. Reload will, apart from refreshing the page, also reload the cache, while Refresh only refreshes the page. The third option is to do nothing.
Colors of FormFlow components can be set in section Colors.
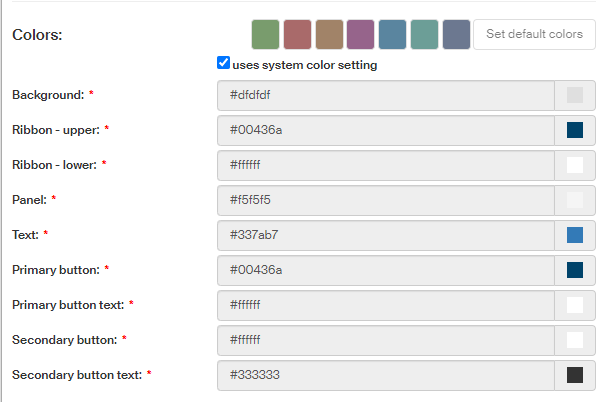
To use system colors set by the administrator, check uses system color setting. Then all the options will be disabled and the colors set to the default palette.
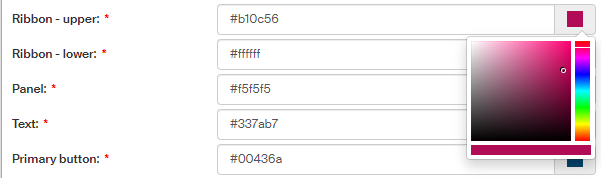
If you do not want to use them, uncheck the box and then use the options to set colors for individual parts of the environment.
To return to the original color palette displayed on top of the section, click Set default colors.
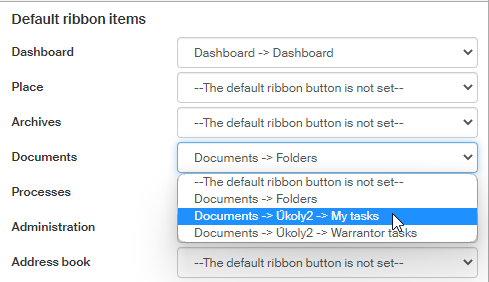
Default ribbon page setting
On the right column of the Application settings screen, you can select for most ribbon tabs which page to display after selecting the tab.
If nothing is set, the tab’s default page will be displayed after selecting the tab and the user will need to select the required page using a button.
| The section only displays sections (tabs) the user has access to, the rest will be hidden. If the user loses access permissions to a tab, the tab setting will be hidden as well. |
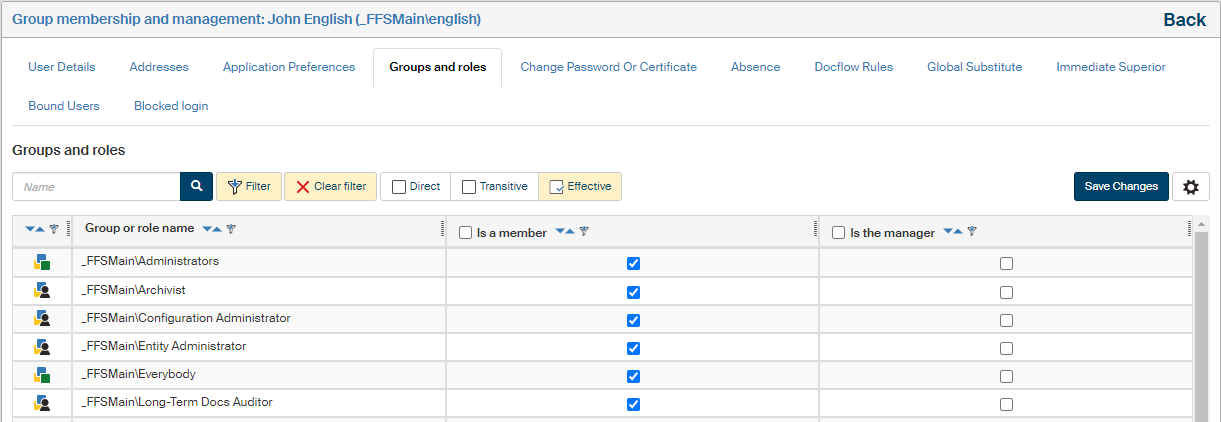
Groups and roles
To place a user in a group or groups, open the Groups and roles tab. Use the checkboxes in the group list to specify where to place the user as a member (Is a member) and where as a manager (Is the manager)). If there is a blue asterisk next to the checkbox (as in the image), the user is already a member of this group or groups thanks to membership in other groups.
You can use checkboxes in the table header to check all the boxes in the corresponding column. You can narrow down the list of displayed user groups using a suitable filter (the Filter button above the list).
If you change any settings, do not forget to click Save changes.
Change password or certificate
Use the sections displayed on the tab Change password or certificate to set up the FormFlow login details.
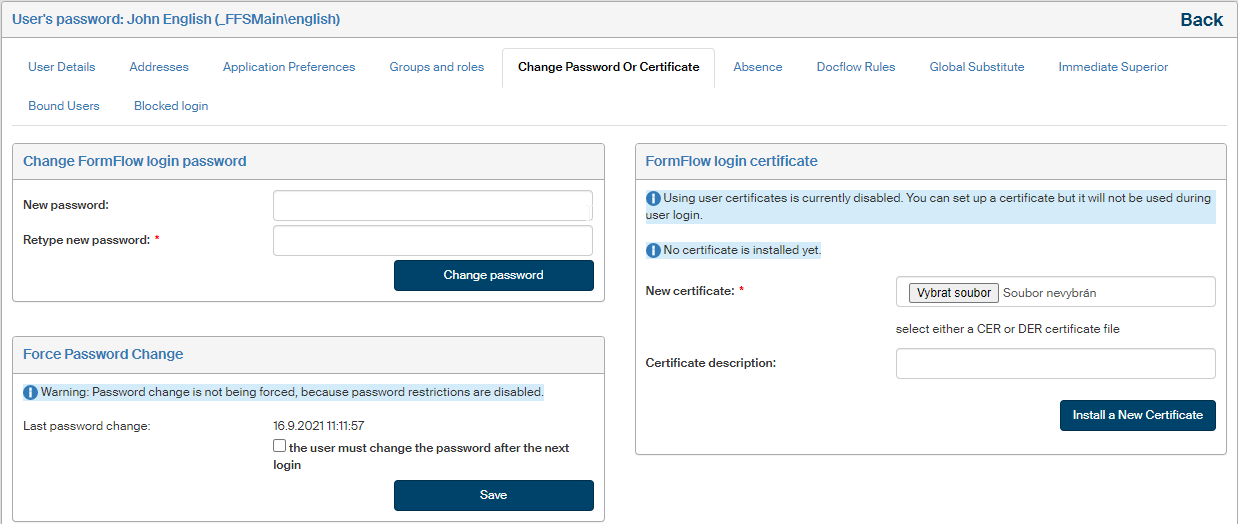
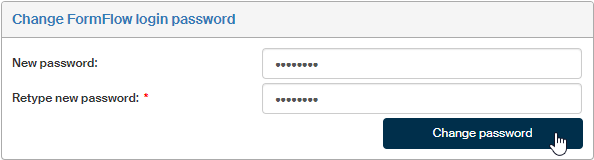
Change FormFlow login password
Use the section Change FormFlow login password to change the user’s password to use when logging in to FormFlow:
-
Enter the new password in the fields New password and Retype new password.
-
Click Change password to confirm the change.
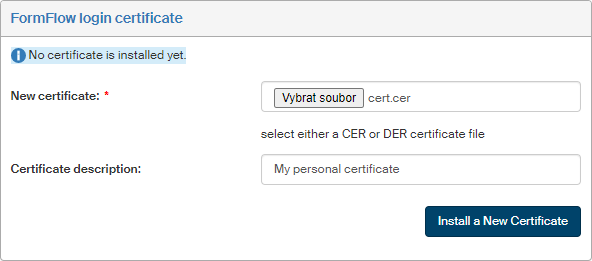
FormFlow login certificate
Besides the combination of username and password, it is also possible to log in to FormFlow using a certificate. You will first need to install the certificate in section FormFlow login certificate using the following procedure:
-
Use the New certificate field and the Browse button to look up a certificate file in CER or DER format on the disk of your computer.
-
If you want to add your own note, enter it in the field Certificate description.
-
Click Install a New Certificate.
When the certificate is uploaded, its description is displayed in section Certificate. It is also possible to replace your current certificate by installing a new one. For a detailed description of settings for this authentication method, see chapter Login using a certificate.
Absence
The Absence tab is used to log the user’s absence in a specific time period by entering the first and last day of the absence. If you do so, forms addressed to the user in the given period will be automatically forwarded to their substitutes.
Set the absence by specifying the start and end dates in the fields Absent from and Absent until and clicking Create.
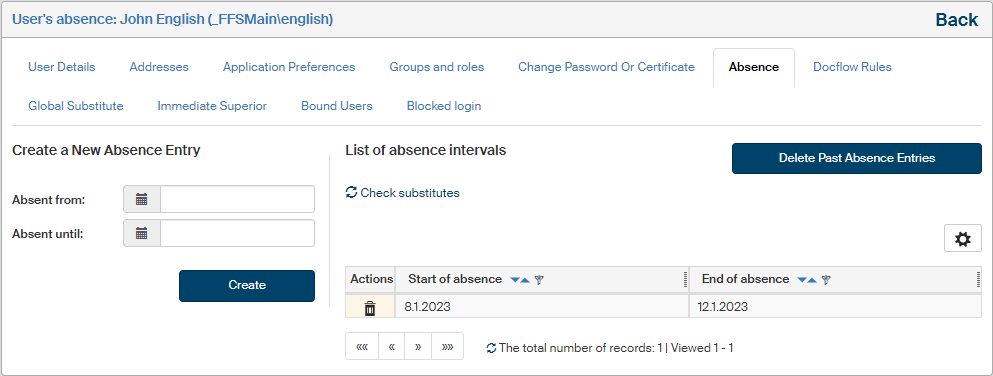
Use the button Delete past absence entries to delete outdated entries (those that have already passed) from the list of absences. Any entry can be deleted at any time using the button in the Actions column.
Click the link Check substitutes to check for this user’s forms and they will be passed on to the substitutes if needed.
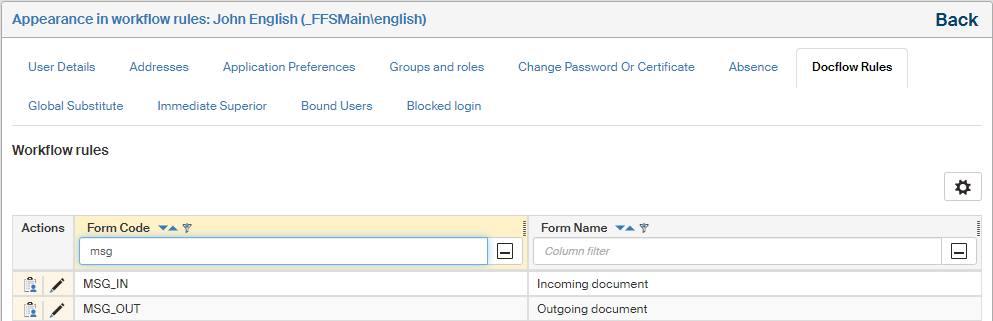
Docflow rules
The Docflow rules tab displays the list of all forms where the user is listed in the workflow rules as the recipient.
-
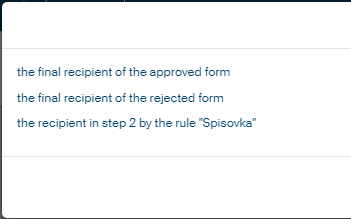
Click
to display the details, specifying in which workflow step the user is placed.
-
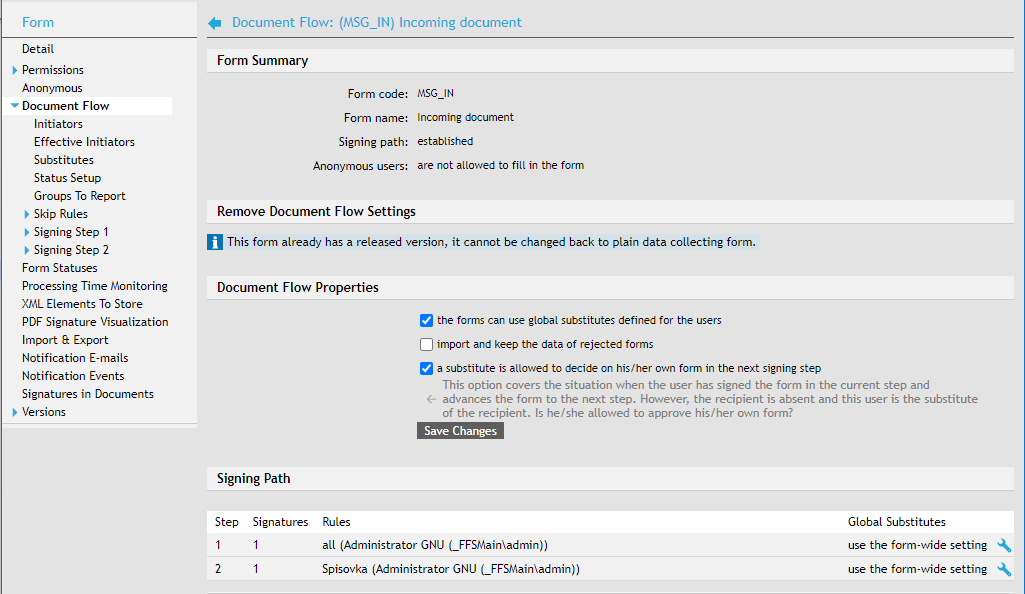
Click
to display the page with form setting details.
Global substitute
The Global substitute tab is used to specify the user’s global substitute user. When this user is absent, the substitute will take over their forms, unless the form’s workflow states otherwise.
| Substitute settings in workflow takes precedence over the global substitute. |

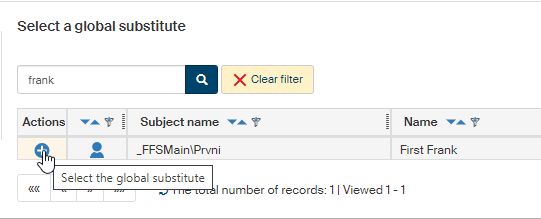
To add a global substitute, enter their name or a part of it in the quick filter field and click the magnifying glass button. The application will display a list of matching subjects.
Now go to the Actions column and click  Select the global substitute next to your required substitute.
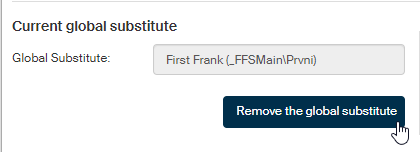
The button for the selected substitute changes to  .
.
It is only possible to have one global substitute at a time. It means that if you set another global substitute later, the current one will be replaced.
You can always remove the substitute by clicking Remove the global substitute.
Immediate superior
The Immediate Superior tab is used to build the employee structure by entering a rule that specifies this employee’s immediate superior. These relationships can be used to create workflow rules more easily: simply set that at a certain step, the form will be forwarded to the user’s immediate superior, without having to specify individual names or departments. For more details on workflow rules, see chapter Settings on the Modify tab.
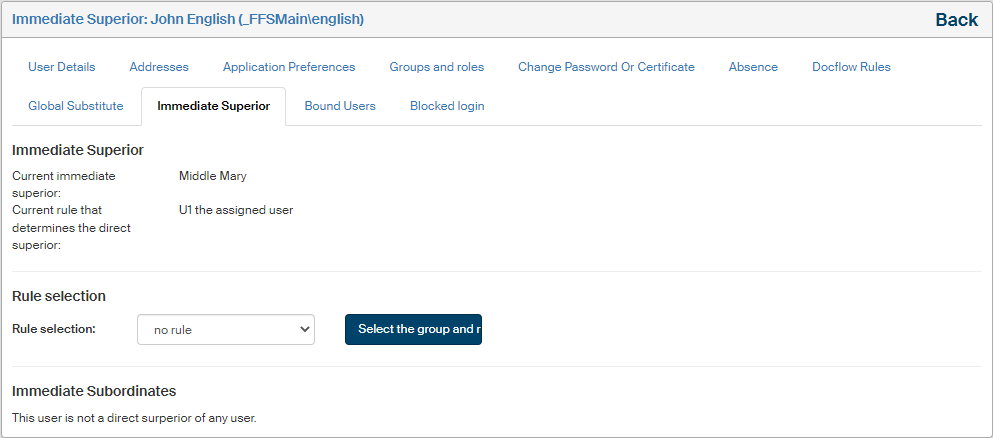
If a rule is set for the user, the upper part of the tab specifies the rule itself and the name of the user who is set by this rule as the current immediate superior.
You can change this setting in section Rule selection. Use the selector of the same name to specify how the superior will be determined:
-
no rule – cancels the current setting, no superior will be set for the user;
-
U1 the assigned user – fixed selection of a specific user;
-
U2 the immediate superior of the group this user is a member of – the superior will change with changes in the group and user structure;
-
U3 the default member of the group this user is a member of – the superior will change with changes in group and user structure.
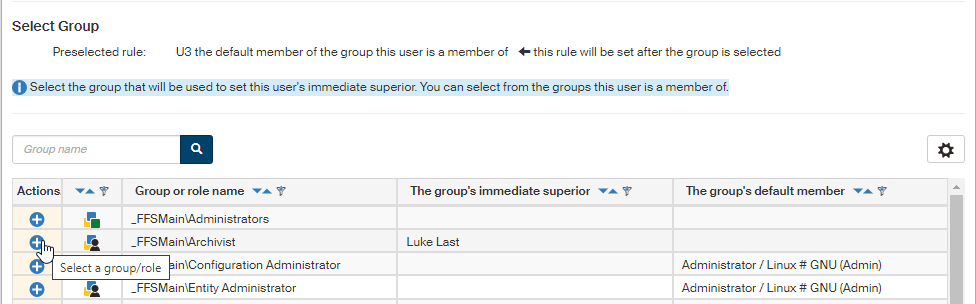
Confirm the selection by clicking Select the group and rule. If you have selected no rule, the setting is now complete. In the other cases, the list of FormFlow users is displayed, or groups and roles of which this user is a member. You can narrow the list down using the filtration tool above the table. Then use the Actions column to select the required user or group/role by clicking the button. The setting is now complete.
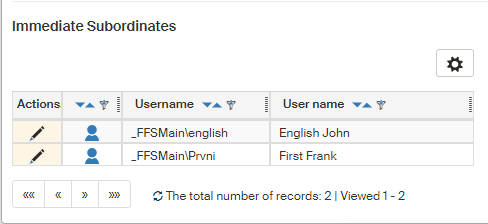
For easier overview of the structure, the lower part of the tab displays section Immediate subordinates with the list of the user’s immediate subordinates, if there are any.
Bound users
Some users may access FormFlow in several distinct roles, which means they have more than one user account to log in. To save them from having to keep logging out and back in using another account, the accounts can be bound together. The user can then switch between the accounts more easily.
If user accounts are bound together, the user can log in to any of them and then switch to any other as needed. A list placed in the header next to the logout button is used to switch between accounts.
To bind two user accounts, you need to know the passwords to both.
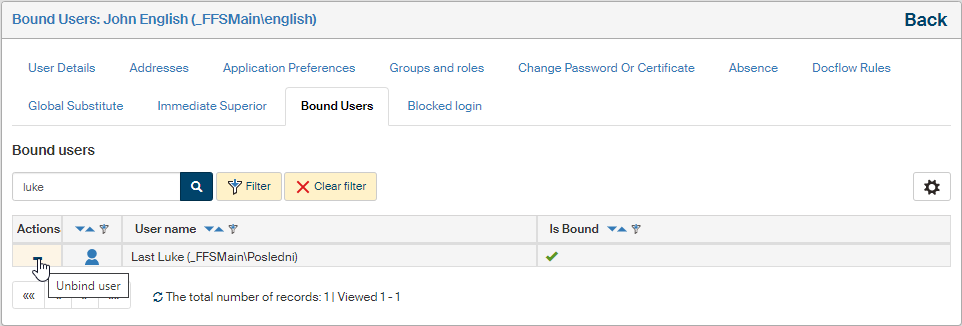
Use the Bound Users tab to manage binding user accounts. The application displays a list of user accounts, which you can narrow down using a filtration tool placed above the list. Accounts already bound to the user are marked by a green check mark in column Is bound.
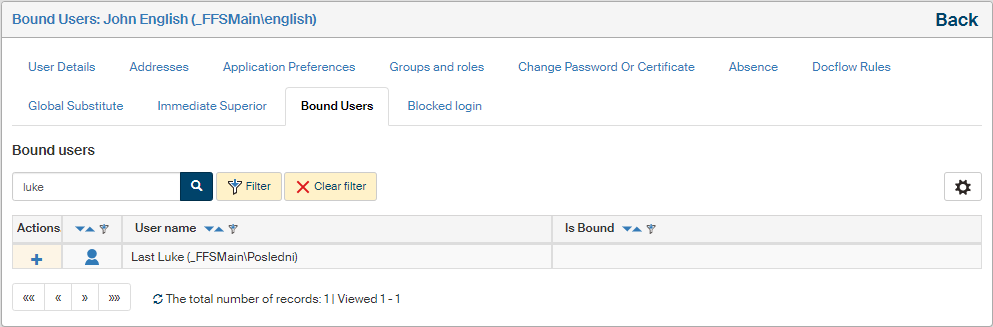
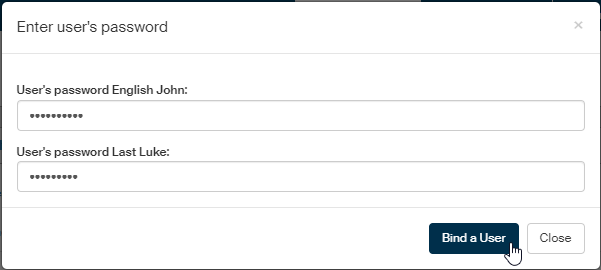
To bind a selected user with the user you are currently managing, click the  button in the respective row. A dialog to place both users' passwords is then displayed. Enter the passwords and confirm by clicking Bind a User.
The users are now bound. If needed, you can cancel the binding by clicking  .
.
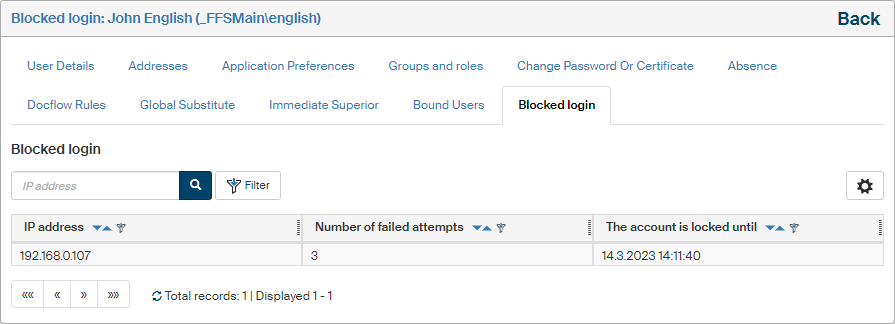
Blocked login
The Blocked login tab displays whether the user’s login to FormFlow is being temporarily blocked because the maximum number of failed login attempts has been exceeded.
User permission settings
Every FormFlow user has various permissions – primarily access permissions to documents, forms (processes) and folders. These permissions are not set from the user’s viewpoint, but from the documents', forms' or folders' end.
A user may be also assigned permissions to specific system operations – for example creating or editing document categories, managing other users, etc. These permissions can be set for all users in section Operation permissions.
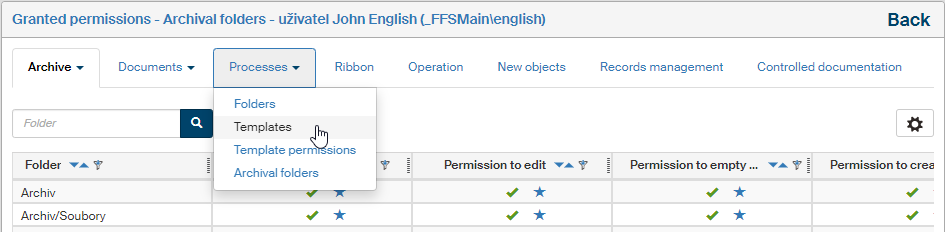
Click the button Assigned privileges in the list of users () to display a list of permissions already assigned to the user. The list is divided into several tabs and the first three of them contain additional menus to narrow down the displayed data more precisely. The menus available for the Archive and Documents tabs are the same: Folders, Metadata, Classes and Ranks. The Processes tab provides the following options: Folders, Templates, Template permissions and Archival folders:
-
Archive – access permissions to folders, metadata, classes and ranks in the archive.
-
Documents – permissions to document folders, metadata, document classes and ranks;
-
Processes – permissions to form templates, process and archive folders, signature certificates of other users, process roles, substituting other users or the role of a censor to anonymous users;
-
Ribbons – permissions to tabs and buttons on the ribbon.
-
Operation – permissions to operations and system-wide operations.
-
New objects – operation permissions to apply to newly created objects;
-
Records management – permissions assigned in the ERMS (records management) module;
-
Controlled documentation – permissions assigned in the Controlled documentation module.
To grant or remove these permissions to users, go to administration of the objects in question. For example:
-
Permissions related to documents can be found using the button and the individual sections are described in chapter Documents.
-
Permissions related to processes:
-
Permissions to process folders: , described in chapter User permissions to the folder.
-
Permissions to a form template:
 , described in chapter Form permissions.
 -
Process roles:
, described in chapter Creating form flow in practice. -
Censor to anonymous users:
, described in chapter Censor for processing anonymous users' forms. -
Global substitution of another user:
, described in chapter Global substitute.
-
-
Permissions to tabs, buttons and other ribbon items:
button, described in chapter Ribbon and its subchapters. -
Permissions to operations: , described in chapter Operation permissions.
-
Permissions to new objects: , described in chapter New object permissions.
There are measures in place to avoid situations when a user is granted an administration permission (such as full access to DG folder – READ, EDIT, GRANT) and subsequently gains access to the Administration tab to access DG folder administration. To prevent them gaining access to the Operation Permissions list and view all subjects' operation permissions, the following measure is in place.
There is operation \FS\XG\Constants\OPER::VIEW_OPER_PRIVILS. The EXECUTE permission to this operation (on OTYP::ALL object type) authorizes the holder to view operation permission settings. The visibility of ribbon item is also based on this permission.
Permissions to this operation are granted as follows:
-
Security Administrator ⇒ GRANT, REVOKE, EXECUTE
-
ffs_system_account ⇒ GRANT, REVOKE, EXECUTE
-
Configuration Administrator ⇒ EXECUTE
