Advanced search
The advanced filter provides detailed search within a list, data filtration and also settings that enable you to adjust the layout of the search result table.
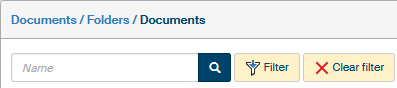
To open the filter, use the  Filter button placed next to the quick filter field.
A dialog window opens, which consists of several tabs.
Filter button placed next to the quick filter field.
A dialog window opens, which consists of several tabs.
Filter
The Filter tab shows all the details (metadata) that can be used for searching.
Enter any combination of details to use in your search. But you will always need to fill in at least one of the fields highlighted in blue and marked with a red asterisk.
The Total number button will display the number of entries that match the current filter. The Clear button will return the filter to default.
Click Submit to start searching. The original FormFlow window will now display only the entries that match your filter.
The contents of the fields may slightly differ from the following figure, based on the context. For example, the ERMS documents and Records windows contain additional fields related to searches based on document lending and returning.
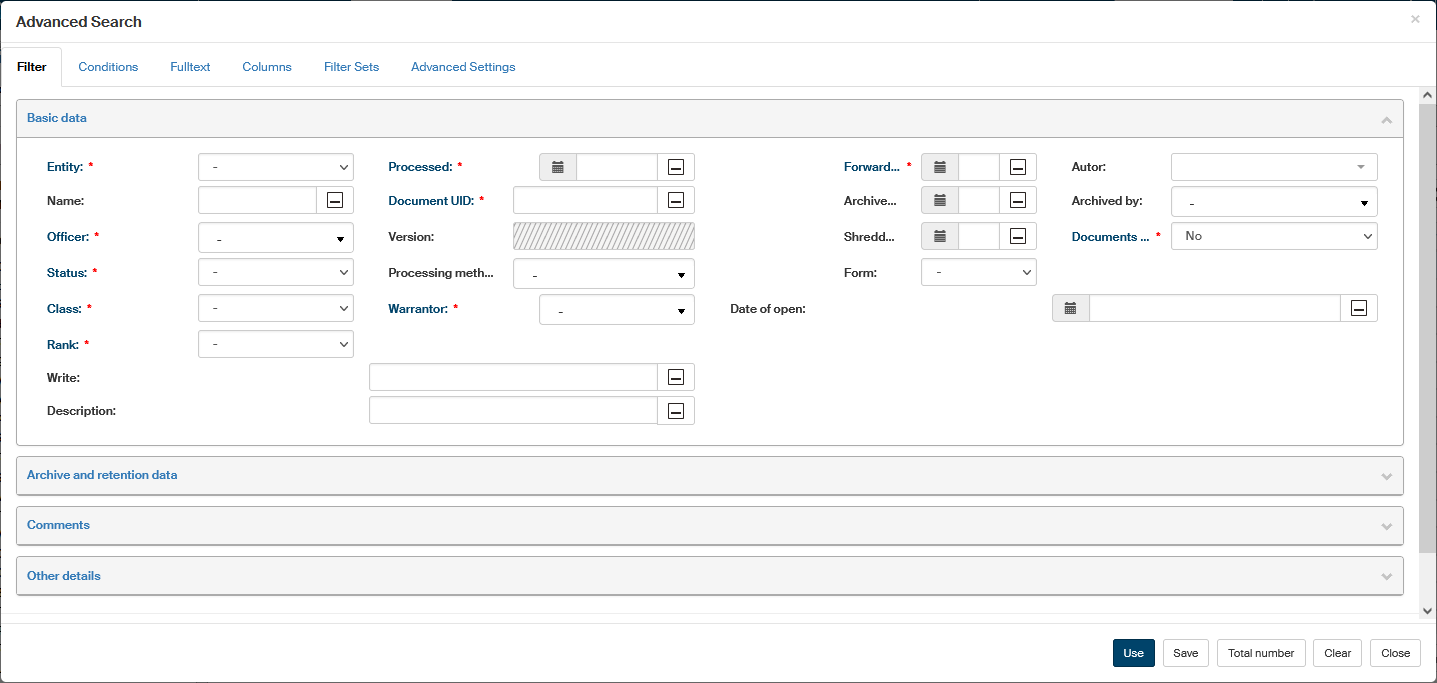
The last section in the lower part of the Advanced search window contains the option to select which column (piece of data) to use for ordering the search results. Click Select the column for sorting to open the drop-down list and select a column. Click the second item to open a menu where you can select the ordering direction – Ascending or Descending.

If there is a filter set, the filter controls are highlighted by a yellow background. To reset the filter and return to displaying all items in the window, use the button Cancel filtering. The previously set filter is then cleared; the Filter button will return to white background and the Cancel filtering button will be hidden again.
While filtering, you can also adjust the layout of the resulting list. To do that, go to another of the tabs in the Advanced search window – Columns.
Conditions
The Conditions tab in the Advanced search window offers more detailed filtering settings than the Filter tab, based on individual properties or metadata. You can set more than one condition and specify whether all of them should be met or at least one of them.
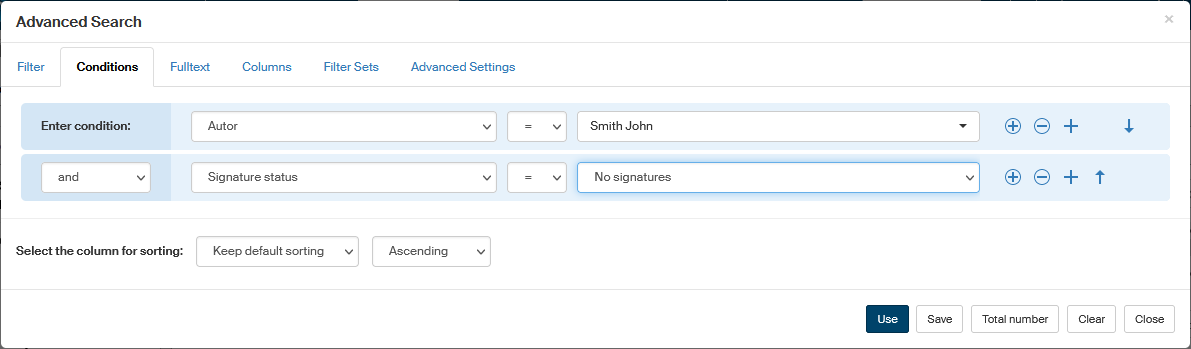
Every condition is built from three parts:
-
The piece of data that is being compared in this condition (Operand 1) – on the following figure, it is the Author (of a document). When you select a metadata item from the list, the fields for setting up the other two parts of the condition are displayed.
-
Operation used in the condition. The options depend on the type of data to be compared – for text data (e.g. document name) and data selected from a list (e.g. users) it is only possible to evaluate its equality (the
=operator) or inequality (the!=operator) with a specified value. For date and time data, “larger than” and “smaller than” operators are also available. -
Specify the value to compare with in the third field (Operand 2 – using the operation in the second field, it will be compared with Operand 1). The field options vary again based on the data type:
-
For text fields, simply enter the required text directly in the field.

-
For list items, including items only allowing the Yes or No values, the field offers the list of allowed values. Select the required value from the list.

-
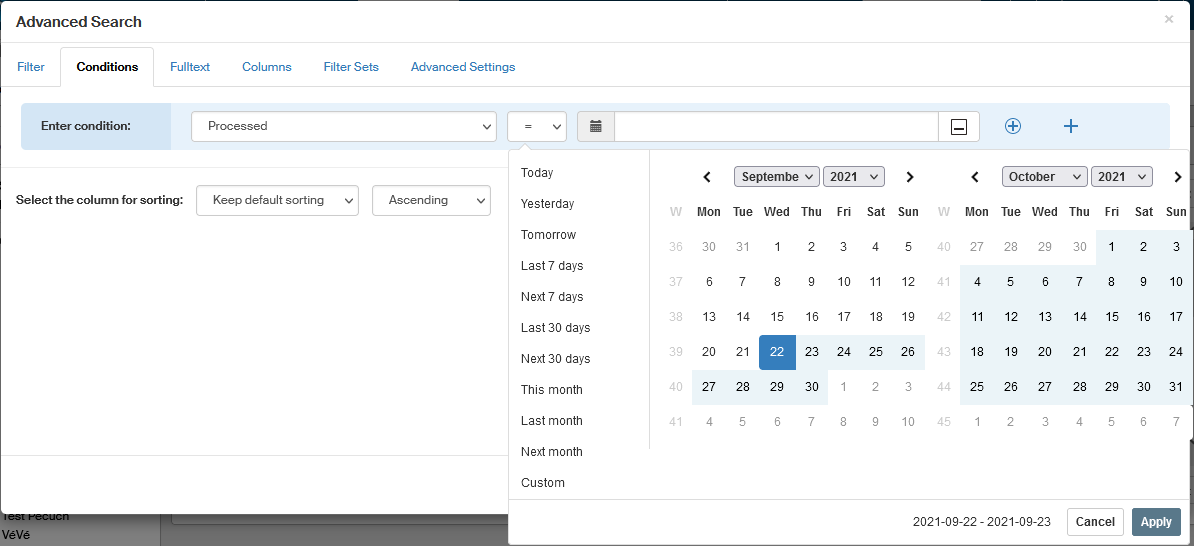
Items of date and time type contain a button in the left part of the field, which can be used to display a tool for selecting date and time.
-
If the Operand 2 item (regardless of type) allows entering an empty (not filled in) value, the field also contains the button
 , or the Unspecified option in the list of options.
You can set this value to look up entries that do not have (or, conversely, do have) this item specified.
, or the Unspecified option in the list of options.
You can set this value to look up entries that do not have (or, conversely, do have) this item specified.
-
To combine more than one condition in the filter, add more rows using the  button on the right of the condition.

Every row contains the field for Operand 1 again and when it is selected, you can continue to specify the operator and the value of Operand 2 again. If the filter contains more than one condition, there will be additional controls displayed next to them:
-
On the left, before the field for data, an additional field specifies the relation between the condition (on individual rows). If both conditions are to be met, select and. If meeting just one of the conditions is enough for the entry to match, select or.

-
On the right, you can find the buttons to
Add a condition and  Remove the condition.
 -
Use the buttons
 Move up and
  Move down to adjust the condition order.
Click Submit to start filtering.
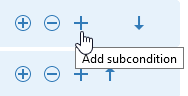
Another option is to use the button  Add subcondition.
It can be used to create combined conditions, e.g. "the author is … and at the same time the officer is …".
Add subcondition.
It can be used to create combined conditions, e.g. "the author is … and at the same time the officer is …".
Start by creating an ordinary filter condition.

Then click and continue by entering a subcondition.
To specify the relation between the two conditions, use the drop-down menu to choose between and and or options, placed before Operand 1.
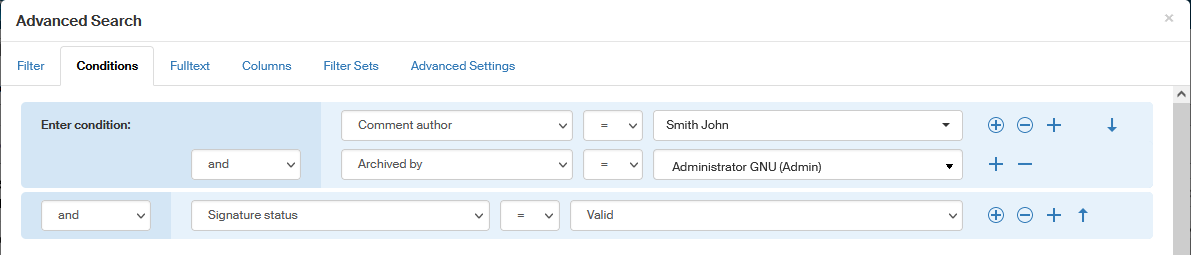
Then you can click to add another subcondition or click to add more conditions to the filter.
Fulltext
The Fulltext tab in the Advanced search window can be used to search anywhere in a document, form, etc. or in their metadata. Place the text you are looking for in the field Search expression and click Submit.
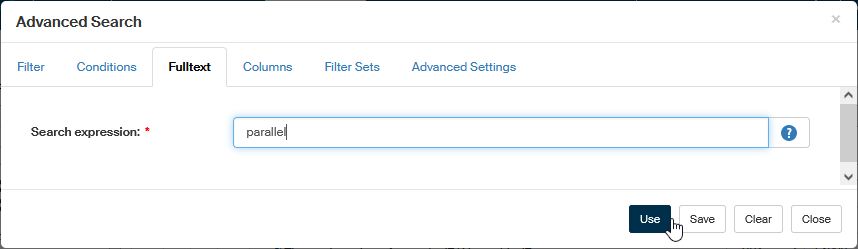
FormFlow then displays the search results in the original window as a list of entries in the folder which contain the expression, either in the entry itself or in some of its metadata.

While searching, you can make use of the following properties:
-
Multi-word phrases. Text entered in quotes will be looked up as a whole, exactly as it was written, e.g.:
"May 2017"will find Minutes May 2017, but not Minutes May and June 2017. -
AND. Space between words is treated as the AND operator, which means that if more than one word is entered, the system will look up entries containing all the words at any positions, e.g.:
job descriptionwill find Job description, Job – detailed description as well as Description of the job. -
OR. If you want to search for entries that contain at least one of the keywords (the OR operator), separate them using the || symbol, e.g.:
timesheet may || junewill find both Timesheet for May and Timesheet for June. -
Text to exclude from the results. If you want to find documents that do not contain a word or a phrase, place a minus sign before them, e.g.:
sheet -timewill find Balance sheet, but not Time sheet.+ NOTE: A space must be placed before the minus sign, otherwise it is treated as a hyphen and therefore part of the word, e.g.:
january-junewill find Timesheet January-June, while searching forjanuary -junewill not find it.
To search for documents in all folders, use the fulltext search field placed on the right in the window header. This field offers search throughout the whole FormFlow; for more details, see chapter Searching the whole FormFlow.
Columns
The Columns tab in the Advanced search window contains a list of all data that can be displayed in columns in the search result window. You can use this tab to set for each column whether to display it and, for those displayed, in which order.
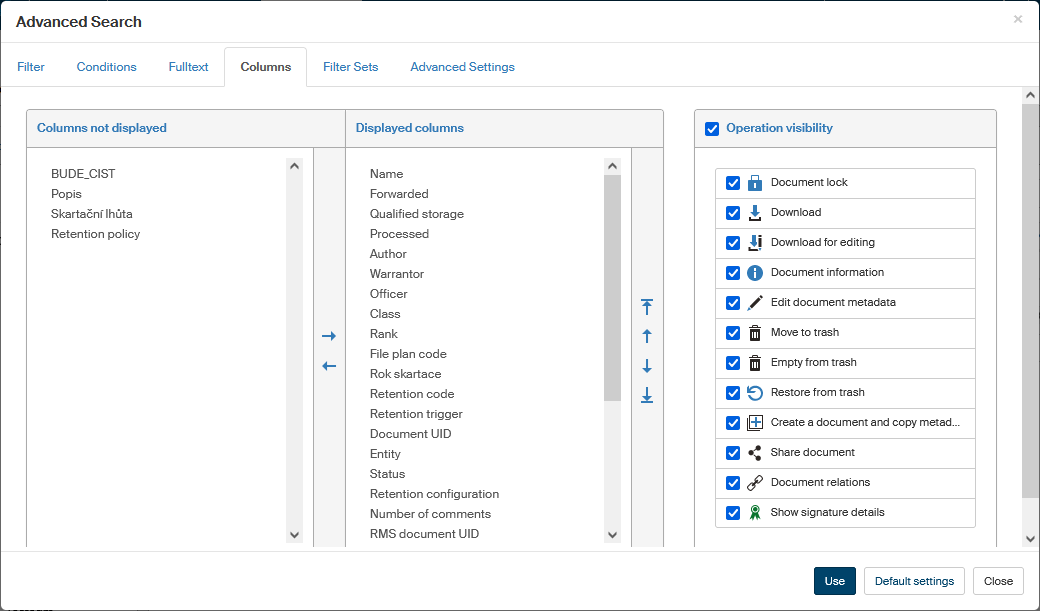
Displayed columns
The table on the left allows you to select the columns, that is, the types of data to be displayed in the search result window.
The table is divided in two columns: Columns not displayed and Displayed columns.
Use the arrow buttons  and
and  buttons placed between the columns to move the individual items from one column to another to set whether to display them or not.
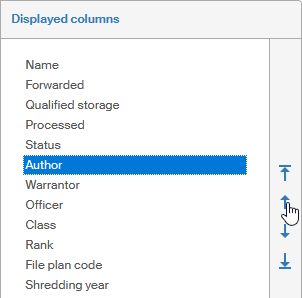
There are several more buttons placed in a vertical row to the right from Displayed columns, and you can use them to set the order of the individual items in the list of search results.
Tap on the item you want to move and then use the buttons to set its position: click the arrow buttons or to move the item one place up or down.
Or you can use the buttons  and
and  to move it to the beginning or end of the list.
Every item will become a separate column in the search result window. The items placed higher on the Displayed columns list will be placed to the left in the search result table.
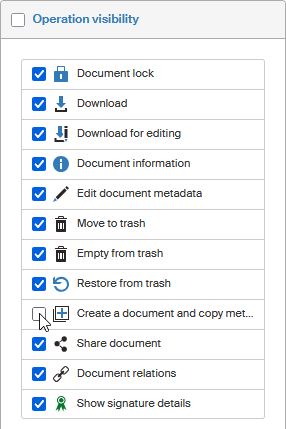
Operation visibility
The Columns tab can also be used to adjust the contents of the Operation visibility column containing the buttons for manipulation with the entry. The column is always displayed on the left of the search result window. The range of buttons to display and their order will vary based on the type of the list you are working with, but you can set for every one of them whether to display it or not. Use the checkbox on the left from the button icon: check it for all actions to be displayed and uncheck for those not to be displayed. Or you can use the checkbox in the section heading to display or hide all the buttons at once.
Filter sets
Once a filter is set, you can save it for later use under a name and activate it under that name anytime again. The Advanced search window contains a tab Filter sets, where you can edit saved filters.
Saving a filter
Here is an example of saving a filter. Let’s say you often look up documents that don’t have an electronic signature, and want to look them up easily.
-
Go to the Conditions tab and create a condition: Signature status = No signatures.

-
In the bottom right of the Conditions tab, click on the arrow part of the Save button and select Save as a new set from the submenu.
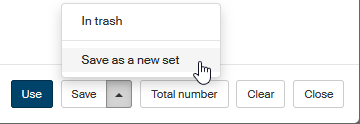
-
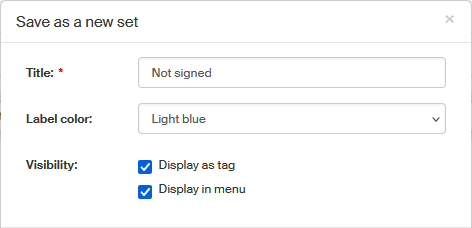
In the Save as a new set dialog, name the filter in the Title field and optionally set other properties – they are described in more detail in chapter Filter properties. Click Save to save the new set.
List of saved filter sets
Existing filter sets are listed in the Advanced search window, on the Filter sets tab.
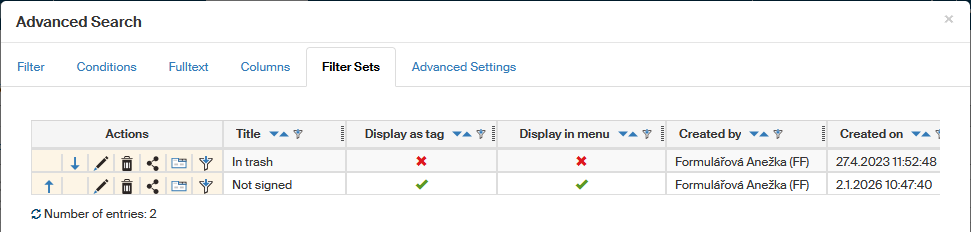
Click an icon in the Actions column to do one of the following:
-
 Edit – displays the Edit set, where you can set the Filter properties.
 -
 Delete – deletes the saved set.
 -
 Share – gives other users permission to use the selected filter set – for more details, see chapter Sharing the filter with other users.
 -
 Load the set data to tabs – transfers the selected filter settings to the individual Advanced search tabs where you can continue working with them.
 -
Apply – the filter is without additional queries applied to files in the current folder.
Filter properties
-
Title – this name will be used for the filter set in the list of saved sets and, based on the settings, also at other places where the filter set is available.
-
Label color – if the filter set is displayed as a tag, the selected color will be used for the tag background.
-
Visibility – select where the filter set will be available:
-
Display as tag – the filter will be available as a button above the list of search results.

-
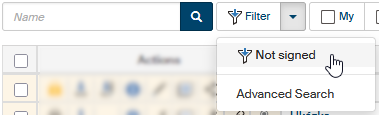
Display in menu – the filter will be available from the menu on the Filter button.
-
Sharing the filter with other users
You can share a filter saved in a filter set with other users.
-
In the row containing the filter you want to share, go to the Actions column and click
Share. -
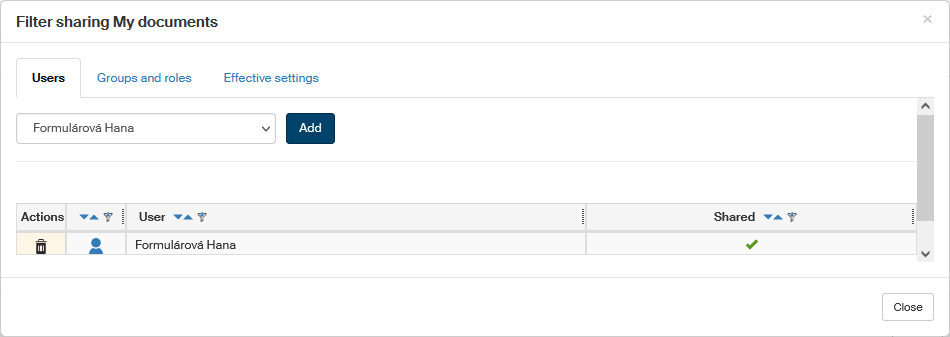
The dialog Filter sharing (name) will open up. Use the selector in the top right part of the dialog to select the user with whom to share the filter and click Add.
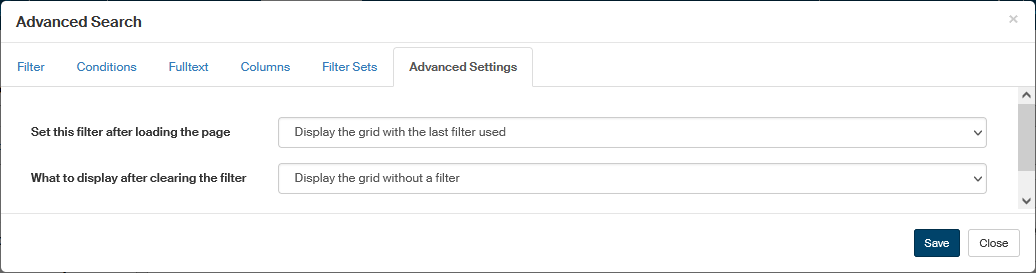
Advanced settings
The Advanced settings tab allows you to set what to display when you open a window with the given folder.
The option Set this filter after loading the page is used to set what to display when you open a window with the folder contents. The Settings offer the following options:
-
Show empty grid – will not display any search results.
-
Display the grid without a filter – displays the search results without any filters applied, which means all entries.
-
Display an empty grid with the advanced filter window – does not search but directly displays the Advanced search window to set a filter.
-
Display the grid with the last filter used – repeats the last search used when the tab was last displayed.
In addition to that, your saved filter sets are included in the menu under the heading Filter sets. If you select one of them, it will be used for the first search.
The setting Set sets after clearing the filter allows you to set what to display when you cancel previous filtering. Only two options are available here:
-
Show empty grid – will not display any search results.
-
Display the grid without a filter – displays the search results without any filters applied, which means all entries.