Signing in Outlook
Microsoft Outlook allows signing documents using Sofa with the help of the SignPoint app in both online (web) and desktop (old and new) versions. You need to install the Sofa 365 Bridge add-in in Outlook to be able to sign.
| Installation of this add-in is described in chapter Deploying Sofa to Outlook. |
How signing works
The signing works as follows: An e-mail message arrives to Outlook, containing document(s) that need to be signed. It can even be a contract created in Sofa and sent by the app using Send files by email, but generally any documents included in the message as an attachment.
Because only documents in PDF format can be signed, documents in other formats need to be converted to PDF before signing.
|
Not every file type can be converted to PDF. Attachment files suitable for conversion to PDF and therefore for signing can be the following types: doc, docx, xls, xlsx, ppt, pdf, html, xhtml, png, jpg, eml, txt, bmp, gif, jfif, jpeg, tiff, psd, rtf, pptx, ods, odt, odp, odf, fo, zfo, isdoc or isdocx. |
If the Sofa 365 Bridge add-in is available, the window with the message open displays the Sign and reply button.
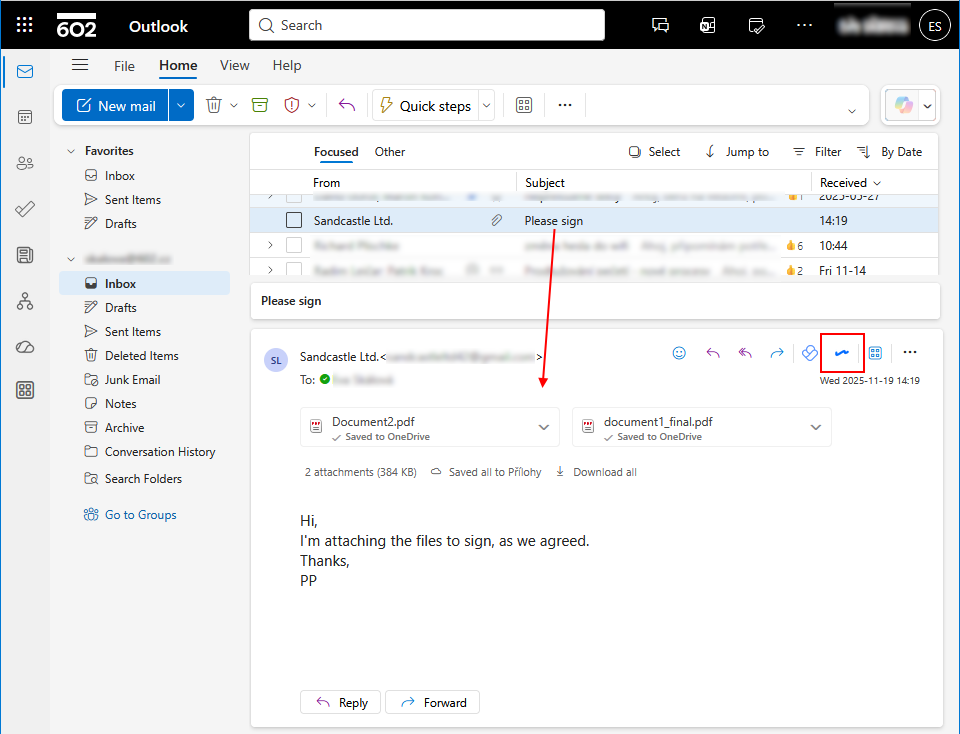
The following image displays a window with a message open and the button in the web-based Outlook.
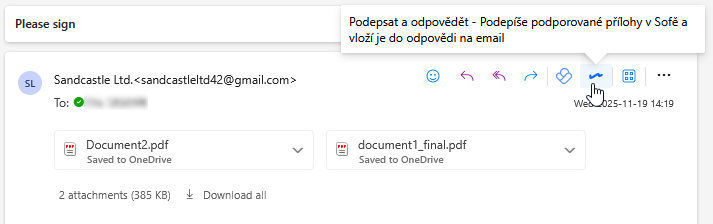
The look and controls of the described feature are practically the same in the "desktop" version of the new Outlook.
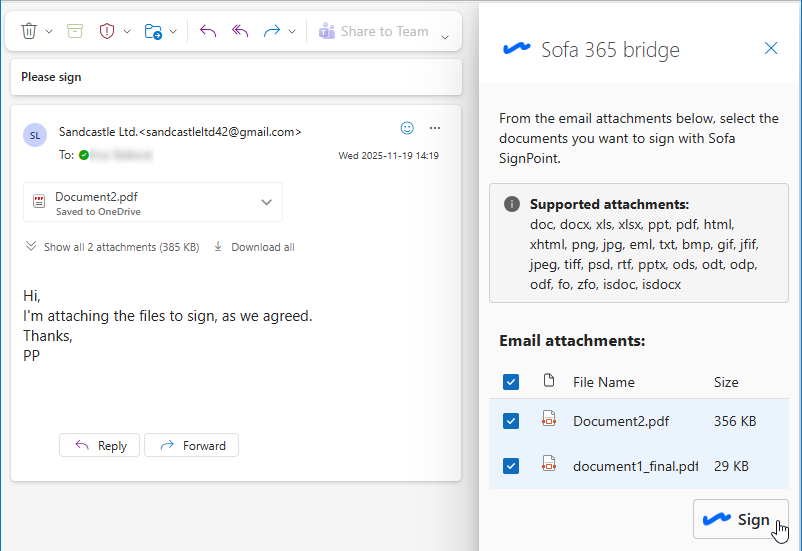
Running the Sofa 365 Bridge add-in
Clicking the button will open the Sofa 365 Bridge panel on the right. The panel shows a list of files attached to the e-mail message.
| If there are files that cannot be converted to PDF the attachments, they won’t be included in the list. |
Selecting the files to sign
A checkbox is displayed in front of each file name. Check it to request a signature (and conversion, if needed) for the file.
To sign all the attached files, check them all at once using the checkbox in the list header.

When you have selected the files, click Sign.
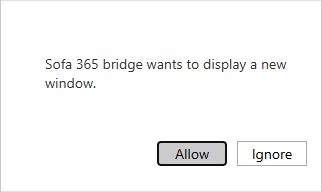
Then you might be asked to allow opening a new window, where the SignPoint app will open.
Signing
First, select the signature certificate in Select signature certificate.
Then, in the document preview, select where to place the frame with the visualized signature.
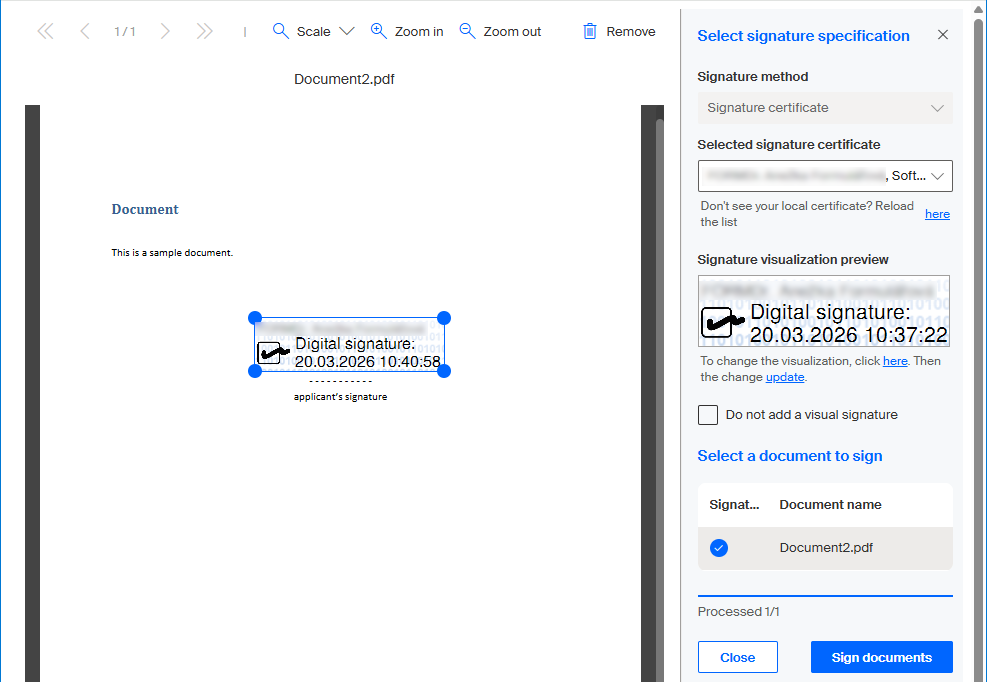
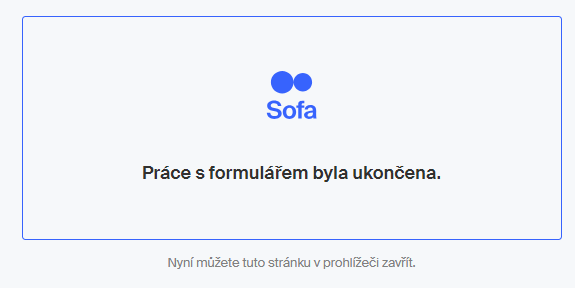
Once all signatures are placed, click Sign documents. You might be asked to enter your PIN, then SignPoint signs the documents and completes the process. When the following screen is displayed, you can close it. The SignPoint app will close.
| The signed documents are physically saved to the OneDrive app. |
Preparing and sending a reply
A window opens in Outlook with a prepared reply to the original e-mail message.
Composing the reply
The window for composing the reply and its controls are the same as the window you use to compose common e-mail messages.
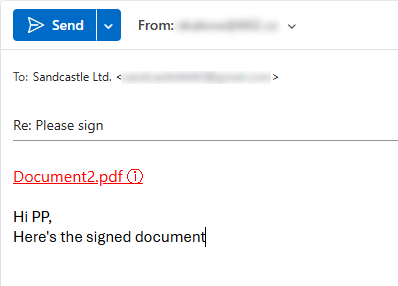
The signed documents are not an attachment of the reply message. Instead, the filenames of the signed documents are listed in red.
These names are links to the corresponding documents, which are stored in OneDrive. The recipient will receive these links with access permissions to the documents, and the documents themselves are not sent. This helps to improve the data security.
Add your text to the reply message as usual and you can attach other files too.
The recipient receives an email messages and they can use the link to display the signed document in OneDrive.
Then they can also download the document to their computer if needed.