User synchronization using SCIM
In addition to synchronization with Entra ID (previously Azure AD) and LDAP, you can set up another synchronization type: SCIM.
SCIM (System for Cross-Domain Identity Management) is an open standard protocol for automation of user identity information exchange between identity domains and IT systems. Microsoft has implemented a subset of this protocol in the Entra environment. It is aimed especially at large companies who manage large numbers of identities.
In our case this protocol provides communication between the Sofa and Entra environments, but in the opposite direction – from Entra to Sofa.
-
During the synchronization, the Entra ID of Sofa contacts regularly the company in the Entra environment.
-
When accessing using SCIM, the remote company itself contacts Sofa through Entra. Sofa then provides all the needed services including user management.
Compared to the classic synchronization known from the previous approach (Sofa itself contacts the company in Entra), the main difference is in the opposite method of contact.
Setting up SCIM synchronization on Sofa end
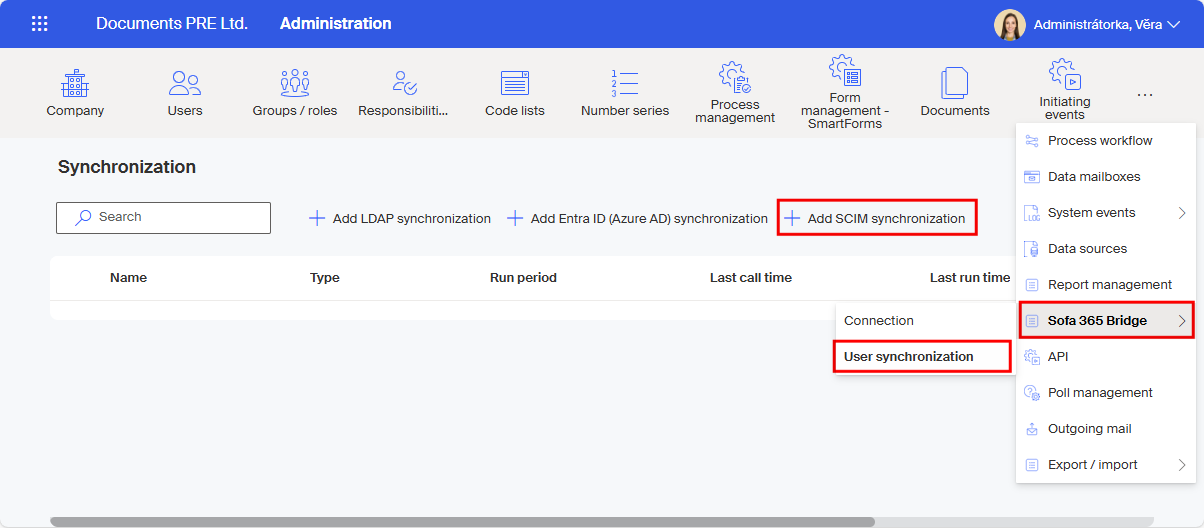
Set up the configuration for SCIM synchronization in Sofa administration, in the view Sofa 365 Bridge – User synchronization.
Unlike Entra ID or LDAP, there is no need for setting up a new connection with SCIM. The connection is actively provided by the counterparty who calls Sofa. You only need to set up the synchronization.
| Once a synchronization is set up, you cannot set up another synchronization type. This is the same behavior as with Entra ID or LDAP settings. |
Click + Add SCIM synchronization to open the window New synchronization, which consists of four tabs.
Parameter settings
On the first tab – Parameters – give a name to the synchronization and set up its basic parameters.
-
In the field Name, enter a name that will be used for the synchronization in lists.
-
Based on the name, an identification string for the synchronization will be created in the field Identifier. You can change it, but make sure that the identifier starts with a letter and only contains the letters of the English alphabet, digits, and underscores.
-
You can enter any text in the Description field, so that you can identify the synchronization easily later if you have set up more than one of them.
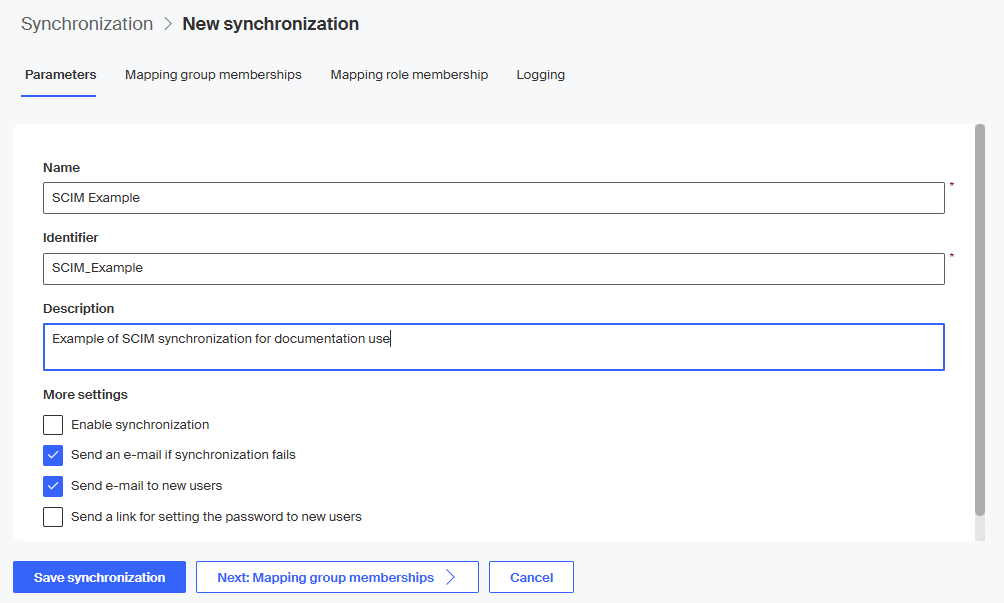
The checkboxes in section More settings specify some operation parameters for the synchronization.
-
Keep Enable synchronization checked if you want the synchronization to be active immediately after saving it.
-
Check Send an e-mail if synchronization fails to enable a notification email if the scheduled synchronization fails. The notification will be sent to users in Administrator and Subject manager roles.
-
If Send e-mail to new users is checked, a welcome message will be sent to the email address of users newly created by the synchronization.
-
If Send a link for setting the password to new users is checked, a link to their password will be sent to the email address of users newly created by the synchronization. Only use this option if you want users to log in using a name and a password. If you want users to only log in using SSO (Single Sign On), do not check this field. In general, we do not recommend checking the field.
Setting up group membership mapping
Click the Mapping group memberships button (or select the tab of the same name above) to switch to the tab where you can set up how to map users to groups.
Click Add a row to create rows with a pair of fields that will be used to map remote groups to Sofa groups.
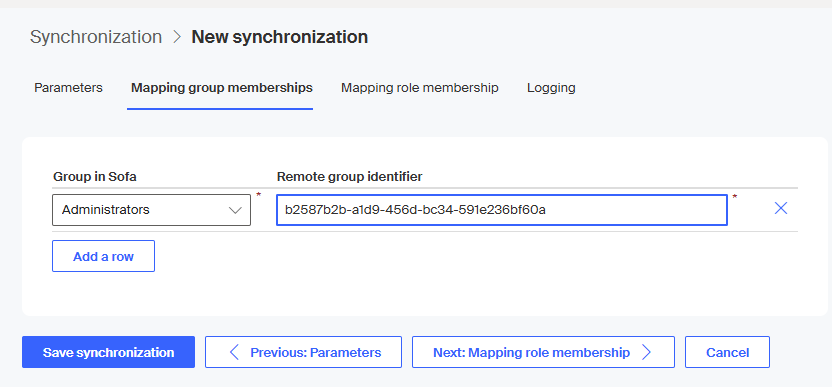
In Group in Sofa, select a group from the list created in Sofa administration.
In Remote group identifier, copy the identifier corresponding to a group of users in the remote company that will contact Sofa.
How to get the identifier? You need access to the Microsoft Entra admin center portal. Log in to the company that is supposed to contact your company in Sofa.
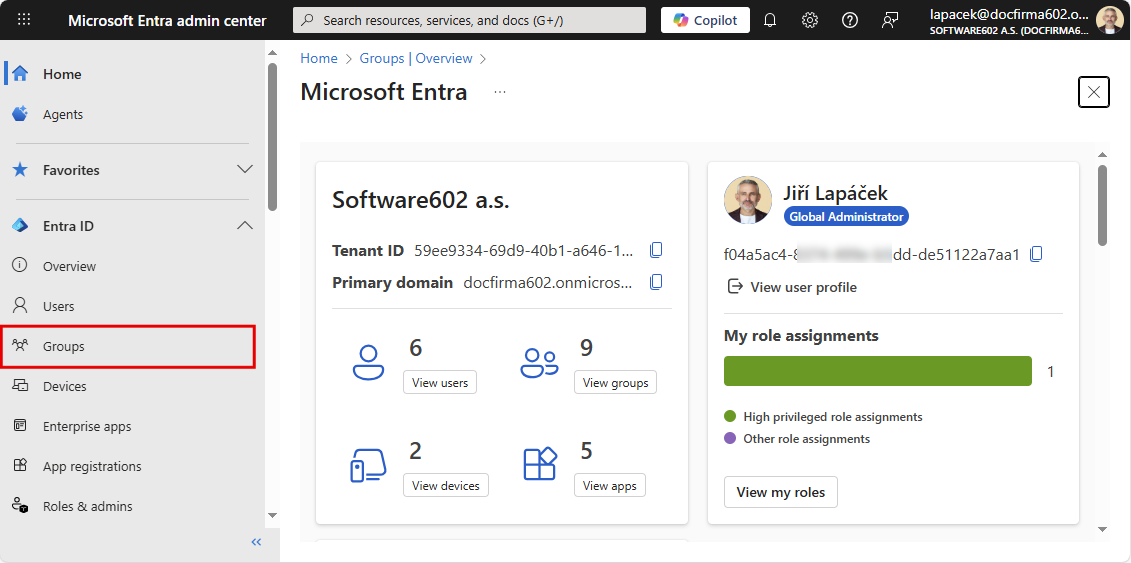
In the main menu on the left, select Groups.
On the right, in the submenu, select the option All groups. In the list of groups, look up the group whose identifier you need. The identifier is in the Object Id column.
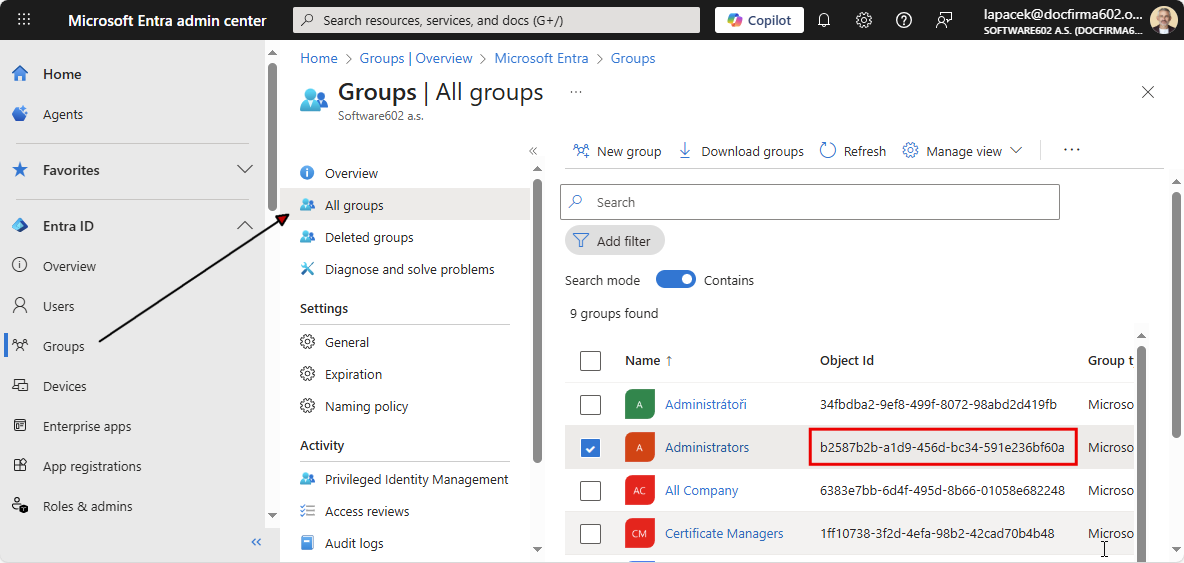
Copy the identifier in the field Remote group identifier in the setting in Sofa environment.

Use the button Add a row repeatedly to create as many mappings as you need.
Setting up role membership mapping
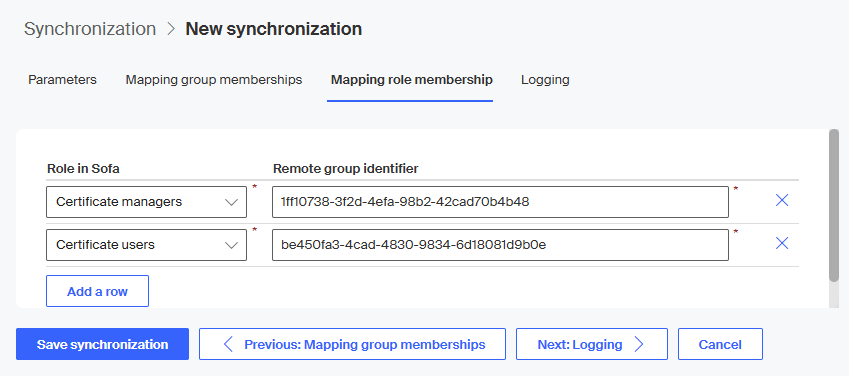
Then use the Mapping role membership button (or the tab of the same name) to switch to the role mapping tab.
Use the same steps as above to create as many mappings as you need.
Setting up process logging
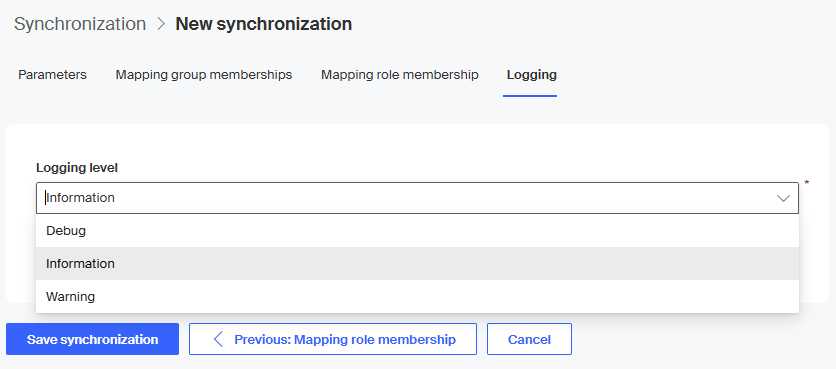
Use the Logging button (or tab) to switch to the tab of the same name, where you select the level of information on progress to be logged during synchronization. In Logging level, select one of the levels Debug, Information and Warning.
-
Warning is the lowest logging level – only warnings, errors and critical errors will be logged.
-
Information is the medium logging level – information, warnings, errors and critical errors will be logged.
-
Debug is the highest logging level – all previous messages are logged in addition to debugging information. It is used as a basis to solve issues.
Saving the synchronization setup
Click Save synchronization to save the synchronization description.
Editing the synchronization
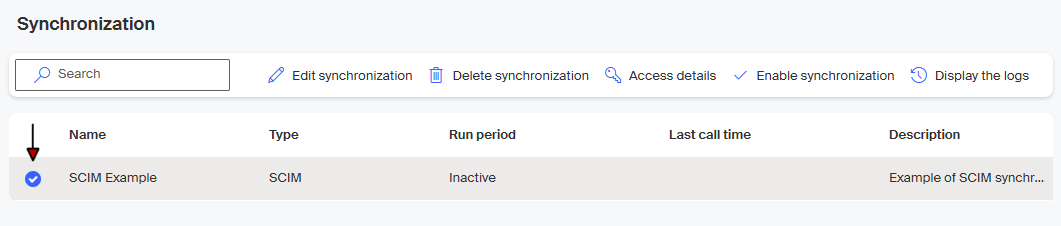
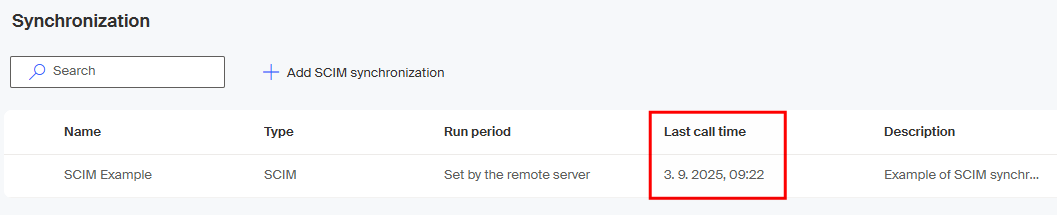
The named synchronization entry is then displayed in the Synchronization window. If you select it, a toolbar is displayed with the usual editing options available.
-
Edit synchronization – opens a window with four tabs similar to the one where you created the synchronization. Here you can add and edit the available values, especially the mapping data.
-
Delete synchronization – after a confirmation query, the selected synchronization entry will be permanently deleted including all settings.
-
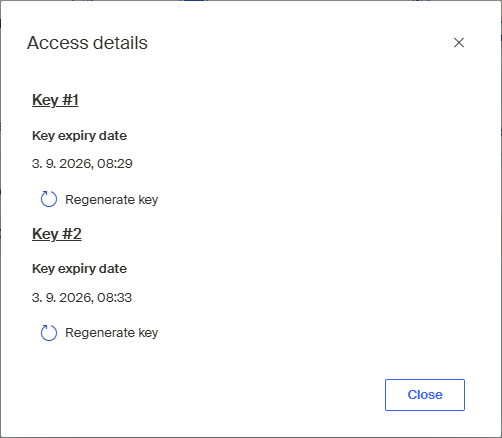
Access details – opens the dialog for generating access keys to the synchronization.
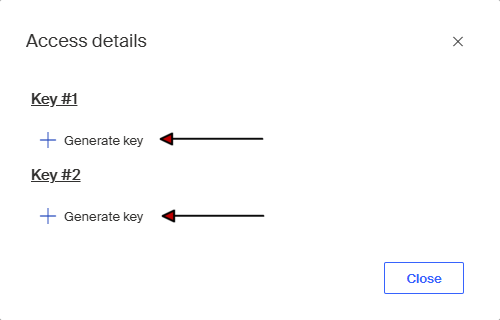
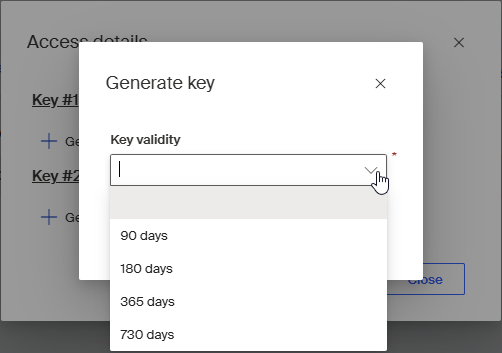
Click the link + Generate key to open the dialog to set up key validity between 90 and 730 days. Select the required value and click Generate key.
The key is displayed in the open dialog.
Copy the generated key and Endpoint URL address and store them safely (the buttons Copy URL to clipboard and Copy key to clipboard are available for easier copying). Sofa does not store the generated details and will not be able to display them after you close the dialog. 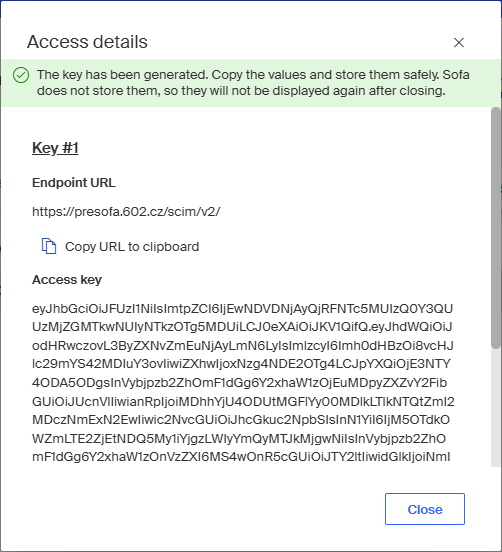
This means you will not be able to get the generated keys again, but if you need to, you can regenerate them in the Access details dialog. The key expiry date is also displayed here so that you can regenerate them on time.
-
Enable / Disable synchronization – if the synchronization is enabled, click Disable synchronization to enable it.

A message in the information strip confirms the action.

A disabled synchronization can be enabled again; the Disable synchronization button changes to Enable synchronization.


-
Display the logs – displays a window with transaction logs related to this synchronization.
Creating a remote application calling Sofa
| This chapter describes the configuration of the "remote company" to illustrate or test SCIM connection to Sofa. In practice we presume that the remote company already exists and is correctly configured. |
The steps will be described using the Microsoft Entra admin center portal (https://entra.microsoft.com/).
Log in to the portal as the "remote" company as a user with the corresponding setting permissions.
Creating an application
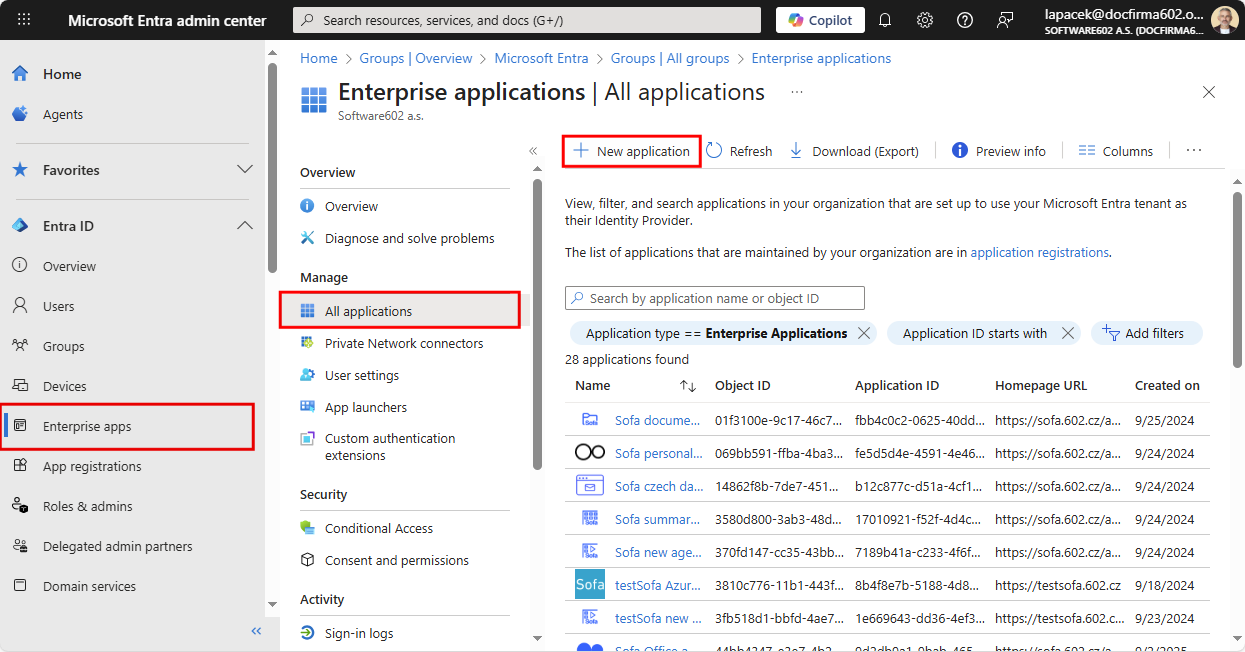
After login, open the view Enterprise apps – All applications. Click + New application.
| Similarly to the Microsoft Entra admin center environment, you can also use the Microsoft Azure (https://microsoft.azure.com/) portal; the steps and procedure are similar. Microsoft recommends switching to the Entra environment. |
In the following window, click + Create your own application.
A modal window opens, where:
-
In field What’s the name of your app? give a name to the application (for example SCIM).
-
Switch What are you looking to do with your application? to the option Integrate any other application you don’t find in the gallery (Non-gallery).
-
Click Create.

The application is created, which is noted by a message shortly displayed in the upper right corner of the window.
The basic application description is displayed in view Application name – Overview.
Creating a list of users and groups
First you need to create a list of users and groups synchronized by the SCIM protocol.
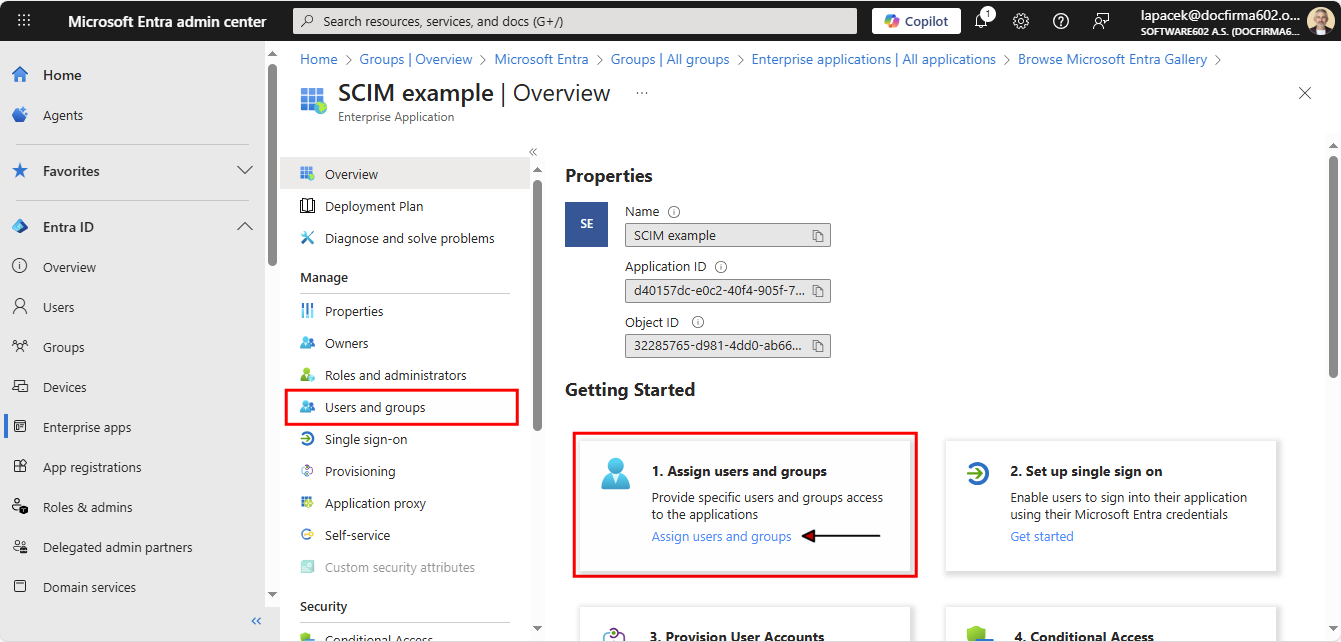
Click Users and groups in the menu or the link Assign users and groups in tile no. 1.
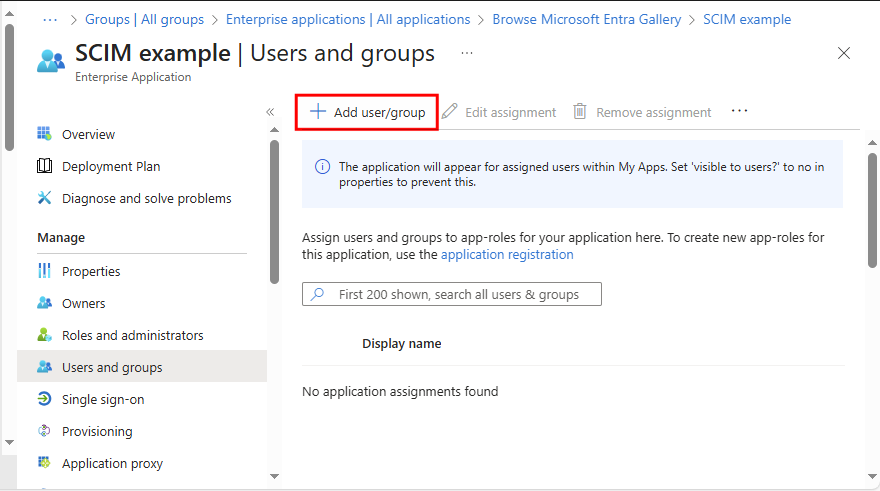
In the following window, create a list of users and groups to have access to the application. Check the boxes next to the users to have access to the application. A list of such users will be gradually composed in the section on the right.
| In the illustration, we have added individual users in the application. For the synchronization with Sofa, add whole groups using the same steps. |
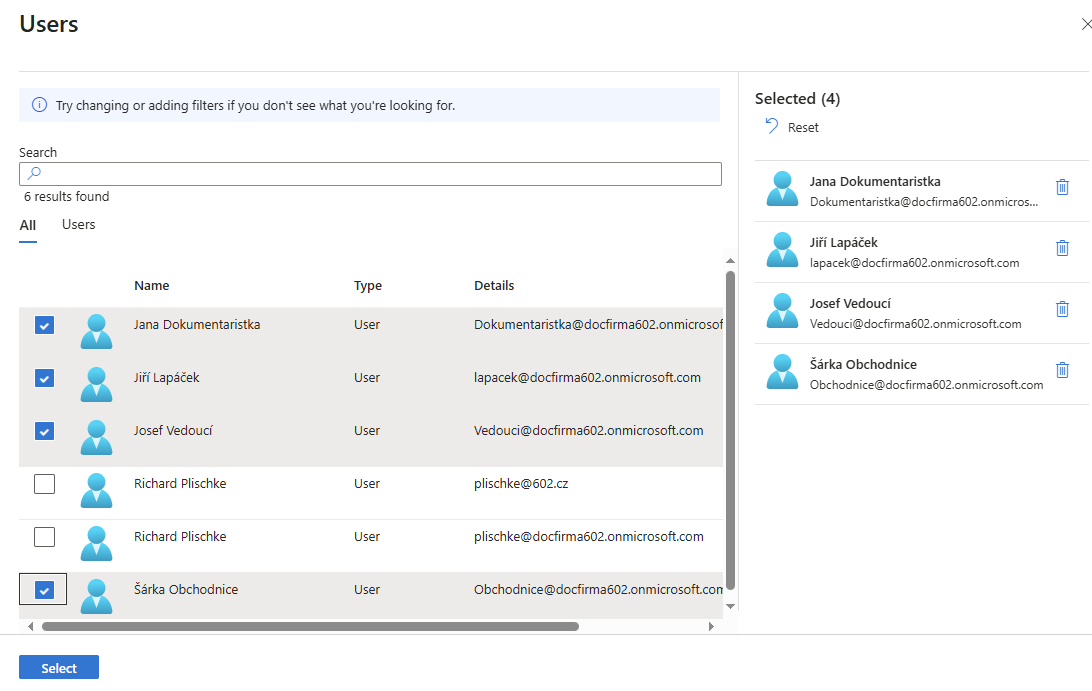
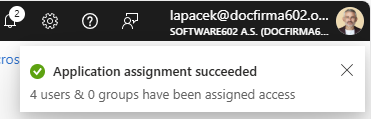
When you finish selecting, click Select. In the following window Add assignment, click Assign. The successful assignment is noted in the upper right window by a message with a green checkmark.
The created list is displayed in the view Application name – Users and groups.
Editing the mapping of attribute externalId
Before creating the connection itself, you need to edit the mapping of the externalId attribute. The attribute mapping specifies how attributes are synchronized between Microsoft Entra ID and the user app.
In the submenu, select Provisioning and then, in the modified menu, select Attribute mapping.
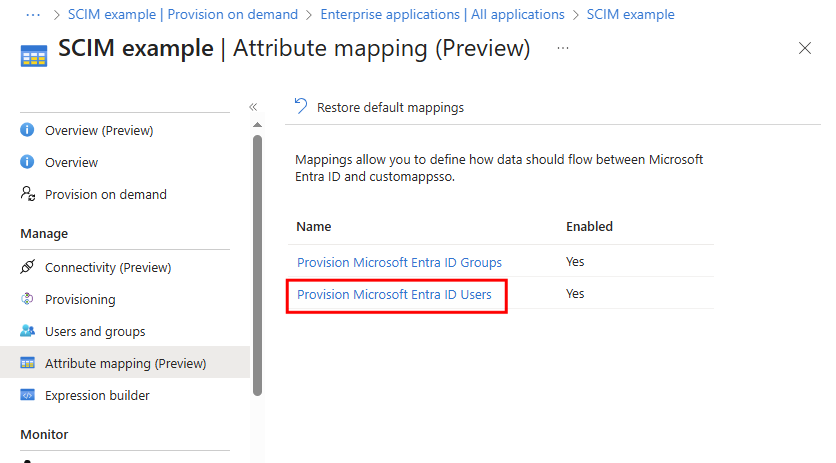
Then select Provision Microsoft Entra ID Users.
In the Attribute Mapping window, in the column Attribute customappsso, look up the externalId entry and click Edit.
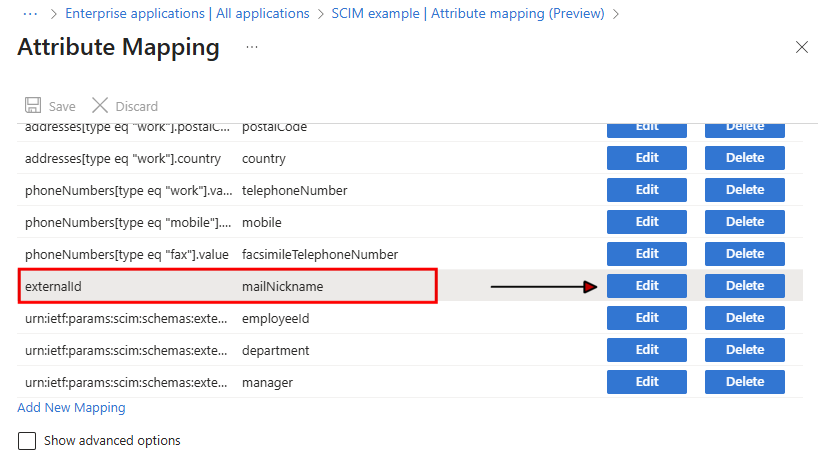
In the Edit Attribute window, which now contains the mailNickname entry, click in the Source attribute field.

In the list of options, look up objectId and click it to transfer it to the field.
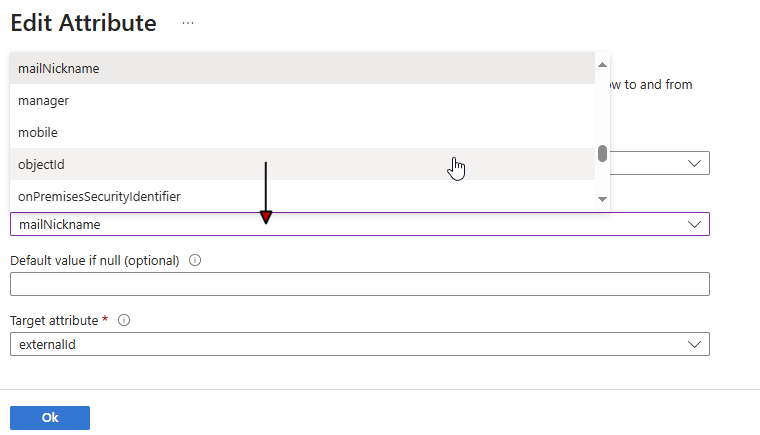
Select OK.
|
You need to save the change by clicking Save in the upper part of the Attribute Mapping window. 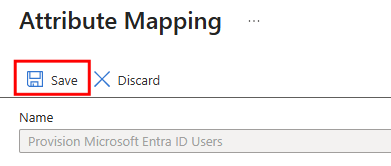
|
The list of SCIM attributes and their mapping in Sofa
| Attribute: | … maps to |
|---|---|
userName |
Personal details » User name |
Display |
operation of enabling/disabling user |
Active Name |
only the user’s virtual display name for synchronization |
tittle |
Organizational details » Job |
emails[type eq "work"].value |
Personal details » Notification e-mail |
preferredLanguage |
not mapped |
name.givenName |
Personal details » Name |
name.familyName |
Personal details » Surname |
name.formatted |
not mapped |
addresses[type eq "work"].formatted |
not mapped |
addresses[type eq "work"].streetAddress |
not mapped |
addresses[type eq "work"].locality |
not mapped |
addresses[type eq "work"].region |
not mapped |
addresses[type eq "work"].postalCode |
not mapped |
addresses[type eq "work"].country |
not mapped |
phoneNumbers[type eq "work"].value |
Personal details » Telephone |
phoneNumbers[type eq "mobile"].value |
Personal details » Mobile phone |
phoneNumbers[type eq "fax"].value |
not mapped |
externalId |
Organizational details » SSO identifier, used to identify the user between Sofa and Entra ID |
urn:ietf:params:scim:schemas:extension:enterprise:2.0:User:employeeNumber |
Personal details » Personal number |
urn:ietf:params:scim:schemas:extension:enterprise:2.0:User:department |
Organizational details » Department |
urn:ietf:params:scim:schemas:extension:enterprise:2.0:User:manager |
Organizational details » Direct superior |
Provisioning a connection
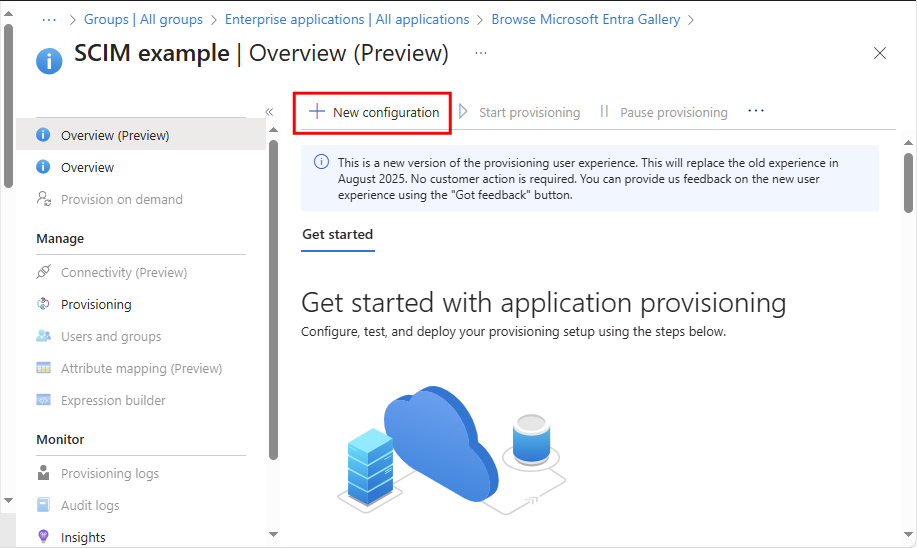
Now you can start creating the connection itself. Open the Enterprise apps window, select your application and in the submenu, select Provisioning. Now we will set up the connection of the remote company to Sofa.
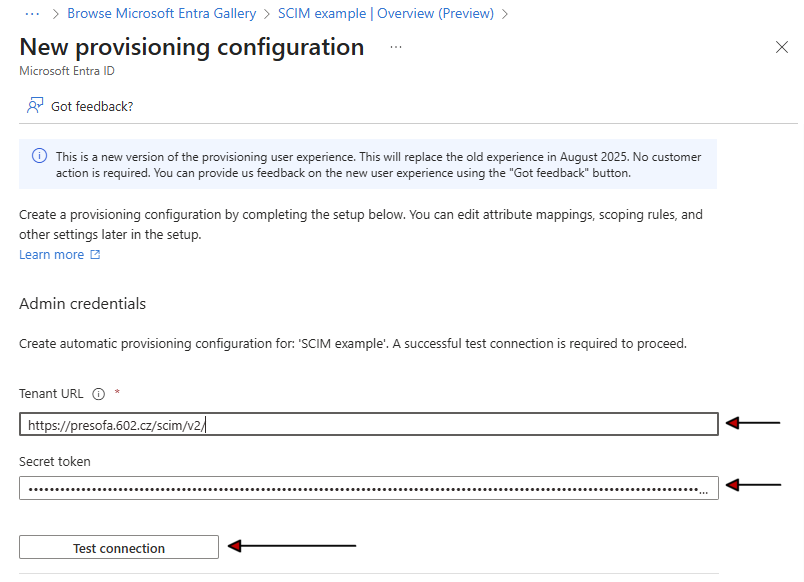
In the view Application name – Overview (Preview), click + New configuration.
In the following window New provisioning configuration, you will use the values you saved when setting up the synchronization in Sofa.
-
In the field Tenant URL, copy the value from Endpoint URL.
-
In the field Secret token, copy the value from Access key.
-
Click Test connection.
A test of the connection to Sofa is run and successful connection is announced in the upper right corner of the window by a message with a green checkmark.
Now you can click Create in the lower part of the window.
Successful creation of the configuration is again announced by a message with a green checkmark.
The window Application name – Overview (Preview) displays: Configuration status – Disabled. The application is created but not enabled. Now you need to click Start provisioning on the toolbar.
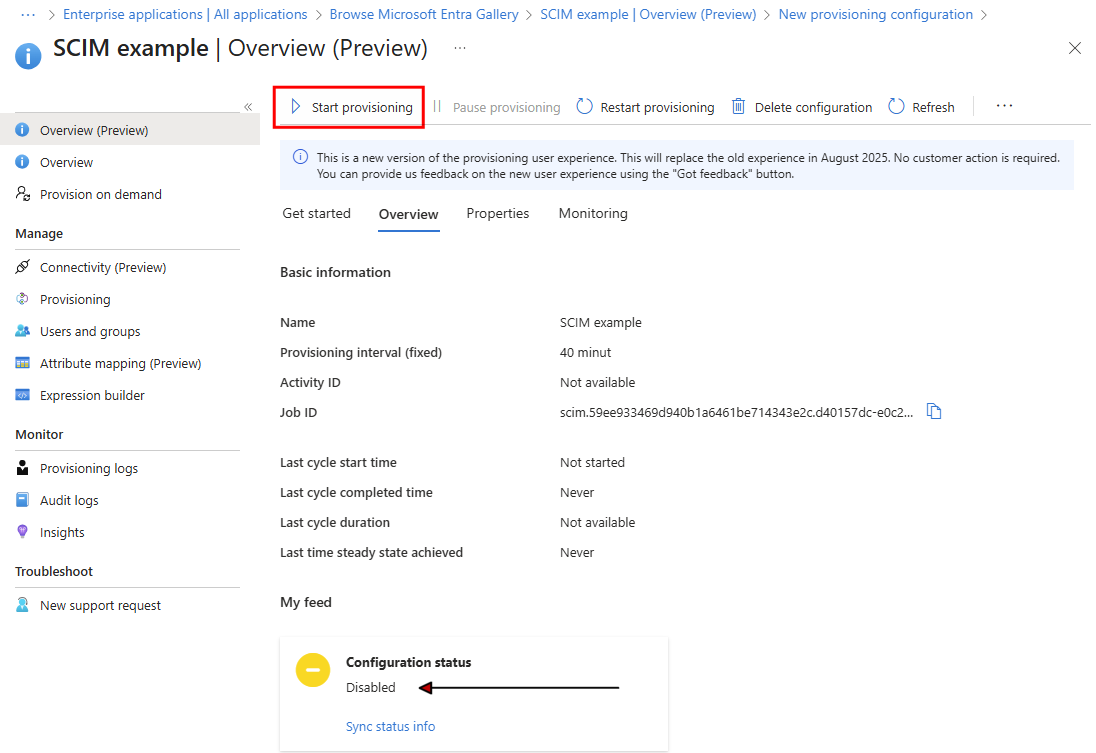
When the contact with Sofa is successfully made, the window displays: Configuration status – Enabled.
| Synchronization is run from the remote company end in an interval set to a number of minutes – see the value in field Provisioning interval (fixed). |
| If you need to synchronize immediately, outside of the set interval, click Provision on demand. |
The provisioning is confirmed by a provisioning log in view SCIM – Provisioning logs.
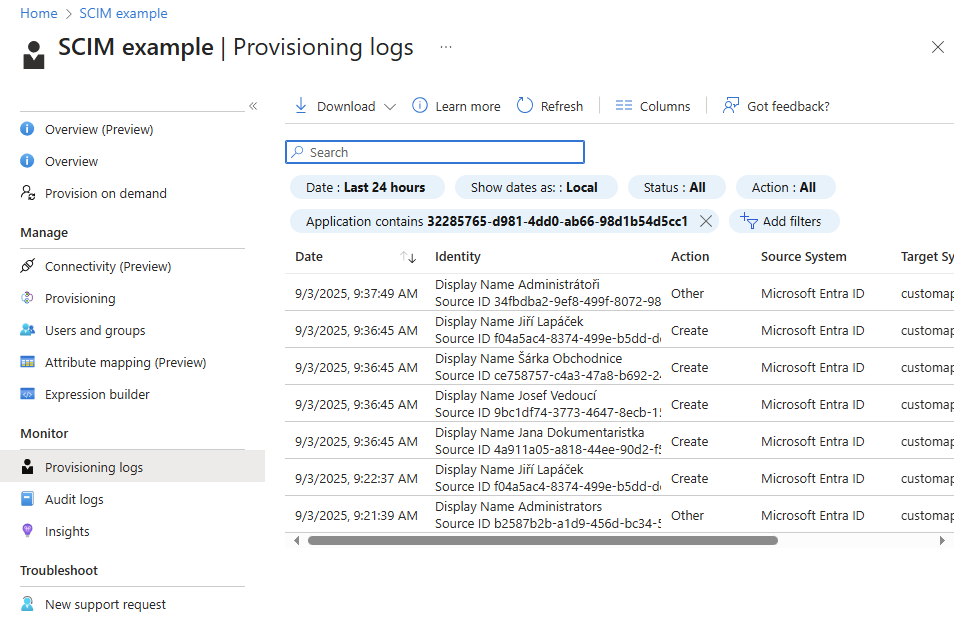
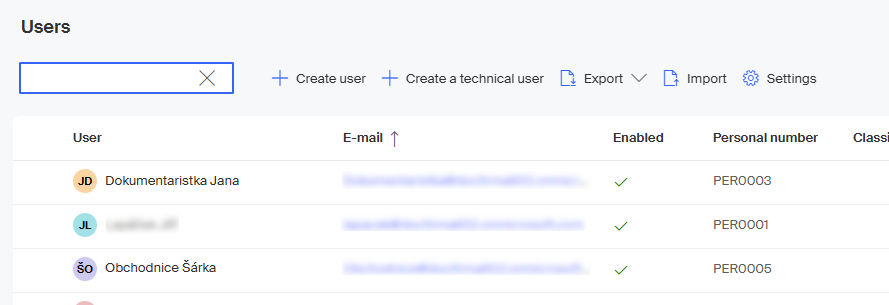
You can also watch the successful run of each synchronization from within Sofa. For example, you can see in the administration that users synchronized from the remote company have been added.