Single Sign-On connection
A Single Sign-On (SSO) connection is generally used to connect to various applications with a single set of login details (typically a username and a password). Users therefore do not need to remember several usernames and passwords.
When using SSO with Sofa, an administrators’s consent on behalf of the organization allows Sofa to log in to the organization’s application, read the profiles of its users and all the data you have provided for it. The consent is given by the organization’s administrator only, on behalf of its all members.
Creating a new connection
Start in the Administration window by clicking the Sofa 365 Bridge button and then select Connection from the menu.
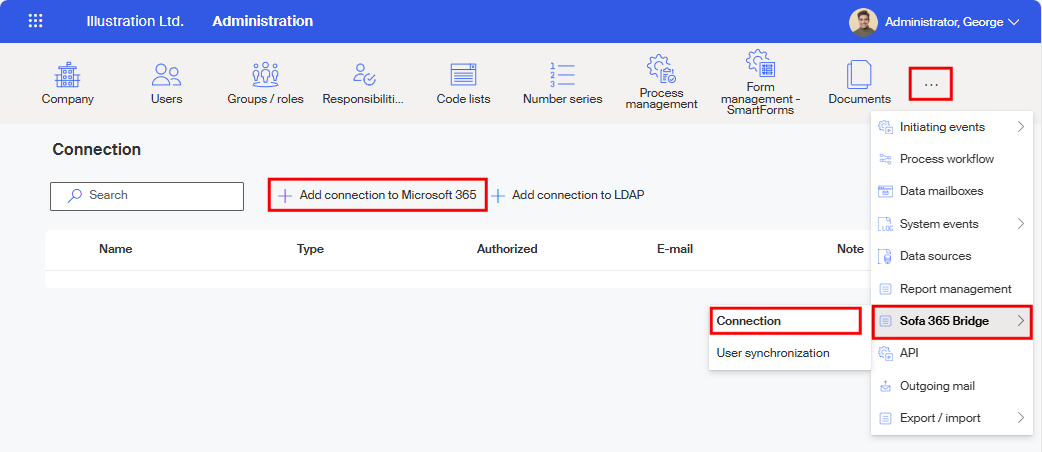
In the toolbar of the Connection window, click + Add connection to Microsoft 365.
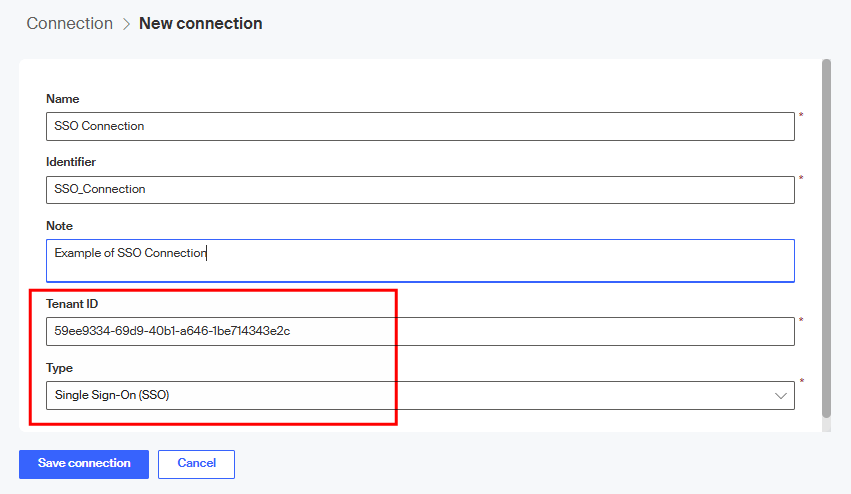
Fill out all mandatory entries in the New connection window.
-
In Name, enter the connection name that will be used when displaying the connection in lists.
-
The default Identifier is created from the Name, but you can adjust it to a preferred string.
Both these entries are used internally in Sofa and do not need to be unique. -
You can also enter any optional description in the Note field.
-
Paste the ID you have copied in Microsoft Entra admin center window as described in the previous chapter to the Tenant ID field.
-
In Type, select Single Sign-On (SSO).
Select Save connection to confirm the settings.
The next step is verifying that you can connect to the remote company using the Tenant ID. If there is an issue, an error message is displayed (in this example, a non-existent Tenant ID has been entered).
The error description includes additional information, which is generally intended form Microsoft support and is not covered by this documentation. But if the error is "only" a wrong Tenant ID, the best approach would be to remove the whole connection setting and create a new one, with the correct ID.
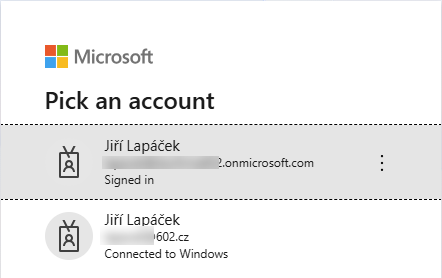
If the entered Tenant ID was found valid, you also need to be logged in to the corresponding company as its user under a Microsoft account with a global administrator’s permissions.
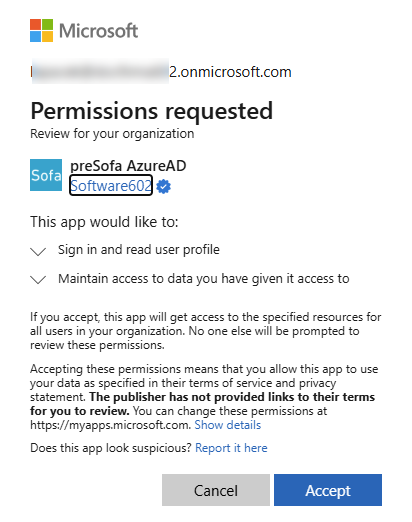
For the Sofa app to be successfully authorized, it needs the administrator’s consent with access to some of the organization’s resources for the current user. Confirm the consent on behalf of the organization in the Permissions requested dialog. The permissions are the following:
-
Sign in and read user profiles.
-
Maintain access to data you have given it access to.
To confirm your consent, select Accept. This will give the Sofa app access to the listed resources for all users in your organization; they do not need to confirm it each for themselves.
| This dialog is displayed with each authorization, even a repeated one using the Authorize connection button on the toolbar for an existing connection. |
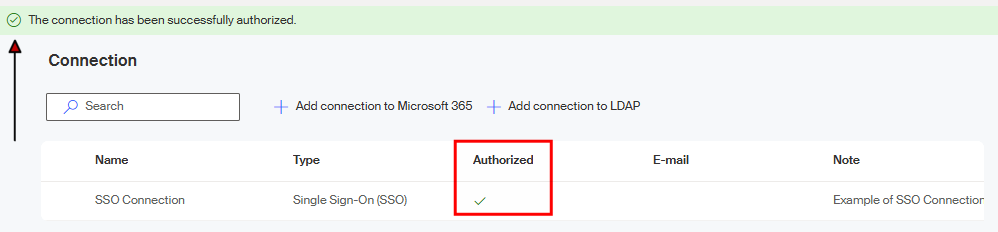
The connection is then authorized and saved. Its entry is displayed on the list in the Connection window. Successful authorization is announced by the message The connection has been successfully authorized in a green frame and also by a green checkmark indicator in the Authorized column.
Editing a connection
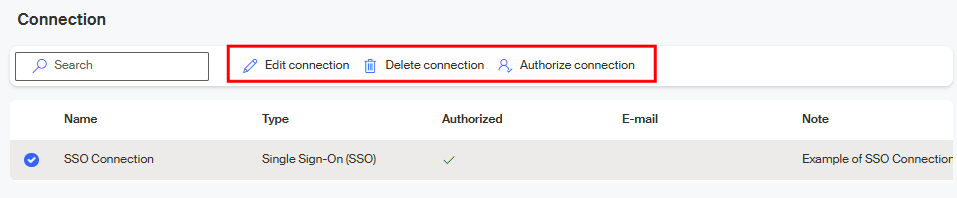
Click on a connection entry with the mouse to select it (a circle with a checkmark) and a toolbar with buttons is displayed in the upper part of the window to provide various maintenance actions.
-
Edit connection – only provides the options to change the connection name and the note. The identifier, tenant ID and connection type settings cannot be changed.
-
Delete connection – permanently removes the whole connection setting from Sofa. If there is a synchronization already created for the connection, you need to delete the connection and its setup first.
-
Authorize connection – reruns the authorization for the current user of the remote company. A check of the user’s Microsoft account settings or login might be required. The result is displayed in an information strip in the upper part of the window.
